Defensive aerial fighter: Shadow Flare zoning and surgical punishes
Fastest BRV 15F (Transience)Fastest HP 43F (Octaslash, Heaven's Light)Dash 81 (Below Average)ATK 111DEF 1111-hit HP YesMultipleHP links YesCombos only
Standing in the meta
Tier A8th of 30 — 2017 tournament tier list from dissidia.wiki (half matchup values, half expert player votes).
Sephiroth is 8th on the 2017 ranking, in tier A. The overview confirms a consistently high competitive placement, carried by his reliability at every level of play.
Overview
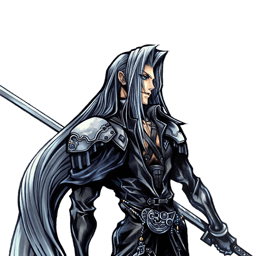
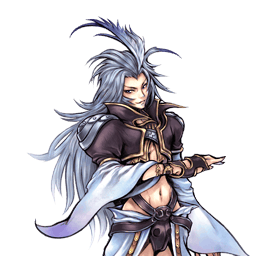
Sephiroth is a defensive aerial fighter able to fight up close as well as at range. His main strategy rests on Shadow Flare zoning, with the aim of forcing mistakes: the dodge cancel lets him chain Shadow Flares quickly, which hampers the opponent's movement, pushes them to approach and opens the way for the rest of his arsenal.
Sephiroth is versatile: he synergises well with the game's mechanics and thrives when the opponent has to come to him. Shadow Flare pressures melee fighters and spellcasters alike, while filling the assist gauge at a steady rate. Sudden Cruelty complements the projectiles up close with its disjointed hitbox and its strong damage and EX potential. His combos are solid thanks to his assist synergy (Kuja and Aerith), and his defensive options after an aerial dodge are formidable: Heaven's Light and Hell's Gate are vertical, evasive HP attacks, Scintilla guards instantly from frame 1 (staggering dashes and low priority melee attacks), and Heaven's Light even guarantees HP damage after an escape with LV2 Assist Change.
He is not without weaknesses: Bravery Boost on Dodge builds discourage overusing Shadow Flare, many of his attacks are telegraphed (HP attacks, Oblivion) or linear (Godspeed, Sudden Cruelty), his fast-startup bravery attacks are paid for with longer than average recovery, and his mobility is below average. Even after a dodge, picking the right defensive option remains a gamble, and he has to keep an eye on vertical tracking, Precision Evasion and the opponent's command blocks so as not to overexpose himself.
Competitively, Sephiroth is consistently ranked high in the hierarchy. His low execution floor and reliable aerial combat make him an excellent character for beginners and seasoned players alike, and he is particularly hard to beat at low and intermediate levels. His very action-oriented style helps him more than it hurts, provided the player does not become a slave to their own habits.
Strengths
Zoning: Shadow Flare puts the opponent under pressure and dictates the pace of the match.
Aerial combat: Sephiroth fights comfortably without depending on the ground.
High damage: a big attack stat, large base damage and HP Wall Rushes — a single assist combo can shred the opponent's bravery.
Reliable EX and assist gauge generation.
Builds with plenty of room for optimisation and fine-tuning.
Flexible post-dodge defence: three aerial HP attacks providing evasion or an instant guard.
An EX Mode that amplifies his damage and unlocks Heartless Angel (the opponent's bravery reduced to 1); a simple, reliable character at every level.
Weaknesses
Anti-zoning: Bravery Boost on Dodge and long-range counters (Firion's Shield Bash, Exdeath's block followups) limit how effective his zoning is.
Linearity: many attacks that are telegraphed or have average to poor tracking.
No fast aerial poke: no move combines a fast startup with an early dodge cancel — the sole exception, Transience, only exists on the ground.
Below-average mobility overall, which pushes him to act rather than to move without committing.
Stats & speeds
Name
Sephiroth (セフィロス)
Original game
Final Fantasy VII
Base ATK (LV100)
111 (High)
Base DEF (LV100)
111 (Average)
Run Speed
9 (Slow)
Dash Speed
81 (Below Average)
Fall Speed
85 (Average)
Fall Speed Ratio After Dodge
41 (Below Average)
Fastest BRV
15F (Transience)
Fastest HP
43F (Octaslash, Heaven's Light)
1-Hit HP
Yes (Multiple)
HP Links
Yes (Combos only)
Command Block
Yes (Scintilla)
Weapon
Greatswords, Katanas
Armor
Chestplates, Gauntlets, Heavy Armor,Helms, Light Armor, Shields
Exclusive weapons
Masamune Blade, Masamune, One-Winged Angel
Alignment
Chaos
Voice Actor (JP)
Toshiyuki Morikawa
Voice Actor (ENG)
George Newbern
Mobility profile (normal mode) — position within the cast
Gold dot: this character · small dots: the rest of the cast · violet line: average. Wiki values, lower = faster; the rank on the right reads directly (1st = fastest).
Moves
Startup of Sephiroth's moves
Shorter bar = faster move. Startup in frames (60 fps, dissidia.wiki data), with priority after the value. Moves marked ★ are the fastest in the kit — usually your best punish and pressure tools.
Bravery attacks
Ground
Reaper21FMelee Low
A three-part ground combo, Sephiroth's high-damage ground punish (21F). Delaying each Circle press until a flurry has finished maximises the number of hits, and therefore the damage; stopped at the second part, Reaper starts assist combos, and walls reduce the knockback of the final hit so that it converts too. It needs a dodge cancel to be made safe on whiff, and Sephiroth's heavily aerial game limits his chances to use it.
Base damage
45 (2, 1 x 5, 10 > 2, 1 x 6, 10 > 3, 1 x 5, 2)
Startup
21F
Type
Physical
Priority
Melee Low
EX Force
93
Effects
Chase
Cancels
Dodge
CP (mastered)
30 (15)
Fervent Blow27FMelee Low, Ranged Low
A linear stream of ground projectiles, to be used sparingly as a mid-range whiff punish: its active time covers attacks with gaps such as Prishe's Raging Fists, and it starts assist combos on the projectile or after a Wall Rush. Long recovery, Ranged Low priority, no tracking: vulnerable to lateral movement, Ground Dash and Free Air Dash. The close-range sword strike, which carries melee priority, tends to cross up against a block from very close range, a potential mixup against guard — but Godspeed, its aerial equivalent, sees more use.
Base damage
35 (5, 4 x 5 > 1 x 3, 7)
Startup
27F
Type
Physical
Priority
Melee Low, Ranged Low
EX Force
30
Effects
Wall Rush
Cancels
Dodge
CP (mastered)
30 (15)
Shadow Flare (ground)45FRanged Low
Shares most of its properties with the aerial version (including the early cancel window), but leaves Sephiroth on the ground: he cannot repeat it endlessly to harass and fill the assist gauge. Its niche: Pre-Jump booster builds (x1.5), which Sephiroth keeps by staying grounded. A useful detail: a ground Shadow Flare can be cancelled into an aerial Shadow Flare, whereas the reverse is impossible.
Base damage
each (3)
Startup
45F
Type
Magical
Priority
Ranged Low
EX Force
0
Cancels
Dodge, Block, Attack
CP (mastered)
30 (15)
Transience15FMelee Low
A close-range ground poke with every attribute of an effective poke: a 15F startup (Sephiroth's fastest), decent damage and a short, cancellable recovery — ideal in theory for offence, defence and safely filling the assist gauge. In practice, Sephiroth's aerial game often makes it unavailable and its reward on hit is low, even though a Wall Rush converts into an assist combo. On the ground, whiffing it on loop speeds up assist gauge gain.
Base damage
20 (1 x 7, 13)
Startup
15F
Type
Physical (1st hit) Magical (other hits)
Priority
Melee Low
EX Force
30
Effects
Wall Rush
Cancels
Dodge (hit / whiff) Block & Attack (whiff only)
CP (mastered)
30 (15)
Aerial
Sudden Cruelty17FMelee Low
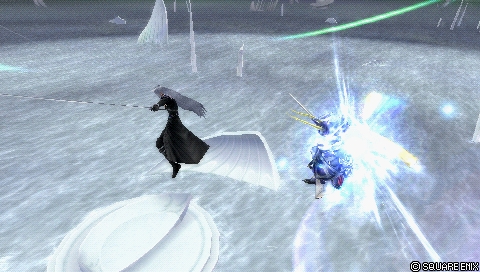
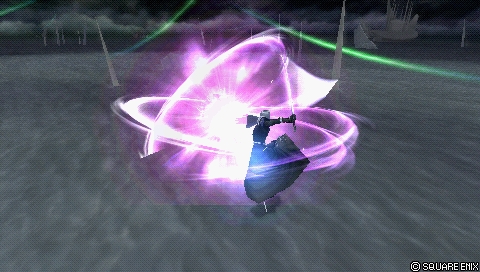
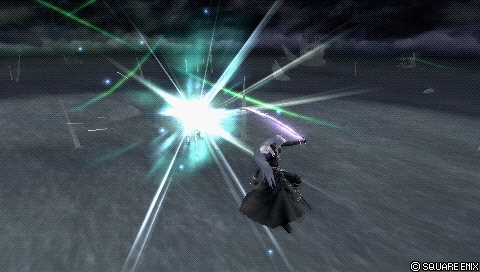
A two-part aerial combo and Sephiroth's major aerial punish (17F, unreactable): his reference offensive poke up close, with a disjointed hitbox that reaches its maximum range quickly. Excellent for starting and padding assist combos, it reliably converts a close Shadow Flare hit and can even pierce high-priority projectiles when well positioned. Weakness: almost no movement towards the opponent — it struggles to catch evasive movement, Ground Dash first among them.
Base damage
40 (2 x 8, 9, 4, 1 x 5, 6)
Startup
17F
Type
Physical
Priority
Melee Low
EX Force
87
Effects
Chase
Cancels
Dodge
CP (mastered)
30 (15)
Godspeed23FMelee Low, Ranged Low
The aerial version of the linear projectile stream: a mid-range whiff punish thanks to its startup and its active frames, able to contest attacks with gaps (Tifa's feints) from a distance, with a Wall Rush on the ground to start an assist combo. No horizontal or vertical tracking: the projectiles fly straight, which exposes him to assist punishes. It competes with Oblivion for the third bravery slot: Godspeed has more lateral reach and damage, Oblivion better vertical coverage; on a hit at range against a grounded opponent, a dodge cancel into Sudden Cruelty can combo on the landing lag.
Base damage
35 (5, 4 x 5, 1, 2, 7)
Startup
23F
Type
Physical
Priority
Melee Low, Ranged Low
EX Force
33
Effects
Wall Rush
Cancels
Dodge
CP (mastered)
30 (15)
Oblivion27FMelee Low
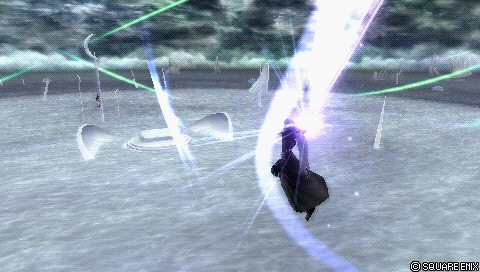
Sephiroth passes through the opponent then delivers a series of hits with a downward Wall Rush, good for assist combos on the ground. It is his melee bravery attack with the longest vertical reach (he closes in during the startup): perfect for punishing careless opponents above or below him and badly placed assists, but reactable otherwise. After a Shadow Flare hit, Oblivion follows up more easily than his other bravery attacks; with lock-on off and assigned to Circle, it doubles as movement in any direction to fill the assist gauge more safely.
Base damage
25 (6, 1 x 9, 10)
Startup
27F
Type
Physical
Priority
Melee Low
EX Force
30
Effects
Wall Rush
Cancels
Dodge
CP (mastered)
30 (15)
Shadow Flare (midair)45FRanged Low
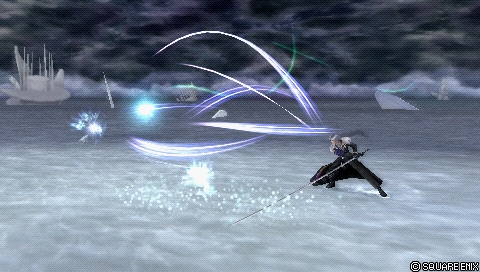
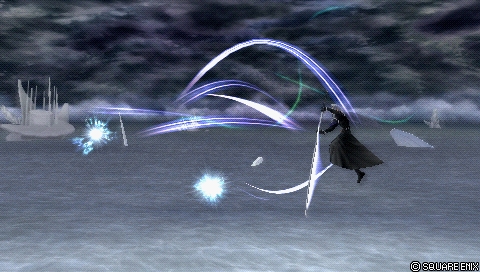
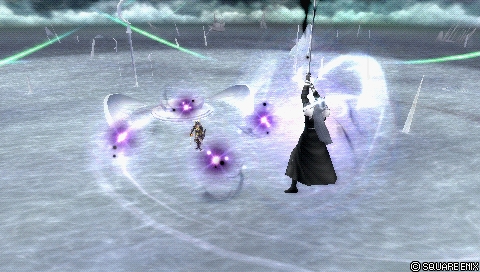
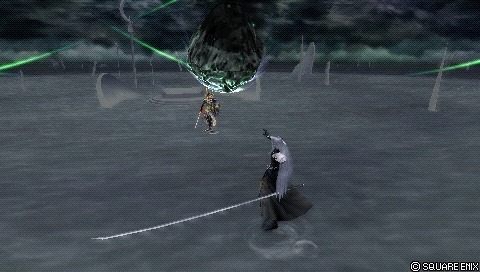
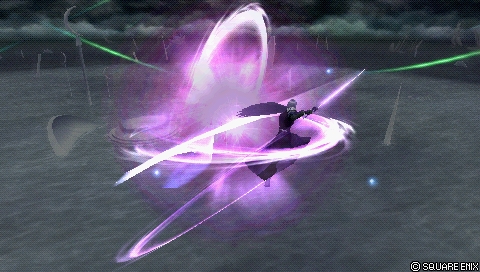
The projectile that defines Sephiroth: four long-range orbs that surround the opponent before converging. Generous range, a fast cancel into other actions, combo starters: it is the heart of his zoning, it forces the opponent to approach, harasses setup characters such as Kefka and Ultimecia and fills the assist gauge quickly. Its weaknesses are real: Ranged Low (a dash goes straight through it), tracking that stops the moment it activates, no protection for Sephiroth's own body, telegraphed (vulnerable to Firion's Shield Bash, Exdeath's Omni Block) and counterproductive against Bravery Boost on Dodge builds.
Base damage
each (3)
Startup
45F
Type
Magical
Priority
Ranged Low
EX Force
0
Cancels
Dodge, Block, Attack
CP (mastered)
30 (15)
HP attacks
Ground
Black Materia63FRanged High
A projectile chargeable in three levels: only level 3, which falls vertically onto the opponent, deals bravery damage and Wall Rush, and Sephiroth can move while it drops. Little used competitively: very slow startup, complete immobility, no protection — the angle of the meteors leaves Sephiroth open to dashes and interruptions from close and far alike. Easy to avoid or interrupt, it brings nothing notable to the neutral of such an aerial character.
Level 163FRanged High
Startup
63F
Priority
Ranged High
EX Force
0
Cancels
Dodge
CP (mastered)
30 (15)
Level 290F (Min. charge)
101F (Release)Ranged High
Startup
90F (Min. charge) 101F (Release)
Priority
Ranged High
EX Force
0
Cancels
Dodge
CP (mastered)
30 (15)
Level 3178F (Min. charge)
201F (Release)Ranged High
Base damage
3 x N
Startup
178F (Min. charge) 201F (Release)
Type
Magical
Priority
Ranged High
EX Force
6
Effects
Wall Rush, Absorb
Cancels
Dodge
CP (mastered)
30 (15)
Octaslash (ground)43FMelee High
An advancing multi-hit combo (43F), a callout tool against whiffs and dodges on the ground: good horizontal coverage, plenty of lateral tracking, and effective space control in enclosed places (corners, stages such as Pandaemonium). Weak vertical tracking and a full animation even on whiff: risky in neutral. It is the HP attack of Sephiroth's that deals the most bravery damage, with an assist combo starter on Wall Rush; Sephiroth is considered airborne at the end of the move.
Base damage
2 x 6, 4 (16)
Startup
43F
Type
Physical
Priority
Melee High
EX Force
21
Effects
Wall Rush
Cancels
Dodge
CP (mastered)
30 (15)
Scintilla (ground)45F, 1F-42F (block)Block Mid, Melee High
A command block that guards instantly then counter-attacks: powerful on defence, but very risky if the stagger does not come. It blocks low-priority attacks and dashes (blocking a mid-priority attack staggers Sephiroth), is ideally used after a ground dodge, and its Wall Rush opens an assist combo. The aerial version sees more competitive use.
Base damage
4, 1 x 6 (10)
Startup
45F, 1F-42F (block)
Type
Physical
Priority
Block Mid, Melee High
EX Force
30
Effects
Wall Rush, Block
Cancels
Dodge
CP (mastered)
30 (15)
Aerial
Hell's Gate55FMelee High
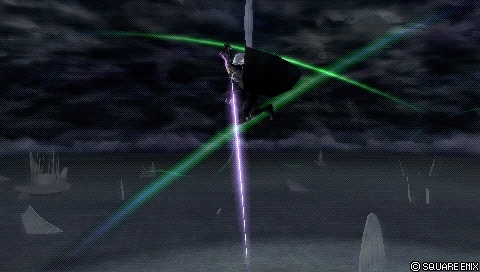
A flexible dive (55F) to threaten the ground, to defend after an aerial dodge or to finish an assist combo. Square held: a multi-hit dive that drags the opponent downwards, with a ground burst carrying an HP hitbox on landing; released: a transition into a single-hit HP attack. The rise during the startup provides a measure of evasion and Sephiroth steers manually throughout the attack; every version converts into an assist combo, extendable with Aerith. Held, it even becomes an infinite combo in Phantom Train by pushing the opponent towards a window.
Base damage
2 x N
Startup
55F
Type
Physical
Priority
Melee High
EX Force
60 + 3 x N
Cancels
Dodge
CP (mastered)
30 (15)
Octaslash (midair)43FMelee High
Works like the ground version: lateral tracking, multiple hits. Less favoured in the air, because Sephiroth's other aerial HP attacks offer more utility in combos and in neutral, but it remains one of his most powerful assist combo finishers in bravery damage.
Base damage
2 x 6, 4 (16)
Startup
43F
Type
Physical
Priority
Melee High
EX Force
21
Effects
Wall Rush
Cancels
Dodge
CP (mastered)
30 (15)
Scintilla (midair)45F, 1F-42F (block)Block Mid, Melee High
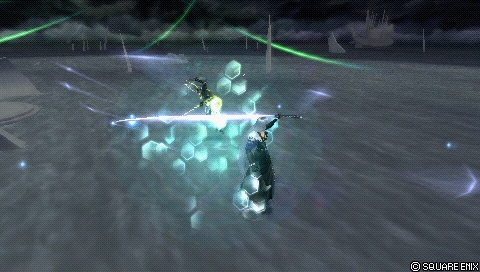
Identical to the ground version, but its existence in the air makes it a pillar of Sephiroth's defence: a frame 1 command block, it stops many dodge punish attempts dead, Free Air Dash first among them. With Evasion Boost, which doubles dodge invincibility, Sephiroth can chain a dodge into Scintilla without the slightest gap — devastating against low-priority melee characters. Careful: the animation always runs to its end, even on whiff, and a dodged Scintilla leaves Sephiroth wide open.
Base damage
4, 1 x 6 (10)
Startup
45F, 1F-42F (block)
Type
Physical
Priority
Block Mid, Melee High
EX Force
30
Effects
Wall Rush, Block
Cancels
Dodge
CP (mastered)
30 (15)
Heaven's Light43FMelee High
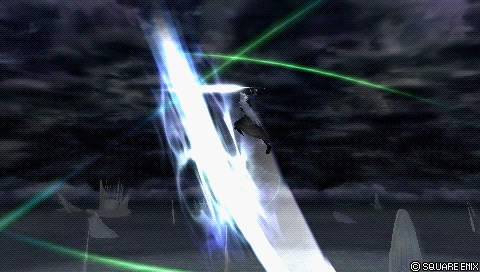
A single-hit evasive HP attack (43F) with the right knockback for ceiling Wall Rushes: Sephiroth places himself under the opponent then shoots upwards. Excellent as a punish, as an assist combo finisher, as protection after an aerial dodge and as a whiff callout; the initial dive dodges many attacks without being invincibility. Reliable after an LV2 Assist Change stagger to secure HP damage, hard to punish thanks to the long distance it covers and its short recovery for an HP attack — an essential move, and a valuable one for gauge depletion through Wall Rush.
Startup
43F
Priority
Melee High
EX Force
0
Effects
Wall Rush
Cancels
Dodge
CP (mastered)
30 (15)
EX Mode: Reunion! & EX Burst
The “Reunion!” EX Mode grants Regen, Critical Boost, Glide (free flight by holding Cross in the air) and Heartless Angel. Sephiroth's bravery damage being good already, he naturally benefits from critical hits; with the assist and EX gauges full, a single assist combo followed by an EX Mode activation creates enormous momentum.
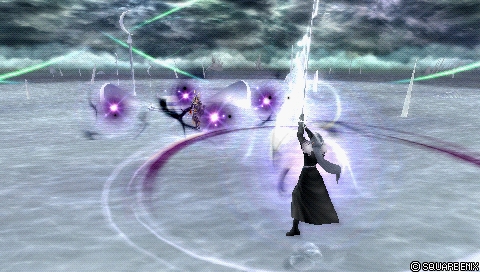
Heartless Angel (R + Square): Sephiroth charges an unblockable attack that reduces the opponent's bravery to 1 (he cannot gain bravery while charging). A charge time of 5 seconds (297 frames), with a cooldown of about 0.6 seconds if the button is released early. Assists can follow up behind it, which generally guarantees a bravery break; assists that hold the opponent for a long time (Jecht, Kuja) work around the long charge. Even without the time to charge it fully, starting it pushes the opponent to approach. If the opponent's bravery is already at 1, it is not reduced any further.
EX Burst : The Super Nova EX Burst fills by mashing Circle: simple execution and one of the most powerful bursts in the game (100 base damage in total).
Special moves
Special commands that never appear in the equip lists: they cost no CP and trigger from a dedicated input.
Heartless AngelSpecial moveR + Square held — EX Mode (One-Winged Angel) only
A special attack absent from the equipment lists, available only in EX Mode: after a long charge time that leaves Sephiroth vulnerable, it instantly reduces the opponent's bravery to 1 if it goes through. It fails if Sephiroth is in a Break state when the charge finishes. It ignores protective summons such as Demon Wall, and against a bravery freeze (Alexander) it forces a freeze at 1. EX Mode also brings Glide: holding X lets him glide.
Sephiroth's neutral starts with Shadow Flare: harass at range, fill the assist gauge and convert into a combo when possible — without expecting direct damage from it. The threat of the projectile forces the opponent to approach, and that is where the rest of the arsenal takes over: Sudden Cruelty punishes aerial dodges and careless attacks up close, Godspeed and Fervent Blow whiff punish at mid range, Oblivion covers the vertical.
His solo combos revolve around Shadow Flare: a dodge cancel into Sudden Cruelty (43~52 base damage, 87 EX), a cancel into Oblivion for less risk, or a direct cancel into Heaven's Light — the most consistent one, which works even above the opponent thanks to the move's automatic movement. In EX Revenge, the reference routine is five Shadow Flares chained then Heaven's Light, and it works anywhere.
With an assist (Kuja), the classic starters are the first part of Sudden Cruelty, Reaper stopped at two hits, Oblivion's ground Wall Rush or an Octaslash Wall Rush; Heaven's Light serves as a reliable, low-execution finisher, Sudden Cruelty or Hell's Gate as EX-oriented finishers, Octaslash as a damage finisher that gives base bravery the time to recover.
Defensively, Sephiroth's strength is his post-dodge flexibility: Scintilla (frame 1) against dashes and low-priority bravery attacks, Heaven's Light and Hell's Gate as vertical evasive exits — not forgetting that Heaven's Light guarantees HP damage after an LV2 Assist Change stagger. Every option has a counter, so vary them: that is the price of his mediocre mobility and his long recoveries.
Beware the character's pitfalls: Bravery Boost on Dodge builds punish overusing Shadow Flare, and Sephiroth's very active style can let the player fall back into their own habits. Control the pace, and only engage once the zoning has prepared the ground.
Character-specific tech
Hell's Gate Infinite (Phantom Train)
A held Hell's Gate becomes an infinite combo in Phantom Train: Sephiroth steers towards one of the carriage windows while hitting the opponent during the multi-hit dive.
Shadow Flare cross-cancel
The ground Shadow Flare can be cancelled into an aerial Shadow Flare, whereas the aerial version cannot be cancelled into itself. A minor detail, but a useful one for Pre-Jump builds that want to leave the ground without deactivating the booster.
Blodge after Shadow Flare
During Shadow Flare's recovery, Sephiroth can blodge to stagger an opponent dashing at him, then convert: Heaven's Light if the dodge has not carried him too far away (guaranteed HP damage and depletion), bravery attacks or an assist otherwise. Recommended at intermediate and advanced levels rather than to beginners.
Oblivion lock-off movement
With lock-on off and Oblivion assigned to Circle, Sephiroth can use it to move in any direction he is facing — a way to fill the assist gauge more safely.
Godspeed landing lag combo
If Godspeed's projectiles hit a grounded opponent at range, a dodge cancel into Sudden Cruelty can combo on the landing lag. The dodge cancel timing is noticeably later on hit, which takes practice.
Hell's Gate input hold
To make sure a Hell's Gate does not stop early when a BRV assist is called: hold Square, then also hold Circle and press L. The input is awkward (thumb + left index finger) but it makes the setup reliable, notably on a clash with a charged One Inch Punch.
Documented solo combo routes
Many routes around Shadow Flare, very few outside it, all of them dealing very high damage: Shadow Flare > dodge cancel > anything; level 3 Black Materia > Reaper or Octaslash; point-blank Godspeed > landing lag > Godspeed > landing lag > Sudden Cruelty.
Sephiroth has a plethora of solo combos, most of which revolve around Shadow Flare. He works well with assists both in close-range and in midrange, and he even has an infinite in Phantom Train. [1]
Main article: Sephiroth Combos (Kuja Assist)
Universal techniques (blodge, dash feint, lock off, dodge punishment): see the Techniques & glitches page.
Matchups
Only one matchup is documented in detail: Prishe (even). The two characters fight over position and EX gauge; Sephiroth wants to harass with Shadow Flare before closing in, Prishe wants to get into contact. The big exchanges happen up close, where every action has a counter — none of Sephiroth's tools is risk-free, so he has to vary them. The matchup calls for a good understanding of positioning, gauge management and timings, but Sephiroth has the tools to come out of it well (recommended build: EX or damage).
In neutral: fill the assist gauge with Shadow Flare then convert into assist combos (finished with Sudden Cruelty for EX or Heaven's Light for HP). Godspeed is exceptional here, whereas it sees little use elsewhere: its burst interrupts a charged One Inch Punch, during the charge or on release, provided he is at the same height as Prishe. Dodging above her exploits the mediocre vertical tracking of her moves. Sudden Cruelty catches the aerial dodges that leave her close, punishes anticipated HP attacks and stops her rushes — but be careful not to whiff punish a charged OIP with it, on pain of a stagger.
On defence: Scintilla establishes that Prishe cannot dash in and hit for free (Free Air Dash, Raging Fists, uncharged OIP), ideally after a dodge — but it protects against neither a charged OIP nor Banishga. Against Banishga: a neutral dodge at the moment of impact then a whiff punish (Sudden Cruelty, Reaper or assist), or vertical dodges. Assist Changes are central: LV1 Change > Heaven's Light against Auroral Uppercut, LV1 Change as soon as Banishga starts > Free Air Dash > Sudden Cruelty, LV2 Change > Heaven's Light against OIP, Dragon Kick or Auroral Uppercut. Under Assist Lock, slow the pace down and keep moving (Quickmoves, Multi Air Slide, jumps).
On offence: Sephiroth rarely attacks — HP attacks work against a block as a mixup after a dash (condition with bravery attacks first), Sudden Cruelty catches the startup of Free Air Dash, Hell's Gate on landing beats ground dodges, and the “checkmate” EX Revenge allows constant Free Air Dashes with an EX Revenge reaction on hit. Watch out for block > Nullifying Dropkick on the ground. On builds: EX with Cleaver/White Gem and Aerith (more EX and ATK but dependent on Chase setups), or EX with Heaven's Cloud and other assists (easier EX outside Chase with Tenacious Attacker, whiff punishes possible, less damage).
Sephiroth works with a great many builds, bravery damage and EX being his bread and butter; his builds leave plenty of room for optimisation. The documented build is a “Seal of Lufenia” hybrid with the Equip Glitch (the total CP cost assumes the glitch has been performed): One-Winged Angel as the weapon, Lufenian pieces (Dirk, Hairpin, Vest), Kuja assist, Rubicante summon and a battery of booster accessories (Hyper Ring, Muscle Belt, Sniper Eye, Battle Hammer, the Summon Unused / Pre-EX Mode / Aerial / Opponent Summon Unused conditions, Tenacious Attacker, Glutton) for a maximum multiplier of x3.5 — 1175 BRV, 180 ATK, 182 DEF. The Best Dresser extra ability is the one to equip.
The matchups page sheds complementary light on the EX trade-offs: an EX build with Cleaver, White Gem and the Aerith assist maximises EX gain and ATK but depends on Aerith's Chase setups; an EX build with Heaven's Cloud and other assists makes EX easier on Sudden Cruelty without Chase (Tenacious Attacker recommended) and allows HP attacks to be whiff punished with an assist, at the cost of lower bravery damage.
A second build is provided in the data but is entirely empty (no stats, no equipment), and the attack selections of the builds are not filled in in the tables.
Build and check a Sephiroth loadout slot by slot: build creator (CP gauge, ability exclusions and tournament rules applied).
Assist synergies
Sephiroth as an assist
Sephiroth sits in the High tier of the assist tier list. His assist attacks: Reaper (ground BRV, 21F, 45 base damage, Chase), Sudden Cruelty (air BRV, 17F, 40 damage, Chase), Octaslash (ground HP, 43F, Wall Rush) and Hell's Gate (air HP, 55F, Chase). On Cloud's page he is described as a “budget” Kuja with a better whiff punish; the Hell's Gate assist helps out in scrambles, despite a cost that is sometimes hard to justify.
Recommended assists
Kuja — Cited alongside Aerith as a pillar of the assist synergy that makes Sephiroth's combos complete; he is the assist of the documented build and of every detailed combo route (Sudden Cruelty, Reaper, Oblivion, Octaslash, Heaven's Light as starters).
Aerith — The second pillar of the assist synergy according to the overview; she extends Hell's Gate conversions in particular and feeds the Chase-based EX build described in the Prishe matchup.
Tidus / Yuna — Mentioned in the Prishe matchup as more consistent conversions than Kuja after Godspeed's projectiles (Tidus ground BRV > Shadow Flare > Heaven's Light; Yuna ground BRV with a wall), at the cost of less destructive routes — acceptable given Prishe's low base defence.
Community tech
Hell's Gate Infinite Combo (Phantom Train)
A documented infinite combo: Hell's Gate held against one of the windows of Phantom Train, hitting the opponent throughout the movement.
Dissidia 012 Duodecim Final Fantasy Sephiroth Combo Montage — Andyz5448 2011
A period montage listing a range of Sephiroth combos and links, performed against level 105 opponents with Auto Recovery on to validate the real follow-ups.
A short demonstration of an EX Mode setup: activation during the slam to purge the opponent's assist, an assist call then Heartless Angel, and another conversion behind it.
A community record of solo combo routes for all 31 characters, compiled by Eddiegames on the Discord DISSIDIA and published on pastebin (last updated December 2022). Sephiroth is described there with a great many routes around Shadow Flare, all of them dealing very high damage.
No unique mechanic is documented for Sephiroth (the section is absent from the wiki).
Only one matchup is detailed (Prishe); the rest of the cast is not covered.
The assist synergy section amounts to a single sentence (“works with most tournament-viable assists”): the recommendations above are reconstructed from the overview and the Prishe matchup.
The second build is entirely empty and the attack selections of the builds are not filled in.
The assist gauge gain values (assistGain) are empty for every move, and Heaven's Light's damage is not quantified (“-”).
The wiki's only reference is a URL with no title, author or date.
 Assist
 Rubicante
 One-Winged Angel
 Lufenian Dirk
 Lufenian Hairpin
 Lufenian Vest
 Hyper Ring

 Summon Unused
 Pre-EX Mode
 Aerial
 Summon Unused
 Tenacious Attacker

