Fast close-range fighter: safe hit and run and war of attrition
Fastest BRV 11F (Combo One)Fastest HP 43F (Asuran Fists, Auroral Uppercut)Dash 73 (NormalATK 109DEF 1101-hit HP YesNullifying Dropkick, Banishga max rangeHP links No
Standing in the meta
Tier S2nd of 30 — 2017 tournament tier list from dissidia.wiki (half matchup values, half expert player votes).
Ranked 2nd in the game (tier S) on the 2017 competitive tier list, behind Exdeath. The overview confirms her among the strongest: consistent strategy, easy to execute.
Overview
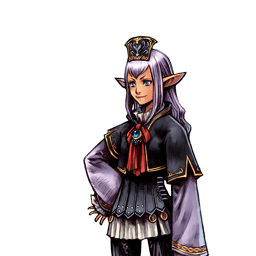
Prishe is a fast short-range fighter with a varied set of melee bravery attacks that chain into one another. Some of them, equipped together, trigger a “Skillchain” reaction that deals extra bravery damage.
She is known for her low-risk defensive close-range game, led by Raging Fists and One-Inch Punch: fast startup, short recovery, good reward on hit. Threaten with delayable advancing strikes, charge One-Inch Punch to crush blocks, dodge away if they whiff. Her fast fall makes her air dodges hard to punish, and her dash speed, among the fastest in the game, helps her chase opponents and EX Cores alike. Fast, safe, hard to touch: the textbook example of effective hit and run in Dissidia 012 — patience pays off handsomely, and she excels in a war of attrition.
Her weaknesses are subtler. Her bravery attacks, hard to punish, cannot be cancelled into block or into other attacks — a ceiling on her defensive mind games, effective as they already are. Most of her attacks track poorly on the vertical axis and struggle against long active disjoints (The Emperor's Thunder Crest, Sephiroth's Godspeed). Her 1-hit HP attacks stay situational in EX Revenge checkmates, and the sheer number of viable chains lands her in a bravery slot dilemma much like Vaan's.
In competitive play, Prishe has often been ranked among the strongest in the game. Her strategy, consistent and simple to execute in most matchups, makes her a notable blind pick: a stable game, even without a clear advantage.
Strengths
Mobility: very high dash speed, both on offense and in races for EX Cores; fast fall after an air dodge, making her dodges far safer than average.
Turtling: fast bravery attacks with short recovery, strong mixup through charged high-priority One Inch Punch; she fights at very low risk and becomes hard to touch.
Safe and reliable: her defence and her synergy with the Aerith assist let her play the long game, stacking EX gauge and bravery.
Heavy bravery damage: despite a low base ATK, charged One Inch Punch and EX Mode combos hurt badly, especially after a guard break.
Weaknesses
Mediocre HP attacks: compared with her bravery attacks, they have poor tracking and coverage.
Low base DEF: when Prishe does get hit, it hurts badly.
Three-slot dilemma: her competitive loadouts are strong but cannot cover everything.
EX Revenge checkmates: 1-hit HP attacks are situational at best (Nullifying Dropkick on the ground, Banishga at maximum range in the air); she falls back on movement and her assist.
Reliance on dodge cancels: a liability mostly at high level, it caps her mixup ceiling and punishes relentless whiffing in races for EX Cores.
Mobility profile (normal mode) — position within the cast
Gold dot: this character · small dots: the rest of the cast · violet line: average. Wiki values, lower = faster; the rank on the right reads directly (1st = fastest).
Moves
Startup of Prishe's moves
Shorter bar = faster move. Startup in frames (60 fps, dissidia.wiki data), with priority after the value. Moves marked ★ are the fastest in the kit — usually your best punish and pressure tools.
Bravery attacks
Ground
Combo (One)11FMelee Low
A quick three-punch combo, her fastest bravery attack (11 frames). Chains into another bravery attack and combos even on whiff. A chain started with Combo yields roughly 10% more EX Force on the finisher.
Base damage
2, 2, 4 (8)
Startup
11F
Type
Physical
Priority
Melee Low
EX Force
39 (One)
CP (mastered)
20 (10)
Howling Fist (One)17FMelee Low
A mid-range fist charge, chainable into another bravery attack. Charged: from Melee Low to Melee Mid, with double damage.
Normal17FMelee Low
Base damage
10 (1 x 3, 7)
Startup
17F
Type
Physical
Priority
Melee Low
EX Force
15
Cancels
Dodge
CP (mastered)
20 (10)
Charged32F (charge), 2F (release)Melee Mid
Base damage
20 (1 x 13, 7)
Startup
32F (charge), 2F (release)
Type
Physical
Priority
Melee Mid
EX Force
15
Cancels
Dodge
CP (mastered)
20 (10)
Dragon Kick (One)17FMelee Low
A mid-range leg sweep; charging adds a hit (Ranged Mid projectile) and takes damage from 15 to 25.
A backflip into a charge at the opponent, dodging their attack on startup (Dodge effect). Slow startup (45 frames).
Base damage
12
Startup
45F
Type
Physical
Priority
Melee Low
EX Force
15 (One)
Effects
Dodge
CP (mastered)
20 (10)
Banish31FRanged Low
A grounded Ranged Low projectile: fast beads of light fired at long range. No Skillchain.
Base damage
10
Startup
31F
Type
Magical
Priority
Ranged Low
EX Force
15
CP (mastered)
30 (15)
Aerial
Backhand Blow (One)29FMelee High
A downward Melee High backhand (29 frames), useful for attacking from above.
Base damage
18
Startup
29F
Type
Physical
Priority
Melee High
EX Force
15 (One)
CP (mastered)
20 (10)
Spinning Attack (One)23FMelee Low
A rising fist rush with an Absorb effect, ideal for attacking from below.
Base damage
1 x 4, 11 (15)
Startup
23F
Type
Physical
Priority
Melee Low
EX Force
15 (One)
Effects
Absorb
CP (mastered)
20 (10)
Raging Fists (One)13FMelee Low
A five-punch combo in 13 frames that combos even on whiff: the backbone of her close-range defensive game (fast startup, short recovery, good reward on hit).
Base damage
2 x 4, 7 (15)
Startup
13F
Type
Physical
Priority
Melee Low
EX Force
15 (One)
CP (mastered)
20 (10)
One Inch Punch (One)13FMelee Low
Hammered bursts of energy at point-blank range, 13 frames in its normal version. Charged: Melee High at 35 damage, the tool that crushes blocks and carries her mixup.
Normal13FMelee Low
Base damage
7 (2, 1 x 3, 2)
Startup
13F
Type
Physical
Priority
Melee Low
EX Force
15
Cancels
Dodge
CP (mastered)
20 (10)
Charged32F (charge), 4F (release)Melee High
Base damage
35 (2 x 14, 7)
Startup
32F (charge), 4F (release)
Type
Physical
Priority
Melee High
EX Force
15
Cancels
Dodge
CP (mastered)
20 (10)
Holy19FRanged Low
A long-range aerial Ranged Low projectile: slow beads of light with strong homing. No Skillchain.
Base damage
10
Startup
19F
Type
Magical
Priority
Ranged Low
EX Force
15
CP (mastered)
30 (15)
Followups
The data is close to the (One) versions, but the (Two) follow-ups generate a different amount of EX Force, can Wall Rush or start a Chase, and cost less CP to equip.
These followups branch off the “(One)” Bravery attacks — the chain diagram below lays out the branches.
Combo (Two)11FMelee Low
Combo's follow-up: same attack data, but 75 EX Force (the best EX return of her follow-ups) and a Chase effect, for only 10 CP.
Base damage
2, 2, 4 (8)
Startup
11F
Type
Physical
Priority
Melee Low
EX Force
75 (Two)
Effects
Chase
CP (mastered)
10 (5)
Howling Fists (Two)17FMelee Low
Chain follow-up: 60 EX and Chase when normal, Wall Rush when charged. As a finisher, the required charge is much shorter.
Normal17FMelee Low
Base damage
10 (1 x 3, 7)
Startup
17F
Type
Physical
Priority
Melee Low
EX Force
60
Effects
Chase
Cancels
Dodge
CP (mastered)
10 (5)
Charged32F (charge), 2F (release)Melee Mid
Base damage
20 (1 x 13, 7)
Startup
32F (charge), 2F (release)
Type
Physical
Priority
Melee Mid
EX Force
0
Effects
Wall Rush
Cancels
Dodge
CP (mastered)
10 (5)
Dragon Kick (Two)17FMelee Low
Follow-up with Chase in both versions; 60 EX when normal, 75 when charged.
A body slam follow-up with Wall Rush, no EX Force.
Base damage
12
Startup
45F
Type
Physical
Priority
Melee Low
EX Force
0 (Two)
Effects
Wall Rush
CP (mastered)
10 (5)
Backhand Blow (Two)29FMelee High
A Melee High backhand follow-up with Wall Rush: its finishers set up combos with the Kuja assist beautifully (see the Skillchain section).
Base damage
18
Startup
29F
Type
Physical
Priority
Melee High
EX Force
0 (Two)
Effects
Wall Rush
CP (mastered)
10 (5)
Spinning Attack (Two)23FMelee Low
A rising rush follow-up with Wall Rush, no EX Force.
Base damage
1 x 4, 11 (15)
Startup
23F
Type
Physical
Priority
Melee Low
EX Force
0 (Two)
Effects
Wall Rush
CP (mastered)
10 (5)
Raging Fists (Two)13FMelee Low
Follow-up to the five-punch combo, with Chase and 72 EX Force.
Base damage
2 x 4, 7 (15)
Startup
13F
Type
Physical
Priority
Melee Low
EX Force
72 (Two)
Effects
Chase
CP (mastered)
10 (5)
One Inch Punch (Two)13FMelee Low
Follow-up with Wall Rush in both versions (no EX Force). As a finisher, the required charge is much shorter; the exact timing is not documented.
Normal13FMelee Low
Base damage
7 (2, 1 x 3, 2)
Startup
13F
Type
Physical
Priority
Melee Low
EX Force
0
Effects
Wall Rush
Cancels
Dodge
CP (mastered)
10 (5)
Charged32F (charge), 4F (release)Melee High
Base damage
35 (2 x 14, 7)
Startup
32F (charge), 4F (release)
Type
Physical
Priority
Melee High
EX Force
0
Effects
Wall Rush
Cancels
Dodge
CP (mastered)
10 (5)
One → Two chain diagram
Every “(One)” Bravery attack (left) can chain into any equipped “(Two)” followup (right) — the followup is picked when equipping, not during the combo. Details for each move in the accordions above.
HP attacks
Ground
Asuran Fists43FMelee High
A point-blank Melee High HP attack (43 frames, tied for her fastest) with Wall Rush: a brief charge then a flurry, effective at any height.
Base damage
3 x 7 (21)
Startup
43F
Type
Physical
Priority
Melee High
EX Force
15
Effects
Wall Rush
CP (mastered)
30 (15)
Nullifying Dropkick49FMelee High
A charged mid-range Melee High dropkick with Wall Rush: slow to start (49 frames) but with good reach. Her grounded 1-hit HP attack, situational for solving EX Revenge checkmates.
Startup
49F
Priority
Melee High
EX Force
0
Effects
Wall Rush
CP (mastered)
40 (20)
Aerial
Auroral Uppercut43FMelee High
A fast Melee High uppercut (43 frames) with Wall Rush, excellent for attacking from below.
Base damage
2 x 5 (10)
Startup
43F
Type
Physical
Priority
Melee High
EX Force
15
Effects
Wall Rush
CP (mastered)
30 (15)
Banishga47FRanged High
A Ranged High shockwave of light (47 frames) with Wall Rush, effective horizontally. At maximum range, an aerial 1-hit HP attack — situational here too.
Base damage
2 x 5 (10)
Startup
47F
Type
Physical
Priority
Ranged High
EX Force
0
Effects
Wall Rush
CP (mastered)
40 (20)
EX Mode: Two-Hour Ability! & EX Burst
The “Two-Hour Ability!” EX Mode grants Regen, Critical Boost and Hundred Fists: while it is active, Prishe chains up to three weapon skills and moves faster — every one of her mobility stats moves up a notch (run, dash, fall, fall after dodge).
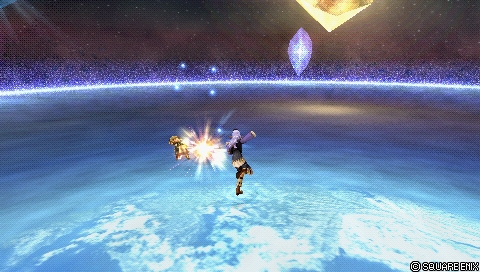
EX Burst : “The Five Lights”: Prishe throws a shard of Magicite, then entering the displayed commands clockwise increases the number of hits landed.
Unique mechanic
Certain chained bravery attacks trigger a Skillchain: a burst of energy dealing extra bravery damage (multiplier 5, physical, no EX Force), fired alongside the attack in progress. Its name appears at the top of the screen, like HP attacks and EX Mode activations.
Only chains of physical bravery attacks trigger them: Banish, Holy and HP attacks never do.
Eight Skillchains are documented with their starter/finisher pairs: Compression (Howling Fist > One Inch Punch), Detonation (Combo, Howling Fist, One Inch Punch, Raging Fists, Shoulder Tackle or Spinning Attack > Backhand Blow), Fusion (Spinning Attack > Combo, Howling Fist, Raging Fists, Shoulder Tackle or Spinning Attack), Gravitation (Backhand Blow > One Inch Punch), Impaction (Shoulder Tackle > Combo, Howling Fist, Raging Fists, Shoulder Tackle or Spinning Attack), Liquefaction (Combo, Howling Fist or Raging Fists > Spinning Attack), Reverberation (Howling Fist > Shoulder Tackle) and Transfixion (One Inch Punch > Howling Fist).
Detonation is one of the handiest: it starts from her most common starters, and Backhand Blow finishers set up combos with the Kuja assist beautifully. The Howling Fist finisher offers more flexibility for aerial assist combos (Chase or Wall Rush), at the cost of bravery damage or EX Force depending on the charge.
Skillchains often remain the third-best follow-up choice: good on certain bravery-damage sets, otherwise outclassed in reward or in utility. Only one bravery chain per slot, hence their limited overall viability. On the other hand, the input timing for charged attacks is more forgiving there — not through the system itself, but through the synergy (frame data and hit stun) between the bravery attacks of a chain.
Skillchain diagram
Compression
Howling Fist→One Inch Punch
Detonation
ComboHowling FistOne Inch PunchRaging FistsShoulder TackleSpinning Attack→Backhand Blow
A Skillchain triggers by chaining a move from the left column (starter) into a move from the right column (finisher) — when several pills are listed, any of them works.
Damage multiplier
Type
EX Force
5
Physical
0
Gameplan & advanced tech
Prishe's loop is a defensive close-range hit and run: threaten with delayable advancing strikes (Raging Fists, One Inch Punch at 13 frames), charge One Inch Punch to crush blocks, pull out with an all-but-unpunishable dodge if the opponent does not bite. Her dash speed, among the highest in the game, chases down runners and wins races for EX Cores. Patience pays: built for a war of attrition, she stacks EX gauge and bravery thanks to her defence and her synergy with the Aerith assist.
Her bravery attacks chain: the (One) versions start the chain, the (Two) follow-ups decide what comes next — Chase and heavy EX gains (Combo, Raging Fists, Dragon Kick) or Wall Rush to set up the assist (Backhand Blow, One Inch Punch, Spinning Attack, Shoulder Tackle). Backhand Blow finishers set up combos with the Kuja assist beautifully, and Skillchains add bonus damage on certain sets. Watch out: only one chain per bravery slot, so no complete coverage.
Her poorly tracking HP attacks remain the weak link: Asuran Fists and Auroral Uppercut are the fastest (43 frames, Wall Rush); Nullifying Dropkick and Banishga at maximum range serve as situational 1-hit HP attacks for EX Revenge checkmates — otherwise, movement and the assist do the work. In EX Mode, Hundred Fists chains up to three weapon skills, mobility picks up further, and combos deal heavy bravery damage, especially after a guard break.
Character-specific tech
Charged One Inch Punch as the universal finisher
Whatever the situation (EX Mode, Skillchain or neither), charged One Inch Punch remains her most powerful attack: players of the era advised ending as many chains as possible on it, balancing slots between One Inch Punch finishers (damage, Wall Rush) and Dragon Kick finishers (EX Force).
Any chain started with Combo yields roughly 10% more EX Force, and charged Dragon Kick is her biggest EX generator as a finisher: Combo > charged Dragon Kick peaks at around 125 EX Force with Chase — the character's best EX return, without any Skillchain at all.
Hundred Fists allows three weapon skills back to back: with Spinning Attack as a slot's finisher, a chain becomes starter > Spinning Attack (Skillchain) > Spinning Attack (second Skillchain) — two bonus bursts in a single engagement.
Its unusual rising-rush hitbox catches opponents caught low enough, right through their guard — an uncommon opening angle against an opponent who blocks.
Dragon Kick triggers no Skillchain, neither as a starter nor as a finisher, but charged it is her strongest grounded attack. On charged Dragon Kick > charged One Inch Punch, period sources disagree: the joint most powerful grounded combo for one player, all but unlinkable (extreme timing) for another.
A single solo combo — the only one she needs, her heavy bravery damage going through Backhand Blow and assists: Raging Fists (4 hits) > dodge cancel > landing lag > Raging Fists or uncharged One Inch Punch. The compiler notes that grounded Combo also chains into Raging Fists, and that the landing lag follow-ups apply to One Inch Punch as well.
Universal techniques (blodge, dash feint, lock off, dodge punishment): see the Techniques & glitches page.
Matchups
The wiki's matchup page is a stub, but the overview gives some bearings: a consistent strategy, simple to execute in most matchups — a notable blind pick, solid even without a clear advantage. Documented friction points: long active disjoints (The Emperor's Thunder Crest, Sephiroth's Godspeed), against which her mediocre vertical tracking struggles.
Her builds usually aim at EX and bravery damage. The documented build (“Adamant Chains”) leans on the special effect of the same name — damage, EX absorption, even safer air dodges — with the Aerith assist, the Cleaver weapon, the Adamant set (Shield, Helm, Vest), booster-oriented accessories (Hyper Ring, Muscle Belt, Dismay Shock, Battle Hammer, Summon Unused, three White Drop, White Gem, Glutton) and Rubicante as the summon. It relies on the Equip Glitch (the total CP cost assumes it has been performed).
Side by Side is not recommended on Prishe: average HP attacks and no solo combo into an HP attack.
The build's bravery and HP attack slots are left blank, and the second build (“Build #2”) is an empty template.
Build and check a Prishe loadout slot by slot: build creator (CP gauge, ability exclusions and tournament rules applied).
Assist synergies
Prishe as an assist
As an assist, Prishe is rated Low tier on Muggshotter's assist tier list. The sources on her page give no detail on her use beyond that ranking.
Recommended assists
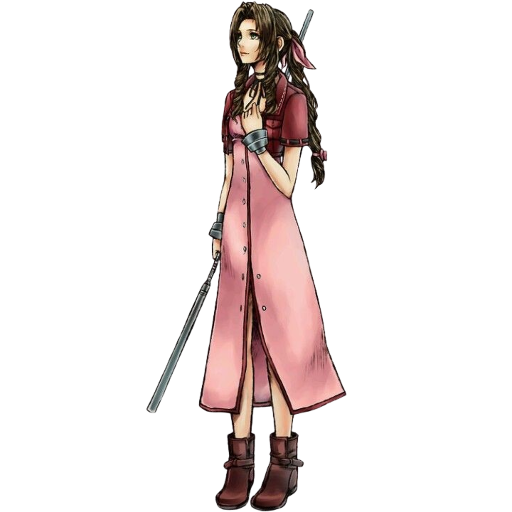
Aerith — Her synergy with Aerith is cited among her strengths: her defence and the Aerith assist let her play the long game, stacking EX gauge and bravery. It is also the assist of the documented Adamant Chains build.
Kuja — Cited by the page among the assists that work well with her; the Skillchain section notes that Backhand Blow finishers set up combos with his assist beautifully.
Community tech
Dissidia Duodecim: The Essential Guide to Learning Prishe 2011
The reference video guide of the era for learning Prishe (glenburg89 channel, March 2011): attack properties and fundamentals, still online.
A community record of solo combo routes for all 31 characters, compiled by Eddiegames on the Discord DISSIDIA and published on pastebin (last updated December 2022). Prishe is credited with a single solo combo — the only one she needs.
List of empty chases leading to an assist gauge reset (Eddiegames)
A character-by-character record of the moves whose hit stun allows an empty chase (a chase started without executing anything in it) followed by a reset of the opponent's assist gauge. The detail for this character is covered in the character-specific tech.
The wiki's matchup page is a stub: no detailed per-character analysis (only the examples cited in the overview could be carried over).
No combo section filled in (the Solo subsection is empty): no detailed combo routes beyond the mentions in the overview and the Skillchain section.
The exact timing of One Inch Punch (Two)'s shortened charge as a finisher is explicitly undocumented in the sources.
The wiki names no advanced technique outside the Skillchains (covered in uniqueMechanics): the advancedTech entries come from a GameFAQs thread of the era (2011), with one disagreement flagged (linking charged Dragon Kick > charged One Inch Punch).
The second build (“Build #2”) is an empty template and the main build's attack slots are left blank.
Assist gain values are missing from the move tables; the wiki's References section is empty; the community tech entries come from the external source pass.
The community's empty chase record is undated (the solo combo record that accompanies it is dated December 2022): its freshness cannot be established.
 Assist
 Rubicante
 Cleaver
 Adamant Shield
 Adamant Helm
 Adamant Vest
 Hyper Ring

 Summon Unused
 White Drop


