Defensive trap layer: Thunder Crest, Flares and the Starfall loop as a win condition
Fastest BRV 21F (Bombard)Fastest HP 35F (Flare, Ground)Dash 81 (Below Average)ATK 110DEF 1121-hit HP YesFlare, Dreary CellHP links YesCombos only
Standing in the meta
Tier A13th of 30 — 2017 tournament tier list from dissidia.wiki (half matchup values, half expert player votes).
Ranked 13th (tier A) on the 2017 tier list, consistent with the overview, which describes him as historically high tier but among the most polarised characters in the game.
Overview
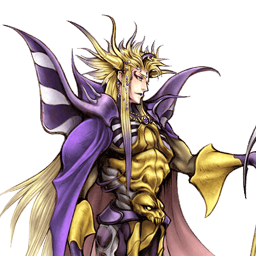
The Emperor is a defensive powerhouse built on laying traps. His strategy: fill the stage with persistent projectiles and non-interactive spells that force a nearby opponent to move — deny space with the unblockable Thunder Crest, pollute the field with Flares, lay Dreary Cells against aerial threats. He excels at stopping close-range characters, because his traps stay active even when he gets hit: hard to catch, he benefits from trades better than anyone.
Left alone, he has a unique win condition: Starfall, a chargeable homing HP attack that rains a barrage of projectiles across the field and lets him call the Jecht assist then charge the next Starfall to chain them together on large stages. Side by Side builds are very strong for that reason, and because his traps lead to HP damage in general; EX builds remain viable when needed, and his assist synergy is adequate for interruptions and combos.
Historically considered high tier, he hugely restricts the options of melee characters and forces them to take big risks to stop the escalation. Without traps, on the other hand, he survives only on fundamental defence (blocks, dodge timing): his aerial offence is exceptionally poor — neither conventional melee pokes nor fast mid-range tools. Long-range fighters (Ultimecia, Kefka) give him great trouble by largely ignoring his traps, and he has to watch out for disjointed attacks such as Squall's Blasting Zone or Firion's Rope Knife.
Played well, The Emperor is a strong, suffocating character with free-form combo conversions and a high skill ceiling. But his disadvantages are all the more pronounced when they apply: he is one of the most polarised characters in competitive Dissidia 012.
Strengths
Space control: the traps saturate the field and remove the opponent's options, with highly profitable chain reactions.
A unique win condition: Starfall is slow to cast but unavoidable once it is out — the opponent has to approach and interact with the traps, or burn resources to avoid the HP damage.
Defensive mixups: a short full recovery on most of his moves and the trading potential of his projectiles let him adjust his attack and dodge timings even against seasoned opponents.
Assist gain: the rotation of low-recovery moves (Starfall, Mine, Dreary Cell) fills the gauge quickly; every trap and Flare can lead to HP damage, which fills it faster still with Side by Side.
High-damage punishes: Thunder Crest and Dynamite open massive combos, boosted by the Mines; assists that strike downwards (Jecht, Yuna) can practically double the damage, and a Thunder Crest combo can guarantee a Bravery Break from 2000 bravery.
Actionable recovery: shorter recovery than most characters on his attacks — he attacks and blocks afterwards faster than most of the roster.
Weaknesses
No aerial melee to break free: without traps around him, the absence of melee moves in the air is a major flaw in his gameplan; an emergency Mine or Dreary Cell can trade with certain moves, but not reliably.
Polarised matchups: the most lopsided spread in the game. Some characters are simply denied under the right conditions, while others can disregard the traps and force an offence he is not equipped for.
Polarised stage strengths: stages affect his gameplan more than most other characters, sometimes obliging him to learn new strategies for atypical or small stages.
Mobility profile (normal mode) — position within the cast
Gold dot: this character · small dots: the rest of the cast · violet line: average. Wiki values, lower = faster; the rank on the right reads directly (1st = fastest).
Moves
Startup of The Emperor's moves
Shorter bar = faster move. Startup in frames (60 fps, dissidia.wiki data), with priority after the value. Moves marked ★ are the fastest in the kit — usually your best punish and pressure tools.
Bravery attacks
Ground
Bombard21FMelee High
His close-range poke: it breaks blocks, counter-pokes lower priorities in neutral and opens assist combos on hit. An exceptional Melee High + 21F startup combination, with a short recovery that makes it very safe on its own; it can also send the reflected blue Flare back to take control of it again. Risky without protective traps (very short range, a slightly awkward hitbox following the staff, active longer to his right); its enormous hit stun lets several assists combo, and it is a good ending after Thunder Crest (positioning, EX Force).
Base damage
5, 5 x 3 (20)
Startup
21F
Type
Physical > Magical
Priority
Melee High
EX Force
84
Effects
Chase
CP (mastered)
30 (15)
Landmine29FRanged Low
His basic move: it fills the assist gauge with no risk, adds a lot of damage to Thunder Crest combos and quickly occupies a little space, with a short, non-committal recovery. The mines stop basic movement but lose to dashes; slight suction on an opponent in hit stun. Laid two at a time, with eight on the field at most (the oldest disappear); careful, the suction can waste ground Wall Rush assists (Jecht, Yuna, Gilgamesh) if the opponent falls into them before Thunder Crest — Flare can retrieve the situation.
Base damage
each (35)
Startup
29F
Type
Magical
Priority
Ranged Low
EX Force
0
Effects
Absorb
CP (mastered)
30 (15)
Light Crest (ground)37FRanged Low
A secondary tool (only one on the ground), to be combined with Flare and Dreary Cell as an anti-air. A fairly high recovery for him and weak hit stun that makes combos awkward, but a hit buys time to lay other traps. It activates when the opponent passes above the sigil: five lightly homing projectiles, which bounce off walls and projectiles and can cross up blocks; the sigil appears slightly above the ground and therefore misses characters standing right on it.
Base damage
each (7)
Startup
37F
Type
Magical
Priority
Ranged Low
EX Force
0
CP (mastered)
30 (15)
Dynamite (ground)43FRanged Low
(Special when sticked)
Almost identical to the aerial version, but it puts The Emperor in the air: useful for placing the projectile in front of him, covering the straight-down angle (impossible in the aerial version) and keeping the Pre-Jump booster going. In exchange, being airborne exposes him more to aerial BRV assist punishes (Kuja, Tidus).
Level 143FRanged Low
(Special when sticked)
Base damage
30 (1 x 5, 25)
Startup
43F
Type
Magical
Priority
Ranged Low (Special when sticked)
EX Force
60+
Effects
Absorb, Wall Rush
Cancels
Dodge
CP (mastered)
30 (15)
Level 280F (charge)
3F (hitbox after shot)Ranged Mid
(Special when sticked)
Base damage
40 (1 x 7, 33)
Startup
80F (charge) 3F (hitbox after shot)
Type
Magical
Priority
Ranged Mid (Special when sticked)
EX Force
60+
Effects
Absorb, Wall Rush
Cancels
Dodge
CP (mastered)
30 (15)
Level 3120F (charge)
3F (hitbox after shot)Ranged High
(Special when sticked)
Base damage
50 (1 x 10, 40)
Startup
120F (charge) 3F (hitbox after shot)
Type
Magical
Priority
Ranged High (Special when sticked)
EX Force
each hit (3)
Effects
Absorb, Wall Rush
Cancels
Dodge
CP (mastered)
30 (15)
Thunder Crest35FUnblockable
THE essential trap: space control, block staggers and varied combos, very effective against close-range characters (Onion Knight, Jecht, Prishe). A true unblockable that ignores every priority — blocks and LV2 Assist Change always lose — and it stays active even if The Emperor is hit, hence trades against HP attacks (Firion's Lord of Arms) that can guarantee Bravery Breaks. It combos into Flare for solo HP damage, with BRV damage multiplied by the Landmines. Slow enough to be punished after a ground dodge; ground only, and it does not interact with projectiles or disjointed attacks (Kefka's Trine, Cloud's Firaga, Squall's Thunder Barret and Blasting Zone). The sigil advances a little along the ground, bounces off walls, stops at ledges and lightly draws in characters and assists while active; it can be laid in any direction with a neutral Circle input.
Base damage
2 x 17, 6 (40)
Startup
35F
Type
Magical
Priority
Unblockable
EX Force
60
Effects
Absorb
Cancels
Dodge
CP (mastered)
30 (15)
Aerial
Mine23FRanged Low
The aerial counterpart to Landmine and a key move: fast, non-committal, it quickly occupies aerial space and fills the assist gauge safely in neutral. A big BRV damage option as a combo filler, notably in Thunder Crest combos and in assist combos in the corner. A different spread from the Landmines, with suction on an opponent in hit stun that can trigger chain reactions into other traps or assist conversions; always laid two at a time, with eight active at most, exploding after a fixed time.
Base damage
each (35)
Startup
23F
Type
Magical
Priority
Ranged Low
EX Force
0
Effects
Absorb
CP (mastered)
30 (15)
Light Crest (midair)37FRanged Low
A more horizontal version but similar to the ground one: a secondary tool, a pre-emptive anti-air or a stopper for slow moves above him (Exdeath's Black Hole), with a long recovery outside a dodge cancel. An enormous vertical activation range and 360° detection, so it is easily defused by simple movement. Four projectiles with the same hit stun and homing as the ground version; not very threatening on their own, but they chain into Dreary Cell and Mines through suction, and hits at a wall help convert into an assist combo. It can also trigger the opponent's Assist Charge, much to The Emperor's benefit.
Base damage
each (7)
Startup
37F
Type
Magical
Priority
Ranged Low
EX Force
0
CP (mastered)
30 (15)
Dynamite (midair)43FRanged Low (Special when sticked on surface)
A pressure and combo tool: charging raises the priority (staggering then guard crushing blocks), and the strong suction plus generous hit stun make it a good assist combo starter, on hit as well as on block. The LV3 naturally combos into the ball stuck against a grounded or walled opponent, and holds them long enough to send them into Flares or Dreary Cells (less consistent at the ceiling). Stuck to a surface, the ball draws the opponent in from mid range and switches to Special priority: unblockable, but cancellable by attacks, dashes and higher Ranged priorities. The explosion, which is the bulk of the damage, always pushes the opponent away from The Emperor — steerable with the camera for a Wall Rush or for chaining traps together. The aim can be adjusted manually up to ~45°; the charge affects priority, damage, maximum range, suction strength and duration once stuck.
Level 143FRanged Low (Special when sticked on surface)
Base damage
30 (1 x 5, 25)
Startup
43F
Type
Magical
Priority
Ranged Low (Special when sticked on surface)
EX Force
60+
Effects
Absorb, Wall Rush
Cancels
Dodge
CP (mastered)
30 (15)
Level 280F (charge)
3F (hitbox after shot)Ranged Mid (Special when sticked on surface)
Base damage
40 (1 x 7, 33)
Startup
80F (charge) 3F (hitbox after shot)
Type
Magical
Priority
Ranged Mid (Special when sticked on surface)
EX Force
60+
Effects
Absorb, Wall Rush
Cancels
Dodge
CP (mastered)
30 (15)
Level 3120F (charge)
3F (hitbox after shot)Ranged High (Special when sticked on surface)
Base damage
50 (1 x 10, 40)
Startup
120F (charge) 3F (hitbox after shot)
Type
Magical
Priority
Ranged High (Special when sticked on surface)
EX Force
each hit (3)
Effects
Absorb, Wall Rush
Cancels
Dodge
CP (mastered)
30 (15)
HP attacks
Ground
Starfall (ground)521FUnblockable
Almost identical to the aerial version, and used more often. Specifics: the slight initial upward movement dodges very low ground attacks (Tifa's Waterkick, Cecil's Valiant Blow), and being airborne preserves the Pre-Jump booster without jumping. The Emperor blocks Ranged Low attacks during the incantation (Sephiroth's Shadow Flare, Lightning's Blizzara, Shantotto's Stun); a brief press makes him actionable very quickly, both to fill the assist gauge and as a sort of command block.
Base damage
each (3)
Startup
521F
Type
Magical
Priority
Unblockable
EX Force
0
Effects
Absorb, Wall Rush, Block Low (Ranged)
CP (mastered)
30 (15)
Flare (ground)35FRanged High
The blue Flare, one of his signature moves: it occupies space, makes close-range fighting miserable, and serves in Thunder Crest combos for solo HP damage. It forces the opponent to move or to reflect it with an HP attack — an opening either way. Weak hit stun and situational combos, but it can remove assists with Auto Assist Lock On and protect against various melee attacks; the explosion extends a little beyond the projectile and the spawn close to The Emperor makes it a deceptively fast interruption. A brief vulnerability after use: beware of dodges through it, of lateral assists, of high-priority command blocks (Jecht Block, Exdeath's Omni Block) and of Bravery Boost on Dodge builds; a blodge can trigger the explosion without damage. Once reflected, it can be sent back at will with Bombard — and every reflection by the opponent buys time to lay traps or charge the gauge.
A single-hit trap that detonates on approach: space control, disruption of aggressive play and solo HP combos, active even if The Emperor is hit. Unblockable priority — only dodging the explosion avoids the damage — and a detonation in HP damage that triggers depletion of the opponent's assist gauge and Side by Side gain: very effective against melee. The suction pulls in anyone lacking momentum or a short recovery, and often catches assists in the blast. Used alongside Thunder Crest on the ground; no protection while laying it (beware Squall's Thunder Barret, Kuja's Snatch Shot, Firion's Reel Axe) and an innate weakness to Bravery Boost on Dodge builds. The sigil, a small one, faithfully represents the activation range; the suction works even with the sigil inactive on an opponent in hit stun, and is stronger than that of the Mines.
Startup
69F (total), 43F (activation)
Type
Magical
Priority
Unblockable
EX Force
36/54/72
Effects
Absorb
CP (mastered)
30 (15)
Aerial
Starfall (midair)521F (8.6 seconds)Unblockable
The most important version of his most important move: forced HP damage, a constant magic shield during the incantation (blocking Ranged Low) and fast assist gains by tapping Square then dodging. To be cast once the traps are laid: most opponents have to approach and interact with them, at disproportionate risk for characters such as Tifa, Zidane and Jecht. On success, the opponent takes the HP damage or spends Assist or EX; the frame advantage is enormous and, with the Jecht assist and Side by Side gain, the following Starfalls are all but guaranteed (at minimum, the ground Wall Rush secures half of the next cast). Once launched: invincibility as the cast ends, completely unblockable, active even if The Emperor is hit, hitting almost everywhere, and Auto Assist Lock On neutralises the opponent's assist before returning to the target. Building an intuition for inescapable situations, feints and movement during the cast is crucial at a high level.
Base damage
each (3)
Startup
521F (8.6 seconds)
Type
Magical
Priority
Unblockable
EX Force
0
Effects
Absorb, Wall Rush, Block Low (Ranged)
CP (mastered)
30 (15)
Flare (midair)35FRanged High
The red Flare: space control, protection and combos, with two major differences — a downward Wall Rush (more HP damage and assist combos, ideal after Thunder Crest) and brief tracking before it freezes in place. A more defensive trap, which stops careless air dashes and creates vicious setups with the suction of Mines and Dreary Cell. Like the blue one, it spawns close to The Emperor (a deceptively fast interruption), stays on the field whatever happens after the startup — so it can trade — and explodes wider than the projectile. Given time, it also allows devious wake-up setups.
It replaces Thunder Crest in the air, which makes this version the more important one: it can be laid anywhere, three at most across both versions, with the same traits as the ground version (a single-hit HP attack, suction, vulnerability to Bravery Boost on Dodge builds). Effective against close-range attacks with long recoveries (Jecht Stream, Cloud's Slashing Blow, Onion Knight's Turbo-Hit); watch out for attacks with strong aerial momentum and medium range — Squall's Beat Fang and Prishe's Raging Fists dodge the explosion, Yuna's Sonic Wings goes through it without setting it off — and for Tidus's aerial BRV assist, a universal whiff punish against it.
Startup
69F (total), 43F (activation)
Type
Magical
Priority
Unblockable
EX Force
36/54/72
Effects
Absorb
CP (mastered)
30 (15)
EX Mode: Power of Hellfire! & EX Burst
The “Power of Hellfire!” EX Mode — effects: Regen, Critical Boost and Blood Magic. Quite powerful despite compact perks: criticals benefit Thunder Crest and the Landmines, and Blood Magic restores enough health for a genuine momentum swing. The Emperor generates a decent amount of EX with his key moves, and the long game around Starfall complements his traps as well as races for EX Cores; not the fastest to reach EX Mode, but the effects are devastating once it is active.
Blood Magic (triggered when an HP attack connects): it absorbs as much HP as the damage dealt. Very strong given his big bravery damage output and how easily he connects HP attacks — a single assist combo can pay out enormously. EX Mode already serves to drain the assist gauge and to guarantee the end of a match, but also for comebacks and for cementing a big health lead.
EX Burst : Absolute Dominion is a relatively simple EX Burst: press the button shown on screen five times for a perfect Burst. Even if movement is set to the directional pad, the pad must be used when it is asked for — no analogue stick input.
Gameplan & advanced tech
The gameplay loop: lay Thunder Crest on the ground (and Dreary Cell in the air, its stand-in), then stack Landmines/Mines, Flares and Light Crests to saturate the space. Once the traps are in place, every approach becomes a risk for the opponent: Thunder Crest ignores blocks and LV2 Assist Change, the Dreary Cells detonate in HP damage, and trades always turn in your favour since the traps stay active when you are hit. The rotation of low-recovery moves (tapped Starfall, Mine, Dreary Cell) fills the assist gauge continuously.
Damage comes from punishes: the basic combo is Thunder Crest > Flare (solo HP damage), with the variant of a dodge cancel upwards > aerial red Flare for the Wall Rush, and Thunder Crest > Landmine for 110 BRV damage. With the Jecht assist (his aerial BRV and its downward strike), the Thunder Crest routes get longer — Landmines as filler, a second Thunder Crest, a final aerial Flare — and a Thunder Crest combo can break 2000 bravery.
The win condition is the Starfall loop, documented as the objective of every match: after a successful Starfall, the Jecht assist buys the time to cast the next one, and Side by Side returns enough gauge on hits to guarantee the assist at every repetition. The opponent only escapes by spending Assist or EX, and a mistimed Assist Change gets hit anyway. The loop is most profitable at long range and on large stages (Order's Sanctuary, Old Chaos Shrine).
On defence, everything rests on the traps and on fundamentals: without them, he has neither an aerial melee poke nor a fast mid-range tool — he has to survive on blocking and dodge timing. Beware projectiles and disjointed attacks that ignore the traps (Trine, Blasting Zone, Rope Knife), Bravery Boost on Dodge builds that neutralise Dreary Cell and Flare, and fast assists that punish Dynamite or the act of laying a trap. Bombard remains your only real close-range poke — valuable, but risky without cover.
Character-specific tech
Starfall loop
Cast the second Starfall while the first is raining down, call the assist (Jecht BRV: hold Square and Circle then L) after the Wall Rush while still incanting, and move away during the cast. With Side by Side, each Starfall returns enough gauge to guarantee the next assist: victory is all but assured once the loop is running. Without Side by Side, the loop breaks far sooner on existing resources.
Blue Flare reflection war
If the opponent reflects the blue Flare, Bombard can send it back as many times as wanted for as long as it persists; The Emperor can also lay another Flare. Every reflection the opponent chooses buys time to lay traps or fill the assist gauge. Careful: casting Flare again removes every Flare he has retrieved.
Starfall as a command block / assist pump
Pressing Starfall briefly makes The Emperor actionable very quickly while blocking Ranged Low attacks during the incantation: both a pseudo command block and a way to fill the assist gauge through repeated presses followed by dodges.
Free placement of Thunder Crest
With Thunder Crest on the neutral Circle input, The Emperor can turn the camera off lock and lay the sigil in any direction he is facing.
Steering Dynamite's explosion
Dynamite's explosion always pushes the opponent away from The Emperor: it can therefore be influenced with the camera to choose the Wall Rush angle or to chain traps into one another. The aim can be set manually up to ~45° before firing, even without charging.
Suction setups (Mine / Dreary Cell)
The suction effect of Mines and Dreary Cells on an opponent in hit stun creates chain reactions into other traps and assist conversions; Bombard can combo into them with precise positioning for disorienting setups. Beware, though, of ground Wall Rush assists being wasted if the opponent falls into the mines before Thunder Crest.
Riposte / Counterattack on Thunder Crest
A recommendation from LuckySeven's “Absolute Dominion” guide: equip Riposte for precisely timed blocks while Thunder Crest stops the opponent's attack — the critical damage of the counter is judged too profitable to do without. Counterattack plays the same role in ground matchups, for instance when Thunder Crest interrupts Squall's Blasting Zone.
Still according to LuckySeven, Precision Block (to be equipped on every set) allows the blue Flare to be re-reflected in the air, as with other persistent projectiles (Watera): The Emperor thereby recovers the pressure of his Flare against characters able to lift it off the ground after sending it back.
The freest combos in the game, hard to reduce to precise links, but with very high damage when they land: Mine (late hit) > dash > Mine; Thunder Crest > two Landmines > ground Flare; Thunder Crest > fully charged Dynamite > two Mines > the Dynamite explosion; Starfall > Thunder Crest > Landmine > aerial Flare.
The Emperor has various combos, though most of the practical combos revolve around Thunder Crest.
The Emperor primarily uses Jecht's air BRV assist for assist combos. The downward slam makes it ideal for additional Thunder Crest combos. Whenever Thunder Crest connects, Jecht air BRV can follow up. Use that if nothing else works. Optimizing damage for Thunder Crest routes takes some work, but it is worth the effort.
Universal techniques (blodge, dash feint, lock off, dodge punishment): see the Techniques & glitches page.
Matchups
The dedicated matchups page is a stub: only the elements of the overview and of the move notes are authoritative. The Emperor's matchup spread is described as the most polarised in the game: some characters are simply denied under the right conditions, while others neutralise his gameplan.
He is strong against close-range characters: Thunder Crest is cited as very effective against Onion Knight, Jecht and Prishe, Dreary Cell punishes close-range attacks with long recoveries (Jecht Stream, Cloud's Slashing Blow, Onion Knight's Turbo-Hit), and Starfall creates disproportionate risk for Tifa, Zidane and Jecht. Side by Side builds accumulate a lot of momentum against those characters, held back as they are by the traps.
Conversely, long-range fighters (Ultimecia, Kefka) give him big problems by largely ignoring his traps, and disjointed attacks or projectiles that do not interact with Thunder Crest get around him: Squall's Blasting Zone and Thunder Barret, Firion's Rope Knife and Reel Axe, Kefka's Trine, Cloud's Firaga, Kuja's Snatch Shot. Bravery Boost on Dodge builds structurally weaken Flare and Dreary Cell, and Squall's Beat Fang, Prishe's Raging Fists or Yuna's Sonic Wings go straight through the aerial Dreary Cell.
The Emperor accepts varied builds: EX as an inevitable factor, or an investment in bravery damage. But Side by Side is particularly effective for two documented reasons: he commonly lands his HP attacks without an assist (the gauge gain triggers every time), and he recovers gauge on successive Starfalls — hence the famous Starfall loop with the Jecht assist. Side by Side builds are therefore very powerful for him, his synergy with the other styles leaving room for the player's own expression.
The documented build (450 CP, Equip Glitch assumed) is a Side by Side + high base bravery build, in the same vein as those of Zidane, Firion and Golbez: 9683 HP, 1683 BRV, 177 ATK, 184 DEF, maximum booster x3.5; Jecht or Yuna assist, Rubicante summon; Piggy's Stick (Peltast's Gear), Chainsaw (Equip Machines), Thornlet, Maximillian (Cavalier's Gear), with Side by Side, Blue Gem and Hero's Seal among the accessories. The idea: big damage spikes on every HP attack and on the assist combo that follows, enormous momentum against close-range characters held back by the traps (Jecht, Zidane), and matches ended very quickly if a Starfall lands.
LuckySeven's “Absolute Dominion” guide (dissidiaforums, 2013, through the Wayback Machine) documents four builds. His main set pairs Side by Side with the Succubus set: the set returns HP to a character who reliably lands his HP attacks and, with the Thunder Crest glitch, a single Thunder Crest > Blue Flare combo recharges two full assist bars. His EX build is built around Mateus' Malice, the exclusive level 100 weapon (EX Intake Range +3 m and a slight anti-EX effect), which pays three quarters of a bar per confirmed Thunder Crest > Blue Flare. His EX Cores build is reserved for camping matchups where neither Thunder Crest nor Blue Flare connects — Exdeath above all, Cloud of Darkness too. Finally his Regen build — a double Growth Egg with EXP to HP, the Succubus set, Blood Weapon and Angel's Bell — recovers about 2000 HP on a Thunder Crest > Blue Flare > Yuna assist > Thunder Crest > Blue Flare combo in EX Mode: he intends it for his bad matchups, where The Emperor will inevitably take HP damage.
The GameFAQs threads of the day confirm that plurality. On “best setup for emperor” (2011), Mad_Cartoonist plays a balanced EX/assist set — EX serving only for Blood Magic's healing — with the Jecht assist pinning the opponent to the ground for Thunder Crest; YonKitoTaoshibe describes a defensive set built on Lore there: Heavy Armor, an extra +1000 HP and Thornlet with its penalty neutralised by Back-Breaking Straw, for about 11000 HP and 1225 BRV. In “How does one build The Emperor properly?” (2013), the same YonKitoTaoshibe details the resource reasoning: Earring is indispensable, EX generation is too low to make White Gem worthwhile (an EX build goes through the cores or through boosted Battle Hammer, Dismay Shock and Judgment of Lufenia), and assist depletion is justified by Mateus's natural chip damage and by his mediocre dash speed, which limits the race for cores; Shihali adds there that any EX build starts with the exclusive weapon and its EX Intake +3 m, enough in ground combat to fill the gauge without chasing cores.
Moves equipped in the build: Landmine, Bombard and Thunder Crest on the ground, Mine, Dynamite and Light Crest in the air; Flare and Dreary Cell as ground HP attacks, Flare, Starfall and Dreary Cell in the air. Extras: Perseverance, Disable Counterattack, EXP to HP, Machinery. The dedicated builds page (“The Emperor (012) Builds”) is not included in the data; the alternative builds described above come from verified external community sources (the archived dissidiaforums guide, GameFAQs threads).
Build and check a The Emperor loadout slot by slot: build creator (CP gauge, ability exclusions and tournament rules applied).
Assist synergies
The Emperor as an assist
As an assist, The Emperor is niche but powerful in certain circumstances (Mid tier on the assist tier list): varied ground combos through Thunder Crest, and high-damage Mines after a long hold and an early call on a ground Wall Rush. Unlike most assists, he is hard to Assist Lock: his priorities ignore LV2 Assist Change staggers, and he disappears quickly after his attacks, so he is hard to hit manually.
His main limitation: his attacks depend on the player's position — Thunder Crest only comes out on the ground, Mine only in the air. He remains one of the few assists viable for double assist combos, because he disappears before Thunder Crest (and sometimes Mine) temporarily disables the gauge. Squall capitalises particularly well on his strengths, and Prishe can combo into the Mines with delayed Raging Fists for elaborate aerial combos. Beyond that, The Emperor assist sees little competitive play.
Recommended assists
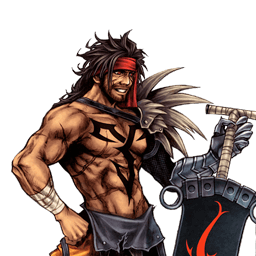
Jecht — One of his strongest assists: fast bravery attacks, plenty of setup time for the traps and the lethal win condition of the Starfall loop — he holds the opponent long enough to chain Starfalls. Very strong with assist depletion, Side by Side and large stages; his ground BRV also converts red Flare or Dynamite Wall Rushes. The downside: easily locked by LV2 Assist Change, and hard to protect if the opponent escapes with LV1.
Yuna — One of the strongest and most reliable assists: her aerial BRV is immune to LV2 Assist Change staggers, converts consistently from Thunder Crest and Bombard, and brings the opponent back to the ground-level Thunder Crest. She stabilises the trap setups and is among the safest assists against Assist Lock attempts. Limits: short lateral and Wall Rush range, trouble piercing projectiles, a brief attack duration.
Gilgamesh — A “melee Yuna”: he trades immunity to LV2 Assist Change for more range, more BRV damage (with Excalibur) and melee HP attacks. He combos reliably from Thunder Crest and Bombard, his ground Wall Rush allows another Thunder Crest to be laid, and his fast aerial HP attack can send blue Flares back.
Tidus — No height requirement for HP combos and safer than most against Assist Locks. Hop Step (aerial BRV) whiff punishes on reaction, a delayed Assist Chase combos into Flare or Mine, and Slice n Dice can pin the opponent down even if the traps connect too early.
Cecil — For the lateral range: his aerial BRV reaches punishes and conversions that even Gilgamesh misses, with a ground Wall Rush. He punishes moves that would otherwise be too safe and could completely neutralise The Emperor — not the first choice, but worth considering.
Kuja — The top assist in the game, reliable whenever he is needed: an aerial BRV excellent at whiff punishing that largely ignores reflected blue Flares, an Assist Chase and heavy hit stun on both BRVs, and strong tracking that synergises with the suction of the Dreary Cells. Few traits specific to The Emperor, but far from a bad choice.
Sephiroth — A niche choice depending on the matchup: ground and aerial BRVs with good range for whiff punishing, able to pierce certain moves, with an Assist Chase (the follow-up has to be delayed manually). His aerial HP attack fits scramble situations amid the traps well.
Community tech
How to play the Emperor ? (GameFAQs thread) 2011
A period thread on the turtle style: the block punish Riposte > Thunder Crest > double Landmine (up to 110 base power in total), Dynamite carrying Defense Crush, and a preference for the ground since the aerial Flare does not track.
A community record of solo combo routes for all 31 characters, compiled by Eddiegames on the Discord DISSIDIA and published on pastebin (last updated December 2022). The Emperor is described there with the freest combos in the game, dealing very high damage.
The dedicated matchups page is undocumented (a stub): the matchups summary rests solely on the overview and the move notes.
No unique mechanic is documented (the section is absent from the sources).
No external reference (the References section is empty): no attributable communityTech; the Starfall loop combo mentions a video with no usable URL.
The dedicated combos article (“The Emperor (Combos)”) is not included: only three solo combos and three Jecht combos are detailed.
The dedicated builds page (“The Emperor (012) Builds”) is not included in the wiki: a single Side by Side + high bravery build is detailed there; partly filled in with external community builds (dissidiaforums, GameFAQs) during the enrichment pass. The exact accessory lists of LuckySeven's four builds were in images that are lost today: only their written principles survive.
The assist gain values of the moves are not filled in in the data, and the “Opponent Assist (Comrade's Vow)” counts for the combos are marked “???”.
 Assist
 Rubicante
 Piggy's Stick
 Chainsaw
 Thornlet
 Maximillian
 Bravery Orb

 Empty EX Gauge
 Summon Unused
 Pre-EX Mode
 Blue Gem

