Melee all-rounder with fast pokes, reliable and accessible, king of depletion
Fastest BRV 13F (Upper Blues, Solid Barrel)Fastest HP 41F (Blasting Zone)Dash 77 (Average / Good)ATK 109DEF 1111-hit HP YesMultipleHP links YesCombos only
Standing in the meta
Tier A+5th of 30 — 2017 tournament tier list from dissidia.wiki (half matchup values, half expert player votes).
Squall is ranked 5th, in tier A+, on the 2017 competitive tier list. The overview confirms a long high tier history, carried by a low execution floor and reliable tools.
Overview
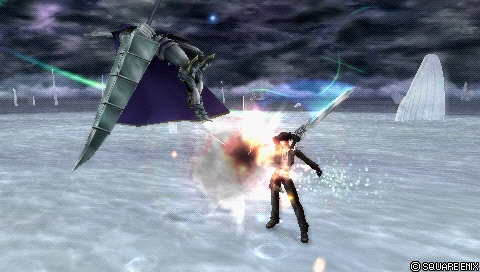
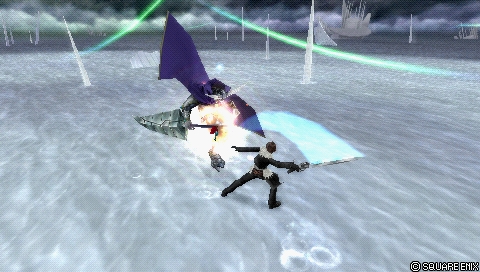
Squall is a short-range all-rounder who leans on his mobility and on a varied set of pokes. On the ground, Solid Barrel and Upper Blues are fast pokes with low recovery, perfect for filling the assist gauge and starting his offence; Thunder Barret sucks the opponent in for a combo, and Blasting Zone's powerful tracking with its very tall hitbox punishes careless dodges. In the air, Heel Crush and Aerial Circle cut through low-priority magic, Fire Barret supports his offence, and Beat Fang is the textbook example of a strong poke: 15 frames, notable tracking, short recovery and heavy combo potential.
Squall exploits the system mechanics very well, hence the common hybrid builds. His attacks with delayable hits pair with many assists, his grounded combos finished with Revolver Drive generate huge amounts of EX, and he is one of the best in the game at EX gauge depletion with the Yuna assist. Even Side by Side builds suit him, his HP attacks (Blasting Zone, Aerial Circle) working well in neutral; his counters to LV2 Assist Change with Aerial Circle are reliable.
He does have weaknesses: poor EX generation without EX Cores or grounded combos, trouble against fast fallers who air dodge (Prishe) and against very fast characters (Onion Knight, Tidus), most of his moves missing against them. The problem: Squall depends on his dodges to stay healthy, yet they leave him exposed with no real answer. His aerial assist combo routes are limited, he does not always capitalise on Bravery Breaks, and he punishes blocks and whiffs poorly beyond Beat Fang's reach.
Competitively, Squall has a long high tier history: a low execution floor and reliable tools for many situations make him a good recommendation for new players and veterans alike, even if some characters can run circles around him.
Strengths
A flexible, straightforward moveset that puts beginners and experienced players alike at ease.
Easy, effective defensive punishment through Beat Fang, Blasting Zone and Aerial Circle.
Heavy combo potential, especially near the ground: varied solo combos, assist conversions and reliable routes into his grounded HP attacks.
Strong, diverse assist synergy thanks to his multi-part attacks and Wall Rush.
An EX Mode that exponentially increases the gunblade's reach and damage.
EX gauge depletion among the strongest in the game, particularly with the Yuna assist.
Versatile builds that support varied playstyles and matchups.
Weaknesses
Average post-dodge defence: his floaty air dodges force him to clash with Beat Fang or to give up reward with the Adamant Chains build.
Mediocre EX generation in the air, hence a reliance on EX Cores.
Prone to whiffing against fast movement: more risk against fast fallers (Tidus, Prishe) and fast runners (Onion Knight, Tifa).
Below-average aerial combo extensions: with no Wall Rush, his bravery damage suffers in very aerial fights.
Stats & speeds
Name
Squall Leonhart (スコール・レオンハート)
Original game
Final Fantasy VIII
Base ATK (LV100)
109 (Low)
Base DEF (LV100)
111 (Average)
Run Speed
5 (Above Average)
Dash Speed
77 (Average / Good)
Fall Speed
81 (Average)
Fall Speed Ratio After Dodge
38 (Average)
Fastest BRV
13F (Upper Blues, Solid Barrel)
Fastest HP
41F (Blasting Zone)
1-Hit HP
Yes (Multiple)
HP Links
Yes (Combos only)
Command Block
No
Weapon
Daggers Guns Katanas Swords
Armor
Bangles Chestplates Clothing Hats Helms Large Shields Light Armor Shields
Exclusive weapons
Revolver, Twin Lance, Punishment, Lionheart
Alignment
Cosmos
Voice Actor (JP)
Hideo Ishikawa
Voice Actor (ENG)
Doug Erholtz
Mobility profile (normal mode) — position within the cast
Gold dot: this character · small dots: the rest of the cast · violet line: average. Wiki values, lower = faster; the rank on the right reads directly (1st = fastest).
Moves
Startup of Squall Leonhart's moves
Shorter bar = faster move. Startup in frames (60 fps, dissidia.wiki data), with priority after the value. Moves marked ★ are the fastest in the kit — usually your best punish and pressure tools.
Bravery attacks
Ground
Upper Blues13FMelee Low
A fast slash with forward movement: a poke, a whiff punisher, a combo and gauge-filling tool through dodge cancels, more reliable than his other grounded bravery attacks against moving targets. A reliable grounded Wall Rush on hit; delaying the second hit lets him chain into Beat Fang after a dodge cancel. Good in most matchups and builds.
Base damage
[3, 3, 5],9 (20) [31]
Startup
13F
Type
Physical
Priority
Melee Low
EX Force
30
Effects
Wall Rush
Cancels
Dodge
CP (mastered)
30 (15)
Solid Barrel13FMelee Low
A very fast bravery attack (13F) with short reach but 90 EX and a fast dodge cancel, whose cancel on the third hit opens the famous “golden combo” through landing lag. The generous input window makes assist conversions reliable; mostly used as a block punish and after Thunder Barret rather than as a poke.
Base damage
[5, 6, 8, 10, 5, 5, 16] (55) (110)
Startup
13F
Type
Physical
Priority
Melee Low
EX Force
90
Effects
Chase
CP (mastered)
30 (15)
Blizzard Barret33FRanged Low
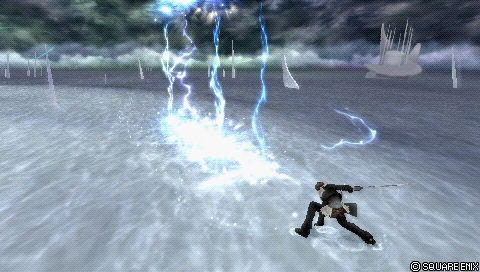
A slow, low-priority single-hit projectile with surprisingly good tracking and usable hit stun. Rarely a priority competitively: an unfavourable risk/reward next to his other grounded bravery attacks.
His signature combo starter: four vertical bolts that serve as a disjointed poke at longer range, an anti-air and a dodge punisher, cancellable on hit into solo combos including his HP attacks. Ranged Low, a fairly slow startup and Squall completely immobile: used predictably, it quickly turns against him.
Base damage
each (3)
Startup
33F (furthest bolt appears first)
Type
Magical
Priority
Ranged Low
EX Force
each 9
Cancels
Dodge, Attack (Hit)
CP (mastered)
30 (15)
Fusillade33FRanged Low
Ranged Mid (thunder)
A mix of projectiles with good EX generation (60-90), the first two of which are relatively safe at range and confirmable into an assist combo. It functionally overlaps Solid Barrel with no truly distinctive trait: rarely a priority competitively.
Base damage
6, 6, 6, 6 each 6 (24+)
Startup
33F
Type
Magical
Priority
Ranged Low Ranged Mid (thunder)
EX Force
60~90
Effects
Chase
Cancels
Dodge
CP (mastered)
30 (15)
Aerial
Heel Crush41FMelee Mid
An advancing Melee Mid attack that blocks Ranged Low attacks during its startup (Lightning's Thunder, Yuna's Heavenly Strike) and staggers opponents who block Beat Fang. A long startup that leaves time to prepare a counter-attack; used as a mixup with Beat Fang and Fire Barret, not essential in every matchup.
Base damage
20 (20)
Startup
41F
Type
Physical
Priority
Melee Mid
EX Force
0
Effects
Block Low (Ranged), Wall Rush
Cancels
Dodge
CP (mastered)
30 (15)
Beat Fang15FMelee Low
THE Squall bravery attack: 15F, homing on startup, an early dodge cancel, a fearsome whiff punisher, with a hitbox able to hit behind a block at point-blank range. The Wall Rush near the ground forces defensive decision-making close to the okizeme of classic fighting games. No hitbox beneath him (it misses against fast fallers and fast runners such as Tidus and Tifa), recovery cancellable only into an air dodge, and the end of the combo is punishable by LV2 Assist Change.
Base damage
[3, 5], 7, [2 x 6, 13] (40) [73]
Startup
15F
Type
Physical
Priority
Melee Low
EX Force
30
Effects
Wall Rush
Cancels
Dodge
CP (mastered)
30 (15)
Mystic Flurry33FRanged Low
A barrage of low-priority projectiles with erratic behaviour: unreliable positioning, Squall completely immobile throughout, and a dodge cancel that saves no time. Very low reward for the risk; the last hit of a projectile can nonetheless Wall Rush into an assist or a pick-up with Beat Fang/Aerial Circle for bold players.
Base damage
each 1 x 8, 7 (15)
Startup
33F
Type
Magical
Priority
Ranged Low
EX Force
each 30
Effects
Wall Rush
Cancels
Dodge
CP (mastered)
30 (15)
Fire Barret33FRanged Low
Three homing fireballs, an aerial staple used with Beat Fang to build gauge efficiently. Each projectile's hit stun opens follow-ups on a good read, and the recovery cancels into an attack (often Beat Fang) even at point-blank range. Squall stays briefly immobile after firing: vulnerable to a well-timed assist whiff punish.
Base damage
each (5)
Startup
33F
Type
Magical
Priority
Ranged Low
EX Force
0
Cancels
Dodge
CP (mastered)
30 (15)
HP attacks
Ground
Fated Circle43FRanged High
A Ranged High circular explosion: immune to blocks and to LV2 Assist Change, Wall Rush, it gets around EX Revenge checkmates (no bravery damage) and even blocks Ranged Low attacks. Against a grounded opponent, the knockback often causes a grounded Wall Rush usable with an assist. Often eclipsed by his other grounded HP attacks, but excellent as a third HP attack.
Startup
43F
Priority
Ranged High
EX Force
0
Effects
Block Low (Ranged) Wall Rush, Absorb
Cancels
Dodge
CP (mastered)
30 (15)
Revolver Drive43FMelee High
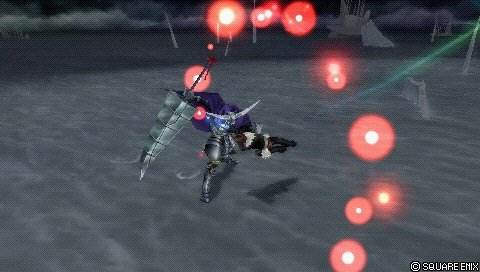
A freely steerable multi-hit HP attack (hold the button to extend it): a block punisher, which opens or closes assist combos, generating up to 150 EX (of which he only recovers about 40-50% without bonuses). Its speed increases drastically during the slow-motion of assist calls and Assist Changes, which allows surprises and conversions with no wall. Pierced by unblockable priorities (The Emperor's Thunder Crest, Exdeath's Black Hole) and limited to the ground, with a maximum duration to manage.
Base damage
1 x N (max 50)
Startup
43F
Type
Physical
Priority
Melee High
EX Force
each 3
Effects
Wall Rush
Cancels
Dodge
CP (mastered)
30 (15)
Blasting Zone41FMelee High
One of his fastest and strongest HP attacks: enormous reach and height, powerful tracking right up to impact, assists that chain with no wall and 90 EX. Very short recovery, all but unpunishable without Omni Ground Dash, air dodge invincibility or an assist. Fantastic for capitalising on a predictable dodge, disturbing opponents inside their traps and reflecting persistent high-priority projectiles (Vaan's Windburst).
Base damage
6, 1 x 4 (10)
Startup
41F
Type
Magical
Priority
Melee High
EX Force
90
CP (mastered)
30 (15)
Rough Divide59FMelee High
A long-distance aerial charge in a single hit. The grounded version is generally outclassed by his other HP attacks; the aerial version serves as a long-range whiff punisher (after a LV1 Assist Change in particular) and creates far more distance than Aerial Circle if the opponent escapes with an Assist Change, but it stays secondary and vulnerable to high-priority blocks (Exdeath's Omni Block, Jecht Block).
Startup
59F
Priority
Melee High
EX Force
0
Effects
Wall Rush
Cancels
Dodge
CP (mastered)
30 (15)
Aerial
Aerial Circle43FRanged High
His reference aerial HP attack, the vertical variant of Fated Circle with the same assets (single-hit Ranged High, absorb, Wall Rush, blocks Ranged Low). The absorb sucks in immobile opponents to land HP damage after a blodge or a LV2 Assist Change. Its great strength: gauge depletion with the Yuna assist, which makes it hit several times with no wall, the depletion applying to every hit. Watch out for an opponent's assist called just before impact, which means a Bravery Break.
Startup
43F
Priority
Ranged High
EX Force
0
Effects
Block Low (Ranged) Wall Rush, Absorb
Cancels
Dodge
CP (mastered)
30 (15)
Rough Divide59FMelee High
A long-distance aerial charge in a single hit. The grounded version is generally outclassed by his other HP attacks; the aerial version serves as a long-range whiff punisher (after a LV1 Assist Change in particular) and creates far more distance than Aerial Circle if the opponent escapes with an Assist Change, but it stays secondary and vulnerable to high-priority blocks (Exdeath's Omni Block, Jecht Block).
Startup
59F
Priority
Melee High
EX Force
0
Effects
Wall Rush
CP (mastered)
30 (15)
EX Mode: Lionheart equipped! & EX Burst
The “Lionheart equipped!” EX Mode: Regen, Critical Boost, Lionheart (RANGE) and Lionheart (HIT). The gunblade's reach increases (useful in particular for connecting the Golden Combo), and Upper Blues, Solid Barrel and Beat Fang gain doubled hits on most of their strikes — Solid Barrel benefits most (base damage x2) — which can also become critical.
His combo bravery attacks can then shatter the opponent's bravery: starting an assist combo with a bravery attack in EX Mode is a good comeback and Bravery Break lever, the EX Burst itself being rather weak.
EX Burst : Renzokuken asks for eight presses of R as the cursor passes through the “Trigger” zone, with generous, regular timing: once the first presses are dialled in, the rest follows at the same rhythm. Squall performs the whole sequence regardless; a missed trigger simply reduces the damage of that particular hit.
Gameplan & advanced tech
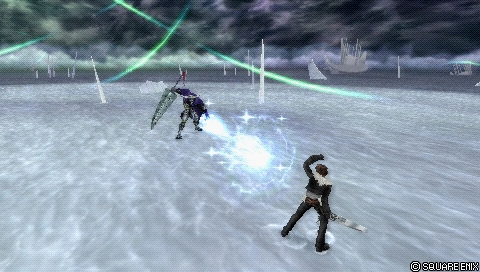
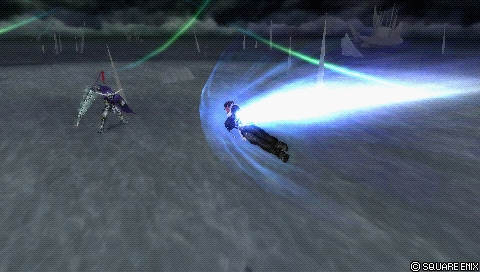
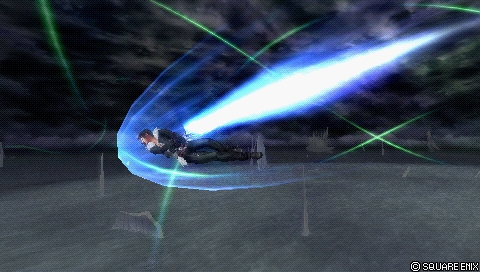
On the ground, the loop is simple: poke with Upper Blues and Solid Barrel (dodge cancel to fill the gauge), control space with Thunder Barret and convert every hit. Thunder Barret > Solid Barrel is the basic combo (67 damage, 126 EX), Thunder Barret > Blasting Zone the most forgiving HP conversion, and the “Golden Combo” (Solid Barrel > Upper Blues > Beat Fang through landing lag) maximises damage and assist gauge against human players.
In the air, everything revolves around Beat Fang: a poke, a whiff punish, a block cross-up and a Wall Rush near the ground for an oppressive wake-up game. Fire Barret complements it to build gauge and create conversions, Heel Crush covers Ranged Low attacks and blocks, and Aerial Circle serves as a versatile HP attack, including as a reliable counter after a LV2 Assist Change.
Resource management is a central concern: grounded combos finished with Revolver Drive or Blasting Zone generate a lot of EX (his weak point in the air), and EX Cores remain an indispensable source. With Yuna, an Aerial Circle synchronised on the third hit of her aerial BRV assist inflicts massive depletion on every hit; in EX Revenge, the Heel Crush x3 > Aerial Circle string works just about everywhere.
Defensively, Squall depends on his dodges, which leave him exposed: against fast fallers and fast characters, he has to accept clashing with Beat Fang, play the distance, or take the Adamant Chains build to secure his air dodges, at the cost of part of his damage and depletion.
Character-specific tech
Golden Combo
Solid Barrel (3 hits) > dodge cancel > landing lag > Upper Blues (2 hits) > dodge cancel > landing lag > Beat Fang. Three bravery attacks with the “fresh move” bonus on the assist gauge (117 with Comrade's Vow); Solid Barrel's hits have to be delayed as much as possible. Technically dodgeable with perfect timing, so mostly effective against humans; amplified by EX Mode.
Revolver Drive assist slowdown
During the slow-motion of an assist call or an Assist Change, Revolver Drive's travel speed increases drastically: enough to swoop in on the opponent, create distance, or get past them so that an assist converts with no wall.
Depletion with Yuna + Aerial Circle
By pressing Aerial Circle as the second/third hit of Yuna's aerial BRV assist connects, the knockback is cancelled and the HP attack strikes several times: no extra HP damage (Wall Rush aside) but the gauge depletion applies to every hit — the strongest in the game, with no wall required.
Countering LV2 Assist Change (Aerial Circle)
After staggering the opponent with a LV2 Assist Change, Aerial Circle lands HP damage reliably thanks to its absorb and its Ranged High priority.
Beat Fang cross-up
Beat Fang has a hitbox able to hit behind an opponent blocking at very close range, ignoring the block; its second rise also dodges certain interruptions (The Emperor's Dreary Cell, assists called on reaction).
Documented solo combo routes
The biggest user of landing lag in the game; numerous combos but almost all of them tight: Thunder Barret > anything; the “Golden Combo” Solid Barrel (4 hits) > dodge cancel > landing lag > Upper Blues (2 hits, with a delay before the second) > DC > landing lag > Beat Fang; Beat Fang > DC > landing lag > Beat Fang (extremely precise, easier in EX); Mystic Flurry > DC > Beat Fang or Aerial Circle (inconsistent); Fire Barret > Beat Fang; Blizzard Barret > Thunder Barret (a loop comes close to working but is unproven).
Squall can do various combos alone. Almost anything works after Thunder Barret, while landing lag opens up even more elaborate and rewarding combo routes.
Main article: Squall Combos (Kuja Assist)
Universal techniques (blodge, dash feint, lock off, dodge punishment): see the Techniques & glitches page.
Matchups
The wiki's matchup page is a stub; only the elements from the overview are usable. Squall takes more risk against fast fallers who dodge in the air (Prishe, Tidus) and against very fast runners (Onion Knight, Tifa): most of his moves, Beat Fang first among them, miss against those profiles, while his defence depends on dodges that leave him exposed. The Adamant Chains build eases the problem at the cost of his damage and his depletion. The rest of the time, his reliable tools and easy defensive punishment let him compete comfortably.
Booster x3.5: it exploits the set's air dodge distance bonus to cover Squall's real weakness, his vulnerable air dodges. The weapon adjusts to the matchup, and against Onion Knight, Jecht or Cloud, the accessories shift towards Side by Side for the assist gauge; Hero's Essence, Winged Boots (anti-trap) and Glutton (against heavy EX generators such as Lightning and Shantotto) are all cited.
Piggy's Stick, Together as One, booster x3.8: recommended on small stages and in even or favourable matchups — two whiffs are enough for an assist bar, and every LV2 Assist Change stagger converted into Aerial Circle keeps the resource lead going.
The Lufenian set, the Yuna assist, booster x6.9: this depletion-oriented build runs the Aerial Circle + Yuna aerial BRV assist loop — every extra HP hit drains the opponent's gauge with no additional damage.
Many substitutes are listed per build (Sniper Eye, Dragonfly Orb, Dismay Shock, Muscle Belt, Together as One, Platinum Hourglass, Hyper Ring, Bravery Orb, the Large Gap in HP / Summon Unused / Grounded / Aerial / Assist boosters, the Blue Gem / Growth Egg / Great Gospel / Winged Boots / Hero's Essence / Badge of Trust specials). The LUK statistic is not filled in for any build.
Build and check a Squall Leonhart loadout slot by slot: build creator (CP gauge, ability exclusions and tournament rules applied).
Assist synergies
Squall Leonhart as an assist
The sources do not document Squall's moves as an assist; the wiki's assist section for him is devoted to the assists he uses. On Muggshotter's assist tier list, Squall is rated Low.
Recommended assists
Kuja — The strongest: heavy damage and reliable conversions off Wall Rushes and bravery attacks, safe against LV2 Assist Change thanks to the Ranged High priority of the Flare Star HP attack, which works well after Beat Fang and Upper Blues. Vulnerable, on the other hand, if the opponent escapes with an Assist Change.
Yuna — The strongest gauge depletion, anywhere on the stage, through the Aerial Circle + third hit of her aerial BRV assist synchronisation; her Ranged Low priority protects her from the LV2 Assist Change stagger.
Jecht — A good all-rounder: a fast startup that converts almost any hit (even a traded one), and follow-ups into Thunder Barret wherever there is ground, for an abundance of Revolver Drive endings that are very generous in EX.
Tidus — A fast aerial BRV assist for whiff punishes, relatively safe, with a slower but more damaging grounded version through Thunder Barret; usable without any truly distinctive advantage.
The Emperor — A reinforced ground game and very damaging mines through Beat Fang's Wall Rushes; Thunder Crest combos easily, does not stagger on LV2 Assist Change and locks down the opponent's assist thanks to its unblockable priority.
Aerith — A conversion into Seal Evil is possible even with no ground thanks to Squall's ability to hold the opponent, and gauge is partly regained during Seal Evil with Ground Dash + Assist Gauge Up Dash; but Cure without hit stun compromises grounded conversions and her depletion is the weakest — one of the weaker meta choices for him.
Community tech
Dissidia 012 Duodecim Final Fantasy Squall Combo Montage 2011
A period combo montage (Andyz5448): a collection of Squall's solo and assist routes, demonstrated against level 105 opponents at maximum settings.
Dissidia 012 Duodecim Squall Revolver Damage Assist Build 2011
A period build video (Tiger Bub): a damage + assist configuration built around Revolver Drive, with the ability breakdown (Assist Critical Boost, and so on).
A community record of solo combo routes for all 31 characters, compiled by Eddiegames on the Discord DISSIDIA and published on pastebin (last updated December 2022). Squall is described there as the biggest user of landing lag in the game, with his “Golden Combo” as his signature.
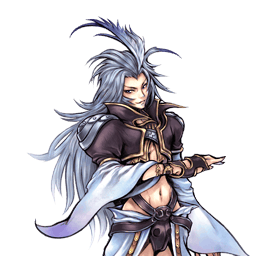 Assist
 Rubicante
 Lionheart
 Lufenian Shield
 Lufenian Helm
 Lufenian Armor
 Hyper Ring

 Large Gap in HP
 Summon Unused
 Pre-EX Mode
 Tenacious Attacker


 Aerial
 EX Core Present
 BRV = 0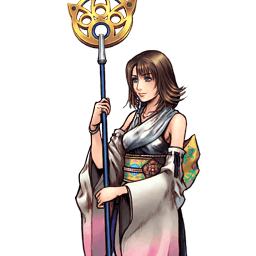
 Assist