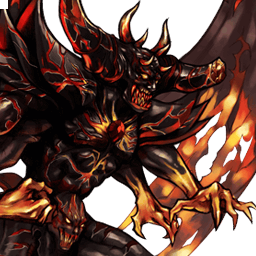
An overpowering colossus up close and at mid range, so polarising that he is usually banned
Fastest BRV 11F (Snarl)Fastest HP 37F (Deus Iratus,Via Dolorosa)Dash 77 (Average / Good)ATK 113DEF 1141-hit HP YesFlagro Maximus, Via DolorosaHP links No
Standing in the meta
Unranked in the 2017 tournament tier list.
Overview
A playable character introduced in Dissidia 012, Feral Chaos overwhelms the opponent up close and at mid range with some of the strongest attacks in the game — raw power in its purest form: speed, range, high priority and Wall Rush all abound. From the lightning-fast Destroy to the oppressive gap closer Brute Force and the infamous Via Dolorosa HP attack, his offence is hard for many characters to contest: bravery attacks with fast startups, short recoveries or mid priority that guard crush easily, HP attacks with long range or enormous vertical coverage, variable timings and durations — enough to pierce defences and discourage assist interruptions at most common distances.
He makes remarkable use of EX and Assist: most of his attacks inflict a Wall Rush from a distance or initiate a Chase, and assist conversions are fairly easy. The highest base stats in the game, Wall Rush potential, above-average EX generation, damage multipliers on his attacks: the return is excellent in damage as in gauge gain and depletion. With a full gauge, EX Mode boosts his attack, defence and movement speed, and the oppressive Regnum Dei EX Burst guarantees the opponent does not get away unscathed, whether they land an attack or not.
That power has a price: Capacity Points. All his abilities cost exponentially more, attacks as well as basic actions (ground block and dodge included), and he suffers exclusive innate restrictions — a passive bravery reduction, EX and Assist gauge locks — each of which costs 50 CP to lift, more than the Precision Evasion often added on top. With no natural increase to his maximum CP, fitting in the bare essentials is very expensive and his builds specialise by playstyle or by matchup. The locks do have one major advantage, though: equipped alongside the Side by Side accessory, they get around that accessory's EX absorption restriction — EX then comes only from EX Cores, but it is a unique asset given the power of his HP attacks.
His weaknesses are not limited to customisation: his giant frame makes homing attacks harder to dodge and blocks his own view in front of and above him, especially against small frames such as Onion Knight and Zidane. He fights well from almost every angle, except air-to-air when the opponent is well above him: his ground anti-airs are effective, his aerial attacks less so, and he has to move to counter halo camping. Finally, assist whiff punishing is the flagship counter-strategy against his most used HP attacks and some of his bravery attacks. Competitively, he was banned for most of the game's life for his abnormally polarising matchups, and his legality — sometimes granted under restrictions, such as no EX and no Assist in Japanese Ranked — remains a contentious subject in the metagame.
Strengths
The highest base stats in the game (top ATK and DEF, +1 each in EX Mode).
Exceptional bravery attacks: fast startups, short recoveries, space control, mid priority, and assist combo and Wall Rush potential.
Destructive HP attacks with variable timing, good tracking and long range.
High EX generation: many attacks pay 60 to 96 EX Force.
A crushing EX Burst: high priority on all his attacks, immunity to EX Break, bypassing of EX Burst defence and the ability to interrupt any attack.
A fast fall speed that makes his air dodges harder to punish.
A unique EX Core + Side by Side synergy: his exclusive gauge locks get around the accessory's EX absorption restriction, so EX and Assist can be used without the usual restrictions.
Weaknesses
A prohibitive CP cost: fewer abilities can be equipped than on other characters, which notably restricts his available actions and his builds.
A large frame: easier to hit, with an obstructed field of view in front of and above him.
Deficient air-to-air when the opponent is well above: his aerial attacks anti-air poorly, and he has to move to counter halo camping.
Assist whiff punishing is a proven counter-strategy against his most used HP attacks and some bravery attacks.
“No assist” is a common restriction in the rulesets and community tournaments where he is allowed, to offset his other strengths.
Stats & speeds
Name
Feral Chaos (デスペラードカオス)
Original game
Dissidia 012 [duodecim] Final Fantasy
Base ATK (LV100)
113 (Normal, Highest)114 (+1 in EX Mode)
Base DEF (LV100)
114 (Normal, Highest)115 (+1 in EX Mode)
Run Speed
2.5 (Normal, Fast)0 (EX Mode, Fastest)
Dash Speed
77 (Average / Good)
Fall Speed
67 (Fast)
Fall Speed Ratio After Dodge
16 (Very Fast)
Fastest BRV
11F (Snarl)
Fastest HP
37F (Deus Iratus,Via Dolorosa)
1-Hit HP
Yes (Flagro Maximus, Via Dolorosa)
HP Links
No
Command Block
Yes (Deus Iratus)
Weapon
Greatswords, Axes, Grappling Weapons
Armor
Gauntlets, Large Shields, Helms, Heavy Armor
Exclusive weapons
Talons of Despair, Aegis of Strife, Calamitous Rage, Deafening Fissure, Endless Oblivion, Eternal Despair, Phantasmal Abyss, Cycle's End
Alignment
Chaos
Mobility profile (normal mode) — position within the cast
Gold dot: this character · small dots: the rest of the cast · violet line: average. Wiki values, lower = faster; the rank on the right reads directly (1st = fastest).
Moves
Startup of Feral Chaos's moves
Shorter bar = faster move. Startup in frames (60 fps, dissidia.wiki data), with priority after the value. Moves marked ★ are the fastest in the kit — usually your best punish and pressure tools.
Bravery attacks
Ground
Snarl11FMelee Low
A double bite at 11F, his fastest bravery attack: a lightning close-range poke, also used to cover Raid by cancelling its recovery. Chase, Wall Rush and 90 EX on hit.
Base damage
15, 15 (30)
Startup
11F
Type
Physical
Priority
Melee Low
EX Force
90
Effects
Chase, Wall Rush
CP (mastered)
60 (30)
Vicious21FMelee Mid
A Melee Mid charge usable from further away than Snarl to approach quickly or anti-air. Its slower startup makes it more reactable, with a risk of an unfavourable post-dodge situation even without a whiff punish; near a wall, it does not always keep the opponent in contact as a mixup.
A projectile that makes magma erupt under the opponent's feet. Little used, but reliable against characters who hold Feral Chaos at bay such as The Emperor and Golbez: it catches them in the middle of a stationary attack (Flare, Nightglow) and interrupts it completely.
Base damage
5, 15 (20)
Startup
23F (close), 43F (projectile)
Type
Physical (close), Magical (projectile)
Priority
Melee Mid (close), Ranged Low (projectile)
EX Force
60
Effects
Chase, Wall Rush
CP (mastered)
60 (30)
Erupt19FMelee Mid
A rising Melee Mid leap with a fairly wide hitbox: without holding the button, Feral Chaos cuts the ascent short and goes straight to the final spin. It serves to bait aerial attacks for a stagger punished with Destroy, with one of the shortest recoveries in his kit, cancellable into a block, a dodge or any attack (HP attacks included) to threaten anyone approaching during the recovery.
Base damage
2 x 10, 25 (max 45)
Startup
19F
Type
Physical
Priority
Melee Mid
EX Force
0
Effects
Chase, Wall Rush
CP (mastered)
60 (30)
Aerial
Destroy13FMelee Low
Very fast claws and a tail swipe (13F), with good horizontal then vertical coverage: a staple poke, a whiff punisher and a post-dodge defensive option that clashes with low-priority dodge punish attempts, all with 90 EX. It initiates a Chase if the Wall Rush is not immediate, and can be converted into a combo with the Aerith assist.
Base damage
4 x 4, 14 (30)
Startup
13F
Type
Physical
Priority
Melee Low
EX Force
90
Effects
Chase, Wall Rush
CP (mastered)
60 (30)
Brute Force21FMelee Mid
One of his strongest bravery attacks, infamous for its speed, its deceptively long range and its ability to stagger and punish normal blocks on contact: the follow-up sends the opponent downwards with heavy knockback, often into a Wall Rush even at altitude, convertible into an empty chase + assist combo — ground pressure close to Squall's Beat Fang or to okizeme in other fighting games. It chases opponents above him poorly and does not protect him immediately on activation.
Base damage
6, 7, 7, 10 (30)
Startup
21F
Type
Physical
Priority
Melee Mid
EX Force
90
Effects
Chase, Wall Rush
CP (mastered)
60 (30)
Splinter29FRanged Mid
Four long-range Ranged Mid shockwaves that chase the opponent, very hard to contest head-on or diagonally, with Chase/Wall Rush to convert the last hit into an assist combo. A rather slow startup but an ending that is hard to assist whiff punish; beware seasoned Precision Evasion users, whose invincibility (with Evasion Boost) dodges all four projectiles and lines up a punish.
Base damage
5 x 4 (20)
Startup
29F
Type
Magical
Priority
Ranged Mid
EX Force
87
Effects
Chase, Wall Rush
CP (mastered)
60 (30)
Raid19FMelee Mid
The mirror of Erupt: a Melee Mid dive whose early release cuts the run short for one of his fastest recoveries, to be made safe with a dodge cancel — without connecting, it generates no assist gauge. Held, it dives in a straight line to the ground with two hitboxes on landing: the body (Melee Mid, stopped by high-priority blocks of the Jecht Block or Wrath type, but whose stagger on a normal block allows almost anything to follow after the landing lag, up to Quo Vadis) and the shockwave, which can only be blocked at high priority. Near a wall, it sets up the Via Dolorosa okizeme; like Erupt, it cancels into a block, a dodge or any attack.
Base damage
2 x 10, 15 (max 35)
Startup
19F
Type
Physical
Priority
Melee Mid
EX Force
3
Effects
Chase, Wall Rush
CP (mastered)
60 (30)
HP attacks
Ground
Deus Iratus37FMelee High, Block High (1-37F)
A stationary multi-hit close-range HP attack (Wall Rush), among his biggest bravery damage when the button is mashed, whose Block High priority covers the whole startup in every direction: it even guards after a dodge and can serve as a substitute for the ground block to save CP in a build. A decent mixup after a Wall Rush, but the long animation and recovery make whiffing dangerous — as with the Warrior of Light's Shield of Light, it all comes down to anticipating when the opponent will strike.
Base damage
2 x 4 (8) + 1 x N
Startup
37F
Type
Physical
Priority
Melee High, Block High (1-37F)
EX Force
96
Effects
Wall Rush, Block
CP (mastered)
100 (50)
Quo Vadis45FMelee High
A teleporting uppercut followed by an ascent of ultra-fast hits, with a ground Wall Rush at the end of the combo (but not at certain heights). If the opponent leaves with an early assist change, the attack carries on and its tracking pierces the invincibility before a dodge is even possible; staggering it through LV2 Assist Change requires timing a precise teleport hit rather than the explosion that follows — a real risk for the opponent — and the initial teleport even dodges attacks. Good range, an average startup and a low recovery for an HP attack (a good dodge punish and counterpoke), but it does not stand out enough from his other HP attacks to be prioritised.
Base damage
3 x 4 (12)
Startup
45F
Type
Physical
Priority
Melee High
EX Force
96
Effects
Wall Rush
CP (mastered)
100 (50)
Via Dolorosa37FMelee High (tail), Ranged High (projectile)
The illustrious HP attack that makes his reputation: two long-range columns of fire, with good tracking and a gigantic vertical hitbox that extends well beyond the visuals, the second delayable up to 218F (~3.6 s) by holding the button — dodging the first too early often means taking the second in dodge recovery, near-guaranteed HP damage against characters with no reliable post-dodge protection, with Precision Evasion also being hard to trigger on the first wave. Excellent for creating space and slowing the match down, but a blind spot exists behind him (beware air-to-ground attacks and projectiles that spawn on the target, such as Sephiroth's Shadow Flare), fast runners such as Onion Knight and Tidus avoid it by running laterally at mid range, and high-priority command blocks (Jecht Block, Exdeath's Omni Block) cancel it or even riposte. Since the second column cannot be cancelled, bad timing exposes him to an assist punish; on low-ceiling stages (M.S. Prima Vista, Pandaemonium - Top Floor), it Wall Rushes on hit, for assist combos and renewed Via Dolorosa pressure.
Base damage
10
Startup
37F
Type
Physical
Priority
Melee High (tail), Ranged High (projectile)
EX Force
each 60
Effects
Wall Rush
CP (mastered)
100 (50)
Aerial
Ventus Ire41FRanged High
His fastest aerial HP attack (41F), with automatic tracking that adjusts its angle and punishes careless dodges. Its Ranged High priority spares it the LV2 Assist Change stagger and its reach pierces persistent projectiles (Garland's Cyclone, The Emperor's Flare), but it remains outclassed by his other aerial HP attacks — Flagro Maximus covers similar situations with more depletion, more damage and more safety.
Base damage
2 x 6 (12)
Startup
41F
Type
Physical
Priority
Ranged High
EX Force
96
Effects
Wall Rush
CP (mastered)
100 (50)
Lux Magnus51FRanged High
A long-range descending vertical beam, extendable by holding the button for more bravery damage, and “steerable” in the sense that Feral Chaos can move during the attack to chase his target. Used above the opponent (air-to-ground or air-to-air) to punish whiffs, occupy space or slow the pace, very hard to punish from a distance and excellent for starting or extending assist combos, notably with Aerith. The opponent's assists can still hit him on startup, or even during the active frames depending on their spawn position: a staple of most of his builds, provided he does not become predictable.
Base damage
1 x N (max 38)
Startup
51F
Type
Magical
Priority
Ranged High
EX Force
60
Effects
Wall Rush
CP (mastered)
100 (50)
Flagro Maximus49FMelee High
A massive explosion with short range by default, whose charge (50F, coming out 11 frames after release or automatically at 76F) exponentially increases its range, its Wall Rush potential and its number of HP hits — big gauge gains with Side by Side and heavy depletion with the right equipment. Despite looking like a projectile, all its hitboxes are Melee High: it pierces Ranged High attacks and clashes with other high-priority attacks and blocks. The full charge window is tiny and cannot be made reliable, and charging telegraphs the opponent's counter — vary the timings, even though the charge catches assist whiff punishes with Auto Assist Lock On well; one of his strongest HP attacks, good as a post-block counter and for getting around EX Revenge checkmates thanks to its lack of bravery damage.
Startup
49F
Priority
Melee High
EX Force
each ~30
Effects
Wall Rush
CP (mastered)
100 (50)
EX Mode: The power of discord reveals the true Chaos! & EX Burst
The “The power of discord reveals the true Chaos!” EX Mode: Regen, Critical Boost, Divine Might and Brutal. Divine Might greatly increases all his movement speeds (run x1.22, a jump height close to Kain's); Brutal adds +1 ATK and +1 DEF — on top of what are already the highest base stats in the game.
EX Burst : Regnum Dei sucks the opponent into a vortex of discord: R + Square triggers the HP attack, whose damage increases with bravery. All of Feral Chaos's attacks become high priority during this Burst, which is also immune to EX Break, able to bypass EX Burst defence and to interrupt any attack.
Gameplan & advanced tech
The plan is to impose, up close as at mid range, attacks that many characters simply cannot contest. Destroy is the staple poke, whiff punisher and post-dodge defensive option; Brute Force the oppressive gap closer that staggers and punishes even normal blocks and sets up okizeme-style ground pressure; Snarl the lightning poke that also covers Raid's recovery; Erupt and Raid provide vertical mobility, bait staggers on aerial attacks and cancel into a block, a dodge or an attack to trap anyone coming to punish their recovery.
The HP attacks structure his space control: Via Dolorosa and its delayable second column create space, slow the match down and set up okizeme behind a Raid near a wall; Lux Magnus locks the opponent down from above; a variable-timing Flagro Maximus punishes blocks and gets around EX Revenge checkmates; Deus Iratus can even replace the ground block. Vary the timings systematically: assist whiff punishing is the documented counter-strategy against his most used HP attacks, and an assist called after Via Dolorosa's second column can swing the momentum through a Bravery Break.
Feral Chaos has no solo combo: conversion goes through the Chase and Wall Rush present on almost all his bravery attacks, chained into assist combos (an empty chase after Brute Force, Splinter's last hit, Destroy's Chase into Aerith, Lux Magnus starters and extensions). With the highest base stats in the game, EX generation of 60 to 96 on many attacks and his damage multipliers, the return is excellent in damage as in gauges; with a full gauge, EX Mode boosts his attack, defence and mobility, and Regnum Dei guarantees damage whether the opponent attacks or not.
Managing the innate restrictions is part of the plan: a passive bravery reduction, EX and Assist gauge locks, 50 CP per restriction lifted and exponential ability costs that force specialised builds. Actively use the whole repertoire to offset the bravery reduction (if it is not disabled) without letting the opponent exploit that tendency to attack; keeping the locks, on the other hand, opens the unique Side by Side + EX Cores synergy. Finally, watch the high angles: good ground anti-airs, but air-to-air below the opponent he has to reposition against halo camping, with his large frame also getting in the way of visibility.
Character-specific tech
Via Dolorosa okizeme
Use Raid near a wall: the Wall Rush positioning lines up perfectly to follow with Via Dolorosa on wake-up. Dodging both columns typically requires Precision Evasion + Evasion Boost — staple abilities of competitive play, but ones that have to be equipped.
Erupt / Raid early release
Not holding the button cuts the run short and goes straight to the final spin, for some of the fastest recoveries in his kit (to be made safe with a dodge cancel in Raid's case, since it generates no assist gauge without connecting). Both cancel into a block, a dodge or any attack, HP attacks included: enough to trap opponents who come to punish the recovery.
A landed Raid against a block
On the landing of a held Raid, the body's hitbox staggers normal blocks with enough advantage to follow with almost anything after the landing lag, including the Quo Vadis HP attack; the shockwave, for its part, ignores every block except high-priority ones (Jecht Block, Wrath).
Side by Side + gauge locks
His innate EX and Assist locks, kept and equipped alongside the Side by Side accessory, get around that accessory's EX absorption restriction: the EX gauge then only fills from EX Cores, but Feral Chaos uses EX and Assist without the usual restrictions — a one-of-a-kind asset given the power of his HP attacks.
Documented solo combo routes
The record is categorical: Feral Chaos has no solo combo — his interesting conversions go through assist combos, mainly through the empty chase reset.
The record credits him with an abundance of empty chases into an assist gauge reset: Raid and Snarl work for certain, most of his other moves probably do too, with the details remaining untested.
Universal techniques (blodge, dash feint, lock off, dodge punishment): see the Techniques & glitches page.
Matchups
The dedicated matchups page is a stub: everything comes from the overview. Feral Chaos was banned for most of the game's life for his abnormally polarising matchups: he is at a severe disadvantage against nobody, but he obliterates any character unable to manoeuvre safely around the Via Dolorosa waves or to fight above him. The profiles that subdue him, at the right level of play, combine good dodge coverage, descending attacks, special blocks, homing or persistent projectiles.
In concrete terms: fast runners such as Onion Knight and Tidus avoid both Via Dolorosa columns by running laterally at mid range; high-priority command blocks (Jecht Block, Exdeath's Omni Block) cancel them and can riposte depending on positioning; small frames (Onion Knight, Zidane) benefit from his own frame blocking his view. Conversely, Spew catches zoners who hold him at bay, such as The Emperor and Golbez, in the middle of a Flare or Nightglow incantation. His legality remains contentious: various specific restrictions have been discussed and some rulesets allow him under conditions, such as Japanese Ranked with no EX and no Assist, and despite counterplay being better demonstrated in recent years, he remains a controversial character in the metagame.
The whole philosophy follows from the CP crisis: every ability costs exponentially more than on other characters (60 CP for bravery attacks, 100 for HP attacks, down to basic actions such as the ground block and dodge), lifting each of the three innate restrictions costs 50 CP, and with no natural increase to his maximum CP, fitting in the bare essentials forces builds specialised by playstyle or by matchup — the Equip Glitch is assumed throughout for the total costs.
EX
The Seal of Lufenia special effect, 495 CP, an x4.0 booster, no assist and no summon: it aims for a full EX gauge to offset the natural bravery depletion through EX Mode and to snatch the advantage — or the win — with the EX Burst. The ground block does not feature: his ground attacks serve as his defence. Documented loadout: Erupt, Snarl and Raid + Brute Force and Destroy as bravery attacks; Via Dolorosa, Flagro Maximus and Lux Magnus as HP attacks; with Disable EX Gauge Lock, Precision Jump and Bravery Regen among the abilities.
The Judgment of Lufenia special effect, 510 CP, an x1.4 booster, Sephiroth or Aerith assist: it equips the Side By Side accessory and lifts the assist lock (Disable Assist Lock), with Master Guardsman for +1000 HP — the direct application of the gauge locks + Side by Side synergy described above.
A third build is started in the data but is entirely empty (stats, equipment and loadout not filled in); the move loadout of the Side By Side build is not filled in either.
Build and check a Feral Chaos loadout slot by slot: build creator (CP gauge, ability exclusions and tournament rules applied).
Assist synergies
Feral Chaos as an assist
Feral Chaos is not available as an assist (a note from the assist tier list in meta-lite.json).
Recommended assists
Aerith — Cited twice in his move notes: Destroy's Chase converts into a combo with the Aerith assist, and Lux Magnus starts or extends assist combos very well with her. She is also one of the two options in the Side By Side build.
Sephiroth — The first assist listed for the Side By Side build (Judgment of Lufenia).
Community tech
Feral Chaos and You: A Guide (SPOILERS) — GameFAQs thread 2011
A period community guide by __Shinryu__ devoted to playable Feral Chaos: unlocking him through Confessions of the Creator, a presentation of the moveset and of the Regnum Dei EX Burst, and the exclusive Rise of Discord equipment set.
A community record of solo combo routes for all 31 characters, compiled by Eddiegames on the Discord DISSIDIA and published on pastebin (last updated December 2022). Feral Chaos is described there as having no solo combo, but an abundance of empty chases into a reset.
List of empty chases leading to an assist gauge reset (Eddiegames)
A character-by-character record of the moves whose hit stun allows an empty chase (a chase initiated without executing anything in it) followed by a reset of the opponent's assist gauge. The detail for this character is covered in the specific techniques.
Not ranked on the 2017 tier list: absent from the tournament list (a note from meta-lite.json), with the overview specifying that he was banned for most of the game's life for his polarising matchups — hence tierNote being null.
The dedicated matchups page is a stub with no content: the matchups summary rests solely on the overview.
No solo combo: the page states so explicitly and the combos section is marked undocumented — no usable combo table.
The assist section is marked undocumented: a single generic sentence about tournament-viable assists.
No dedicated “unique mechanics” section on the wiki: his innate restrictions (bravery reduction, EX/Assist locks, exponential CP costs) are described only in the overview — uniqueMechanics is null.
The third build is entirely empty and the move loadout of the Side By Side build is not filled in in the extracted data.
No external reference (the wiki's References section is empty; the community tech entries come from the external sources pass).
The cancels and assistGain fields are empty for every move; Flagro Maximus's damage is not filled in (“-”).
The community's empty chase record is undated (the solo combo record that accompanies it is dated December 2022): how current it is cannot be established.

 Cleaver
 Lufenian Dirk
 Lufenian Headband
 Lufenian Vest
 Muscle Belt

 Large Gap in HP
 Empty Assist Gauge
 Pre-EX Revenge
 Hero's Spirit


 BRV = 0