Explosive ground defender: Glare Hand, Rising Wave and the Cosmic Ray HP links
Fastest BRV 17F (Glare Hand close)Fastest HP 15F (Nightglow close)Dash 77 (Average / Good)ATK 110DEF 1121-hit HP YesNightglow & Genesis Rock from afarHP links Yes
Standing in the meta
Tier B16th of 30 — 2017 tournament tier list from dissidia.wiki (half matchup values, half expert player votes).
Ranked 16th (tier B) on the 2017 tier list, consistent with the overview, which places him historically around mid tier competitively.
Overview
Golbez is a ground-oriented defensive fighter who performs strikes and projectiles simultaneously. He controls the space between close range and mid range: Rising Wave and Glare Hand form its foundation, with every hit leading into the Cosmic Ray HP link. Against a head-on approach, the Nightglow HP attack protects him from immediate danger and leads into ceiling assist combos on many stages. Fast ground attacks, an abundance of HP links, strong synergy with Side by Side builds: Golbez commands respect in ground fights.
Historically ranked around mid tier competitively, his ground game and the big momentum of every hit earned him the reputation of an explosive character who rewards patience. Patience is essential, because his aerial combat is risky: his aerial HP links come out fast, but all his aerial attacks suffer from long recovery frames, which expose him to whiff punishes. His mid-range tools are comparatively weaker in speed, tracking and priority.
Unable to force ground combat with his ground attacks alone, Golbez relies on Ground Dash turtling for assist gauge, on good reads and on punishing the opponent's mistakes. He does not fill his assist gauge quickly on whiff (an average to long dodge cancel recovery) and his EX generation is severely outclassed by Side by Side builds. He remains capable of facing a good part of the roster all the same, even if the fruits are slow to ripen.
Strengths
Ground space control: Rising Wave and Glare Hand cover his lateral range faster than most characters manage, reactively as well as pre-emptively.
Nightglow: a fast HP attack (15F up close) that protects him with high-priority hitboxes and leads into ceiling assist combos on many stages — a strong self-defence tool.
Side by Side: as an HP linker, every HP link or Nightglow that connects returns assist gauge; combined with high base bravery builds, the reward on hit is greatly amplified.
Invincible aerial jumps: Golbez is briefly invincible on every jump in the air, for safer movement against melee characters.
Weaknesses
Committal aerial combat: all his aerial attacks are telegraphed or carry long recoveries, whatever their startup speed.
No way to force ground combat: he suffers halo camping without being able to stop it safely or consistently. Black Fang forces a Bravery Break, but only in EX Mode, which compromises his Side by Side synergy.
Slow gauge gain: outside Side by Side, the assist and EX gauges fill slowly — average to long recoveries that slow down how often he can repeat moves, and weak EX generation on most attacks, outclassed by the reward of the HP links.
Stats & speeds
Name
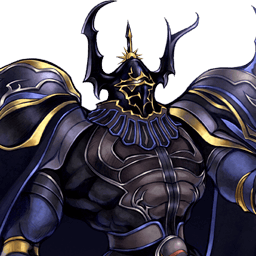
Golbez (ゴルベーザ)
Original game
Final Fantasy IV
Base ATK (LV100)
110 (Average)
Base DEF (LV100)
112 (High)
Run Speed
7 (Average)
Dash Speed
77 (Average / Good)
Fall Speed
??
Fall Speed Ratio After Dodge
40 (Average)
Fastest BRV
17F (Glare Hand close)
Fastest HP
15F (Nightglow close)
1-Hit HP
Yes (Nightglow & Genesis Rock from afar)
HP Links
Yes
Command Block
No
Weapon
Axes, Greatswords, Rods, Spears
Armor
Gauntlets, Heavy Armor, Helms, Light Armor, Shields
Exclusive weapons
Lilith Rod, Asura's Rod, Zeromus Shard
Alignment
Chaos
Voice Actor (JP)
Takeshi Kaga
Voice Actor (ENG)
Peter Beckman
Mobility profile (normal mode) — position within the cast
Gold dot: this character · small dots: the rest of the cast · violet line: average. Wiki values, lower = faster; the rank on the right reads directly (1st = fastest).
Moves
Startup of Golbez's moves
Shorter bar = faster move. Startup in frames (60 fps, dissidia.wiki data), with priority after the value. Moves marked ★ are the fastest in the kit — usually your best punish and pressure tools.
Bravery attacks
Ground
Rising Wave23FMelee Low, Ranged Low (2nd part)
Used for its unblockable priority projectile (the far version): it stops dashes, goes through every block and combos into the Cosmic Ray HP link even from a distance (hold Square then release to close the gap). Mixed with Glare Hand, it effectively controls the pace of ground fights, and it can even catch an opponent picking up an EX Core. The projectile's spawn depends on distance: on a nearby opponent hit by the strike, it appears further away (allowing him to push the opponent into it with the follow-ups); on a distant opponent, it appears on their position, with a maximum range of about a quarter of Order's Sanctuary.
Close23FMelee Low, Ranged Low (2nd part)
Base damage
~35 (6, 3 x 3, 6 x 3, 2 x N)
Startup
23F
Type
Magical
Priority
Melee Low, Ranged Low (2nd part)
EX Force
~30
Effects
Wall Rush (2nd part)
Cancels
Dodge
CP (mastered)
30 (15)
Far43FUnblockable, Ranged Low (2nd part)
Base damage
~26 (2 x N, 6 x 3)
Startup
43F
Type
Magical
Priority
Unblockable, Ranged Low (2nd part)
EX Force
each 3
Effects
Wall Rush (2nd part)
Cancels
Dodge
CP (mastered)
30 (15)
Glare Hand17FMelee Low, Ranged Low (2nd part)
His main poke against grounded and low-altitude opponents: speed (17F up close), reach and the HP link into Cosmic Ray form the heart of ground Golbez. The magic sweep punishes dodges, whiffs and dash startups above him, and its suction gives him an HP link in practice wherever it connects (up close, hold Square then release to close the gap into Cosmic Ray). It should not be spammed for all that: its recovery is longer than that of his other pokes, and an opponent orbiting at its maximum range can dash through the projectile and immediately force him into a defensive mixup.
A secondary ranged tool, to be mixed with Glare Hand at a slow pace against grounded opponents: often a “fresh move”, it fills the assist gauge a little faster. Golbez stays in a grounded state during the attack. The magic shots have enough hit stun to start assist combos, or even solo ones depending on position, but their tracking is inconsistent and completely linear once fired (less of a problem against large frames such as Garland and Feral Chaos, or against an early dodge). No protection beyond the close-range strike: beware fast ground assists such as Jecht and Sephiroth during the long animation.
Base damage
4, each 2
Startup
23F (slap), 83F (laser)
Type
Magical
Priority
Melee Low (slap), Ranged Low (laser)
EX Force
30
CP (mastered)
30 (15)
Aerial
Gravity Force61F (sphere), 113F (after warp)Ranged Mid, Ranged High (sphere)
A highly committal attack, used mostly in combos: his most damaging bravery attack, particularly up close — useful for criticals on a block stagger and for ceiling Kuja assist combos, with a downward Wall Rush that opens assist combos. Golbez can move with the stick during the startup, and the warp after the shot throws the opponent into the sphere (solo combos at a very precise angle). With the air dodge distance boost from Adamant Chains, the initial movement even serves as a makeshift double dodge — to be kept for emergencies: a telegraphed move, long startup, animation lock, mediocre vertical range on the sphere, an uncancellable warp and brief vulnerability on the way out. Once the opponent learns to take distance and dodge the warp, the threat collapses.
Close61F (sphere), 113F (after warp)Ranged Mid, Ranged High (sphere)
Base damage
53 (15, 3 x 9, 11)
Startup
61F (sphere), 113F (after warp)
Type
Magical
Priority
Ranged Mid, Ranged High (sphere)
EX Force
30
Effects
Absorb, Wall Rush
Cancels
Dodge
CP (mastered)
30 (15)
Far61F (sphere), 113F (after warp)Melee Mid, Ranged High (sphere)
One of his main aerial bravery attacks: an anti-ground tool, and guaranteed damage after an LV2 Assist Change stagger. Jumps and Gravity System combine to disorient grounded opponents and strike off-rhythm; against an opponent who blocks the close-range strike, attacking early at short distance can catch the block recovery with the laser. Fast to come out and with good downward tracking, but a very long whiff recovery: a miss exposes him to counters.
Another important bravery attack: its upward tracking contests aerial characters and punishes nearby air dodges from ground level after a jump. The same anti-block logic as Gravity System (strike early to catch the recovery with the laser), and the same flaws: fast to come out but a long recovery. It is a risk worth taking all the same: opponents with an emptied or locked assist gauge retreat into the air, and when Golbez has a full gauge and nothing to do, Float System helps create offence.
It works like the ground version, but the long recovery exposes him to whiff punishes from all sides, aerial assists included. A long animation, mediocre tracking and an inconsistent reward: little used, but playable occasionally if the opponent does not punish it.
Base damage
4 (slap), each 2 (laser)
Startup
23F (slap), 83F (laser)
Type
Magical
Priority
Melee Low (slap), Ranged Low (laser)
EX Force
30
Cancels
Dodge
CP (mastered)
30 (15)
HP attacks
Ground
Nightglow15F (close), 91F (far)Melee High (close), Ranged High (far)
The move that completes his ground game — the reason Golbez is avoided on the ground. Mainly defensive: against approach pokes, it protects him after a ground dodge and punishes landing lag. Golbez surrounds himself with high-priority melee hitboxes from frame 15, too fast for a nearby opponent to react to, with suction that works even above him; a dark circle appears at the same time on the opponent's position (on the ground, frame 91) and detonates in HP damage, with a maximum range slightly greater than Rising Wave's projectile. The HP hit has enormous vertical knockback, with a guaranteed ceiling Wall Rush in Order's Sanctuary — with Side by Side, that generally leads into an assist combo. Vulnerabilities: a brief dead time between the end of the dark magic and the circle's detonation, an exposed window after a ground dodge before it activates, fast ground assists and mid-range attacks; on a miss, a dodge cancel during the explosion makes him safe. Take care against an opponent in Near Death (a full Assist Charge is possible).
Base damage
11 (1 x 3, 4, 4)
Startup
15F (close), 91F (far)
Type
Magical
Priority
Melee High (close), Ranged High (far)
EX Force
30
Effects
Wall Rush
CP (mastered)
30 (15)
Sector Ray (ground)61FRanged High
Base damage
~12 (1x ~12)
Startup
61F
Type
Magical
Priority
Ranged High
EX Force
~36
Effects
Wall Rush
CP (mastered)
30 (15)
Aerial
Genesis Rock51FRanged High
Slow area denial, usable on small stages for pressure, with a Wall Rush into assist combos on hit. Generally more trouble than it is worth: slow, an animation lock, insufficient stage presence on large stages, vulnerability after the shot. Golbez rises towards the opponent before launching the rocks, but they fly at his height, which limits the range. One quirk: it can pull the opponent towards Golbez from high altitude (position yourself in front of them and well above) — a niche punish, otherwise a gimmick.
Base damage
~13 (1 x ~13)
Startup
51F
Type
Magical
Priority
Ranged High
EX Force
~36
Effects
Wall Rush
CP (mastered)
30 (15)
Sector Ray (midair)61FRanged High
A mid-range attack recommended for catching floaty air dodges (Cloud, Yuna) and for protecting his assist when needed. The lasers have sharp vertical tracking on activation then stay static; modest hitboxes that can drop the opponent if a single laser connects at an awkward angle. The spheres do not go through walls but the lasers do, with a hitbox that does not then necessarily match the visual. On hit, the Wall Rush starts assist combos — a reward for good reads in cramped areas.
Base damage
~12 (1 x ~12)
Startup
61F
Type
Magical
Priority
Ranged High
EX Force
~36
Effects
Wall Rush
CP (mastered)
30 (15)
HP links (Bravery → HP)
HP attacks that fire as an extension of a specific Bravery attack — the “HP link”. They are equipped like any other HP attack.
All the Cosmic Rays share the same data, even though they trigger from different bravery attacks.
Cosmic Ray A??Melee High
Golbez's HP link and the keystone of his game: it converts most of his bravery attacks into HP damage and starts assist combos with its Wall Rush. Holding Square makes him warp towards the opponent and increases the range — indispensable for converting Rising Wave's projectile or Glare Hand's strike. Vulnerable to aerial attacks after the move ends if the opponent escapes with an Assist Change, and its Melee priority exposes it to LV2 Assist Change staggers (a problem against Squall's and Sephiroth's HP ripostes). With gauge available, calling the assist just before the HP hit holds the opponent in place (the assist slowdown takes care of it, unlike a classic knockback cancel) — this works if Golbez does not warp first.
Base damage
6 (1 x 6)
Startup
??
Type
Magical
Priority
Melee High
EX Force
36
Effects
Wall Rush
CP (mastered)
30 (15)
Cosmic Ray B??Melee High
Identical to Cosmic Ray A, as a branch of Glare Hand.
Base damage
6 (1 x 6)
Startup
??
Type
Magical
Priority
Melee High
EX Force
36
Effects
Wall Rush
CP (mastered)
30 (15)
Cosmic Ray C??Melee High
Identical to Cosmic Ray A, as a branch of Gravity System.
Base damage
6 (1 x 6)
Startup
??
Type
Magical
Priority
Melee High
EX Force
36
Effects
Wall Rush
CP (mastered)
30 (15)
Cosmic Ray D??Melee High
Identical to Cosmic Ray A, as a branch of Float System.
Base damage
6 (1 x 6)
Startup
??
Type
Magical
Priority
Melee High
EX Force
36
Effects
Wall Rush
CP (mastered)
30 (15)
EX Mode: Summon Shadow Dragon! & EX Burst
The “Summon Shadow Dragon!” EX Mode — effects: Regen, Critical Boost and Black Fang.
Black Fang (activated with R + Square): it breaks the opponent in one go (a Bravery Break), with Golbez recovering only the stage bravery. The attack takes 400F (about 6.5 seconds). It is his only way of forcing a Bravery Break against halo camping — but being restricted to EX Mode, using it compromises the Side by Side synergy of his builds.
EX Burst : Twin Moon: a powerful spell cast with a Shadow Dragon. The commands displayed on both sides of the screen have to be entered simultaneously.
Special moves
Special commands that never appear in the equip lists: they cost no CP and trigger from a dedicated input.
Black FangSpecial moveR + Square held — EX Mode (Summon Shadow Dragon) only
A special attack absent from the equipment lists, available only in EX Mode: after a long charge time that leaves Golbez vulnerable, it inflicts an instant Break if it goes through — including if Golbez is himself in a Break state when it launches. Only the Phoenix summon can stop it: summons that freeze the opponent's bravery (such as Alexander) have their effect immediately interrupted, and Demon Wall or Mandragora persist but do not block it.
The gameplan is played on the ground: hold close range and mid range with the Rising Wave / Glare Hand mixup — Rising Wave to break blocks and dashes with its unblockable projectile, Glare Hand as a poke and a dodge punisher. Every hit converts into Cosmic Ray (hold Square to warp and close the gap), whose Wall Rush starts assist combos. Nightglow locks it all in: near-instant self-defence after a ground dodge or against a head-on approach, with vertical knockback that guarantees a ceiling Wall Rush in Order's Sanctuary and leads into an assist combo with Side by Side.
Patience is the watchword: Golbez cannot force ground combat with his ground attacks alone. He has to turtle with Ground Dash for assist gauge, make good reads and punish mistakes as the match goes on. The explosive momentum of every hit — HP link, Side by Side gauge, assist combo — rewards that approach.
In the air, everything is committal: Gravity System (anti-ground, guaranteed damage after an LV2 Assist Change stagger) and Float System (contesting the air) come out fast but leave Golbez exposed on a miss. When the opponent retreats into the air with an emptied gauge and yours is full, Float System becomes the risk worth taking to create offence. His invincible aerial jumps make movement safe against melee.
Gauge management leans entirely towards the assist: EX generation is weak and outclassed by Side by Side, which returns gauge on every HP link and Nightglow that connects. Against halo camping, the only forcing answer is Black Fang in EX Mode — a documented trade-off, since it sacrifices the Side by Side synergy.
Character-specific tech
Cosmic Ray warp
Holding Square during the link then releasing makes Golbez warp towards the opponent and extends Cosmic Ray's range. That is what allows Rising Wave's distant projectile or Glare Hand's strike to be converted into HP damage.
Cosmic Ray + assist (holding in place)
With gauge available, calling the assist just before Cosmic Ray's HP hit keeps the opponent in place: the assist slowdown takes care of it (different from a classic knockback cancel), Cosmic Ray still deals its HP damage and the assist follows up without trouble. It only works if Golbez has not warped first.
Lock Off Nightglow
With Lock Off, Nightglow's dark circle appears on Golbez instead of on the opponent's position: more ambiguous if Golbez is still facing the opponent. Mostly defensive use (it can miss an opponent right next to him): it disrupts the opponent's dash timing and assist punish timing, and catches aerial approaches in niche situations. It does not destroy stage elements under his feet (the pillars of World of Darkness, the platforms of Ultimecia Castle or Pandaemonium - Top Floor).
Gravity Force as a makeshift double dodge
With the air dodge distance boost from Adamant Chains, Gravity Force's initial movement (steering with the stick during the startup) serves as a pseudo double dodge. To be kept for emergencies: the warp cannot be cancelled and Golbez is vulnerable on the way out.
Pushing into Rising Wave's projectile
Against a nearby opponent, Rising Wave's projectile appears at a distance: Golbez can then push them into it with his follow-ups. Against a distant opponent, the projectile spawns directly on their position (a maximum range of about a quarter of Order's Sanctuary).
Genesis Rock's high-altitude suction
Genesis Rock can pull the opponent towards Golbez from high altitude: position yourself in front of the opponent while well above them. A niche punish, otherwise a gimmick.
Mixups after Gravity Force's ground rush
According to tehdr4g0n's guide (2012), Gravity Force's ground rush opens a formidable mixup situation without spending assist: the threat of Sector Ray forces a dodge on wake-up (it beats blocking and dashing), Genesis Rock catches forward and lateral dodges, and a dodge cancel into a dash — or simply waiting into Glare Hand / Rising Wave -> Cosmic Ray — beats the back dodge. The ground rush into Sector Ray works particularly well in a corner or at the edge of a platform.
The “glare” portion of Glare Hand pulls the opponent towards Golbez and its active frames last longer than the animation suggests: by buffering Square during and just after the animation, the Cosmic Ray link comes out reliably — and the whole thing works through walls, which tehdr4g0n's guide exploits notably in Pandaemonium.
A decent quantity of combos, highly specialised in their application or their spacing: a high Gravity Force slamming downwards > Float System or Nightglow; Attack System > dodge cancel > any bravery attack except itself or Gravity Force; point-blank Rising Wave > bravery follow-up > DC > Float System; Float System > DC > landing lag > Gravity System; a low Gravity Force slamming upwards > Genesis Rock.
Universal techniques (blodge, dash feint, lock off, dodge punishment): see the Techniques & glitches page.
Matchups
The only exhaustive matchup analysis comes from tehdr4g0n's Golbez guide (GameFAQs, v1.4, 2012), which goes through all 30 opponents. Its reading grid: Golbez's ground game dominates pure melee and mediocre zoners; the trouble starts when the opponent shuts down the Glare Hand / Attack System pairing or takes him into the air. On the favourable side: Firion — a very good Firion cuts off all his ground zoning with Shield Bash, but Rising Wave easily punishes Rope Knife and Reel Axe, and it is enough to go up into the air, where Firion is far worse off than Golbez; Tifa, unable to act outside close range, is held at the tip of Glare Hand; Laguna, Jecht, Shantotto and Onion Knight are handled by dodge punishing patiently (a forward dodge then Gravity/Float System -> Cosmic Ray comes back again and again in the guide).
The documented bad matchups: Squall — in the air Golbez simply loses, and on the ground Thunder Barret's maximum range exceeds Glare Hand's, which cuts into his game; tehdr4g0n advises camping outside Thunder Barret's range, laying Attack System before advancing, and above all keeping an assist bar to punish whiffs, without which Squall can pressure him all day. Kuja punishes every ground zoning tool with an Ultima and forces Golbez to go up — a very good Kuja is genuinely hard to beat. Exdeath is incredibly difficult: the Omni-block blocks everything, HP attacks included; the two plans put forward are to touch neither Circle nor Square (give him nothing to block), or to press with Gravity Force, whose sphere crushes the guard and whose follow-up staggers. The Emperor, unable to reflect his Flares, is played patiently — Rising Wave punishes almost all his options.
The mirror match demands a completely different plan: Golbez has every tool needed to shut down his own zoning (Rising Wave punishes Glare Hand and Attack System), so the initiative is taken in the air with Gravity/Float System — the guide notes in passing that Float System starts faster than Gravity System and makes the more reliable punisher. Against Cecil, a dangerous opponent: Dark Cannon eats Glare Hand with more range, Nightfall staggers on block and a Paladin equipped with Speed Boost++ approaches Onion Knight's speed; Dark Cannon has to be dodged rather than traded with, and Searchlight avoided at all costs. Against Bartz, keep the fight on the ground (only Hazard Raid goes through his zoning, and it is punished with a jump then Gravity System behind him) — in the air, Slide Shooter gives Bartz a slight advantage. Gilgamesh stays relatively simple: his slow walk can be zoned, but Rocket Punch, very fast and longer than Glare Hand, allows no lapse in concentration.
Seen from the opponent's side, b0untyhunter270's Firion guide (GameFAQs, 2012) confirms the perceived threat: Golbez is a nuisance because almost all his close and mid-range game links into Cosmic Ray (Rising Wave, Glare Hand, Gravity System, Float System), Sector Ray catches dodges thrown out too early, Genesis Rock punishes excessive closeness, and Black Fang looms as an instant break in EX Mode.
The data contains only one detailed build, “Side by Side (Seal of Lufenia)”, consistent with the HP linker status described in the overview: Golbez recovers assist gauge on every HP link and Nightglow that connects, and high base bravery builds greatly amplify his reward on hit, while his EX generation is described as severely outclassed by Side by Side.
The build (450 CP, Equip Glitch assumed): 9623 HP, 1205 BRV, 180 ATK, 182 DEF, 60 LUK; Jecht assist, Rubicante summon; the Lufenian set (Lufenian Lance, Lufenian Dirk, Lufenian Jacket) with Thornlet, for the Seal of Lufenia special effect; accessories including Sniper Eye, Battle Hammer, BRV = 0, Empty EX Gauge, Summon Unused, Pre-EX Mode, Pre-EX Revenge, After 30 Seconds, Opponent Summon Unused and Side by Side.
A second build slot (“Build #2”) appears in the data but is entirely empty, and the moves equipped in the Lufenian build are not filled in. No build philosophy prose accompanies the tables. tehdr4g0n's Golbez guide (GameFAQs, 2012), on the other hand, documents reasoned alternative builds: his main set combines Zeromus Shard (damage +10 %) and the Lufenian equipment (the Judgement of Lufenia effect, assist depletion +15 %) with Sniper Eye/Ring, Battle Ring, Dismay Shock, the Large Gap in HP / Pre-EX Mode / Pre-EX Revenge / Empty EX Gauge boosters, Great Gospel, Rebellious Soul and Force to Courage, with the Carbuncle summon — the stated logic: Golbez chips away at HP on every hit (everything leads into a Wall Rush), assist/EX depletion keeps the opponent on the defensive, Great Gospel rebuilds bravery between two HP attacks, Carbuncle exploits the zeroed bravery after an HP attack, and the EX Mode, judged unremarkable, is sacrificed in favour of Force to Courage. A variant proposed by YonKitoTaoshibe stacks HP (Master Mage +1000 HP, Heavy Armour, Green Gem for 11699 HP, with EXP to HP) so as to activate Large Gap in HP and HP > 10000, completed with Back to the Wall, Achy+ and Rebellious Soul as an insurance policy.
Build and check a Golbez loadout slot by slot: build creator (CP gauge, ability exclusions and tournament rules applied).
Assist synergies
Golbez as an assist
Golbez's assist section is not documented in prose (the Assist Overview is empty); the assist tier list places him in Mid tier. His assist data: Glare Hand as a ground BRV attack (23F, spawning on the opponent, up to 26 damage, Chase on the first hit, Wall Rush), Attack System as an aerial BRV attack (23F for the strike / 83F for the laser, Chase on the strike), Nightglow as a ground HP attack (15F up close / 91F for the projectile, spawning on the player, Wall Rush) and Genesis Rock as an aerial HP attack (51F, spawning on the player, Wall Rush).
Recommended assists
Kuja — The synergies section amounts to a single sentence: Golbez works well with Kuja and Jecht. The Gravity Force notes also mention ceiling Kuja assist combos.
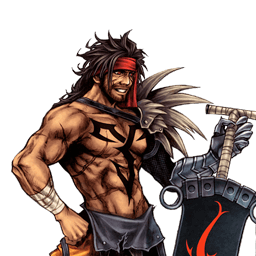
Jecht — Cited in the same synergies sentence, and he is the assist equipped in the documented Side by Side (Seal of Lufenia) build.
Community tech
Gravity Force solo combo (with a Yuna assist setup)
A video example of the solo combo allowed by Gravity Force's warp throwing the opponent into the sphere at a very precise angle, referenced from the move's notes.
A complete text guide (v1.4, 2012): character analysis, EX, assists, combos, builds and detailed matchups against the whole roster, Feral Chaos and Gilgamesh included.
A community record of solo combo routes for all 31 characters, compiled by Eddiegames on the Discord DISSIDIA and published on pastebin (last updated December 2022). Golbez is credited there with a decent quantity of highly specialised combos — Float System falls just short of the assist reset.
The wiki's matchups page remains a stub: the matchups section is entirely sourced outside the wiki, from tehdr4g0n's GameFAQs guide (2012) — a single author's point of view, completed by b0untyhunter270's Firion guide for the opponent's view.
No unique mechanic is documented (the section is absent from the sources).
The combos section is undocumented: no detailed combo in the data.
Sector Ray (ground) has no usage notes: only the data table exists, and the key is omitted from moveNotes.
The assist section is not documented in prose: asAssist amounts to the assist tier list (meta) and the data table; synergies are reduced to a single sentence (Kuja, Jecht).
Builds: a single build (Seal of Lufenia) with no written philosophy and no equipped moves; the second build slot is empty; the max booster is not filled in.
Incomplete data in the tables: Fall Speed “??”, Cosmic Ray startup “??”, assist gain values absent.
No summary text on the EX Mode beyond the list of effects and the Black Fang table; EX Burst damage and details are limited to the table.
 Assist
 Rubicante
 Lufenian Lance
 Lufenian Dirk
 Thornlet
 Lufenian Jacket
 Sniper Eye

 BRV = 0
 Empty EX Gauge
 Summon Unused
 Pre-EX Mode
 After 30 seconds
 Summon Unused
 Side by Side

