Tier A+4th of 30 — 2017 tournament tier list from dissidia.wiki (half matchup values, half expert player votes).
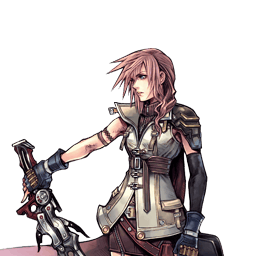
Lightning is ranked 4th, in tier A+, on the 2017 competitive tier list — first behind the S-tier trio. The overview credits that standing not to a single tool but to a very complete kit covering most of the game's fundamentals.
Overview
The protagonist of Final Fantasy XIII, Lightning adapts to any situation through Paradigm Shift: Commando for close and mid range, Ravager for zoning, poking and rushdown (Thunder), Medic for generating bravery. A few tools stand out, but her real potential lies in a very complete kit that covers an enormous share of the game's fundamentals.
Her gameplay is simple and versatile: good pokes, good zoning, good rushdown and mixups on dodge/block — enough to answer most common options and matchups. Her zoning is aggressive: she keeps her distance, sends projectiles after the opponent and punishes setups from mid range, making it hard for the opponent's offence to start while launching her own. Many of her moves carry high hit stun, lead into Chase or cause a Wall Rush: she confirms most hits into an assist, sometimes into HP, and produces combos of impressive length.
Her gauge economy is a central engine: her routine confirms, assist combos and advanced combos generate a lot of EX Force, her dash speed and zoning frequently win races for EX Cores, and Thunder (among others) boosts her assist gauge gain. Lightning is one of the few characters able to fill the EX gauge twice in a (long) match, and one of the best users of that gauge: good EX Revenge combos, a good EX Mode, and Omega Weapon as a kill confirm off a Bravery Break.
In exchange, her damage stays low even on her most optimised combos, Glutton paired with a boosted EX absorption range can siphon off much of her EX if she does not invest in EX intake range herself, and Watera — excellent though it is — can wreck her own combos if it gets reflected or overlooked.
Strengths
Simple, versatile gameplay: good pokes, good zoning, good rushdown and mixups on dodge/block, enough to cover most common options and matchups.
Powerful gauge economy: confirms, assist combos and advanced combos generate a lot of EX Force; dash speed and zoning often win races for EX Cores; Thunder also boosts assist gauge gain. She can fill the EX gauge twice in a long match.
Aggressive zoning: plenty of tools to keep her distance, chase with projectiles or punish setups from mid range.
Heavy combo potential: high hit stun, Chase and Wall Rush on many moves, hence confirms into an assist (sometimes into HP) and very long combos off the right hit.
Excellent use of EX: good EX Revenge combos, a good EX Mode, and Omega Weapon as a Bravery Break kill confirm.
Weaknesses
Low damage: even with her most optimal combos, she struggles to put up big numbers consistently.
Vulnerable to Glutton: paired with a boosted EX absorption range, it can strip much of her EX if she does not invest in EX intake range herself.
Double-edged Watera: reflected or overlooked, it can frequently wreck her own combos.
Mobility profile (normal mode) — position within the cast
Gold dot: this character · small dots: the rest of the cast · violet line: average. Wiki values, lower = faster; the rank on the right reads directly (1st = fastest).
Moves
Startup of Lightning's moves
Shorter bar = faster move. Startup in frames (60 fps, dissidia.wiki data), with priority after the value. Moves marked ★ are the fastest in the kit — usually your best punish and pressure tools.
Bravery attacks
Commando — ground
Blitz29FMelee Mid
A whirling slash with long active frames, huge and travelling far: its active frames and Melee Mid priority take it straight through attacks like Squall's Thunder Barret, and it converts into an assist from the first hit as well as from the Wall Rush. A guard break converts with an assist (or on a very late break), but the Wall Rush shot then does not come out and a dodge cancel is needed. Fairly long recovery yet often hard to punish: use with care.
Base damage
2 x 7, 4, 17 (35)
Startup
29F
Type
Physical
Priority
Melee Mid
EX Force
30
Effects
Wall Rush
CP (mastered)
20 (10)
Launch23FMelee Low
Two same-named moves depending on role and position. On the ground (Launch, 23F): her fastest grounded move, reactable but with good tracking and good reach for a quick whiff punish or for punishing back and side dodges — mostly used after an assist combo to chain into Flourish of Steel, the HP attack that deals the most bravery damage. In the air (Blaze Rush, 29F): a shot plus a sword charge, effective at any height, whose first part opens a solo combo (Blaze Rush > dodge cancel > landing lag > Smite).
Base damage
12, 10, 18 (40)
Startup
23F
Type
Physical
Priority
Melee Low
EX Force
30
Effects
Wall Rush
CP (mastered)
20 (10)
Ruinga37FRanged Low (orb), Ranged Mid (explosion)
A long-range orb with limited vertical tracking, Wall Rush on hit. The slightly more useful version of Ruin: a long-distance whiff punish converted into an assist, worth considering once in a while even if the chance is rare.
Base damage
10, 15 (25)
Startup
37F
Type
Magical
Priority
Ranged Low (orb), Ranged Mid (explosion)
EX Force
30
Effects
Wall Rush
CP (mastered)
20 (10)
Commando — midair
Smite23FMelee Low
A 23F slash that sends the opponent downwards, Wall Rush. Ends solo combos through Blaze Rush's landing lag; a possible follow-up to Watera.
Base damage
12, 10, 18 (40)
Startup
23F
Type
Physical
Priority
Melee Low
EX Force
30
Effects
Wall Rush
CP (mastered)
20 (10)
Ruin33FRanged Low
A long-range projectile usable up to three times, every hit leading into Chase, steerable with the stick. Often outclassed in utility by Blizzara/Watera, but faster than Blizzara for a rare long-distance whiff punish.
Base damage
each (10)
Startup
33F
Type
Magical
Priority
Ranged Low
EX Force
0
Effects
Chase
CP (mastered)
20 (10)
Blaze Rush29FRanged Low
Two same-named moves depending on role and position. On the ground (Launch, 23F): her fastest grounded move, reactable but with good tracking and good reach for a quick whiff punish or for punishing back and side dodges — mostly used after an assist combo to chain into Flourish of Steel, the HP attack that deals the most bravery damage. In the air (Blaze Rush, 29F): a shot plus a sword charge, effective at any height, whose first part opens a solo combo (Blaze Rush > dodge cancel > landing lag > Smite).
Base damage
7 x 3, 14 (35)
Startup
29F
Type
Physical
Priority
Ranged Low
EX Force
30
Effects
Wall Rush
CP (mastered)
20 (10)
Ravager — ground
Fire25F, 11F, 11FRanged Low
Up to three small projectiles set down in front of her then launched at the opponent at a good speed, with very generous hit stun that makes the follow-up easy. Combined with Thundaga and/or Watera, it stops approaches and puts the opponent on the defensive. A pillar of advanced grounded combos — after a grounded Wall Rush with Aerith, or behind the Jecht assist, which buys the time to set it down — with Fire > Launch as a fine extension when it is available.
Base damage
each 4 (up to 12)
Startup
25F, 11F, 11F
Type
Magical
Priority
Ranged Low
EX Force
0
CP (mastered)
20 (10)
Aerora43FRanged Low
A small projectile with slow vertical tracking, weak in neutral. Its appeal: it can hit glitch into Lightning Strike, even though that combo is harder to land than the handier link glitch combos.
Base damage
1 x 5, 6 (11)
Startup
43F
Type
Magical
Priority
Ranged Low
EX Force
0
CP (mastered)
20 (10)
Thundaga27FRanged Low
Two same-named spells depending on position. On the ground (Thundaga, 27F): Ranged Low bolts in a small area around her, so frequent and so persistent (even if she gets hit) that most characters cannot punish her inside it — time enough to generate bravery in Medic, to recast, or to build the assist gauge; the hit stun allows an assist during the chase, but the confirm is hard, the prompt coming out as soon as one bolt connects. In the air (Thunder, 13F): the move that defines the character — deceptive reach, anti-air, spammable thanks to a tiny recovery that lets her cancel into neutral and repeat it rhythmically to build the assist gauge; even when blocked, many characters struggle to retaliate, so blocking does not guarantee getting a turn. Its Ranged Low priority does leave it open to melee attacks, dashes and magic blocks (Squall's Heel Crush); low damage, but 90 EX Force per full cast and a possible way around Assist Change LV2 around the third hit.
Base damage
each (10)
Startup
27F
Type
Magical
Priority
Ranged Low
EX Force
each 21
Effects
Chase
CP (mastered)
20 (10)
Army of One (ground)43FMelee Mid
A tracking rush leading into Chase on hit, with far longer reach than expected and a reliable dodge punish up close; a good mixup to punish block and dodge despite a slightly slow animation. Enormous EX generation on hit (120, more with the Chase), but the grounded version sees less use, other moves covering the same situations.
Base damage
3 x 6, 12 (30)
Startup
43F
Type
Physical
Priority
Melee Mid
EX Force
120
Effects
Chase
CP (mastered)
20 (10)
Ravager — midair
Watera43FRanged Mid
A staple projectile: very slow but very persistent, ideal for occupying space, and it must be reflected to be disarmed — few answers for characters without a fast, safe mid/high move; when blocked, Lightning punishes the stagger with HP or throws out another Watera by reflecting the first with Army of One. It stays active even if she gets hit (intercepting nearby combos and low-priority assists), generates a lot of EX (90) and offers ample hit stun for solo combos (close to or above the opponent, or while advancing) as well as assist combos. Some assists can whiff punish it consistently, but the timing is delicate: the assist has to attack after the ball is launched.
Base damage
15
Startup
43F
Type
Magical
Priority
Ranged Mid
EX Force
90
CP (mastered)
20 (10)
Thunder13FRanged Low
Two same-named spells depending on position. On the ground (Thundaga, 27F): Ranged Low bolts in a small area around her, so frequent and so persistent (even if she gets hit) that most characters cannot punish her inside it — time enough to generate bravery in Medic, to recast, or to build the assist gauge; the hit stun allows an assist during the chase, but the confirm is hard, the prompt coming out as soon as one bolt connects. In the air (Thunder, 13F): the move that defines the character — deceptive reach, anti-air, spammable thanks to a tiny recovery that lets her cancel into neutral and repeat it rhythmically to build the assist gauge; even when blocked, many characters struggle to retaliate, so blocking does not guarantee getting a turn. Its Ranged Low priority does leave it open to melee attacks, dashes and magic blocks (Squall's Heel Crush); low damage, but 90 EX Force per full cast and a possible way around Assist Change LV2 around the third hit.
Base damage
2, 3, 5 (10)
Startup
13F
Type
Magical
Priority
Ranged Low
EX Force
90
Effects
Chase
CP (mastered)
20 (10)
Blizzara63FRanged Low
Lightning's anti-zoning tool: extremely slow for a bravery attack (63F) and punishable on reaction, but excellent for countering the opponent's setups. As soon as the ice appears (about halfway through the startup), a strong suction effect pulls in opponents even slightly out of range; it can be dashed through and works well in tandem with Watera to stay safe. Lightning can move again roughly at the moment of impact: the long, floaty hit stun allows a solo combo up close, or one with any common assist.
Base damage
2, 10 (12)
Startup
63F
Type
Magical
Priority
Ranged Low
EX Force
60
Effects
Absorb
CP (mastered)
20 (10)
Army of One (midair)43FMelee Mid
The aerial version, even more useful than the grounded one: good vertical tracking to chase downwards, the ability to reflect Watera, and a tandem with Thunder for a block/dodge mixup that keeps the opponent permanently guessing. Still 120 EX Force and Chase on hit.
Base damage
3 x 6, 12 (30)
Startup
43F
Type
Physical
Priority
Melee Mid
EX Force
120
Effects
Chase
CP (mastered)
20 (10)
Medic
Both Medic bravery attacks exist on the ground and in the air: passive abilities, with no attack, whose only purpose is to generate bravery. Their animation leaves Lightning vulnerable — save them for safe moments.
Cure~33F-
Generates bravery passively (138 in total at level 100 over roughly 3 seconds), with no input timing required and reasonable ending lag. Use sparingly between two projectiles or after a lost race to an EX Core, to regain or bank bravery.
Base damage
1 to 6 % of raw BRV (21 %)
Startup
~33F
Type
Magical
CP (mastered)
20 (10)
Cura~55F-
Like Cure but it starts more slowly, ends sooner (about 2.5 s) and yields more (165 at level 100), at the cost of two extra inputs to time: a miss leaves less bravery than a Cure, and the risk/reward climbs sharply. The better of the two if your timing is consistent.
Base damage
1, 1, 23 % of raw BRV (25 %)
Startup
~55F
Type
Magical
CP (mastered)
20 (10)
HP attacks
Ground
Lightning Strike47FRanged High
A grounded HP attack (47F, her fastest alongside Crushing Blow): bolts called down around her, very good against attacks from the flank. Combos from Aerora through a hit glitch against a grounded opponent, possibly after a stagger on block.
Base damage
each (7)
Startup
47F
Type
Magical
Priority
Ranged High
EX Force
60 + 12 x N
CP (mastered)
30 (15)
Razor Gale59FMelee High (blade), Ranged High (projectile)
A shockwave thrown from the sword at long range: slow but with powerful homing, Wall Rush, and one of her two single-hit HP attacks.
Base damage
10
Startup
59F
Type
Physical
Priority
Melee High (blade), Ranged High (projectile)
EX Force
0
Effects
Wall Rush
CP (mastered)
30 (15)
Aerial
Crushing Blow47FMelee High
A cutting charge that sends the opponent upwards, tied for her fastest HP attack (47F) and single-hit. It slots into the middle of Fire combos (Fire 1 and 2 > Crushing Blow > Fire 3 > Blaze Rush...).
Startup
47F
Priority
Melee High
EX Force
60
CP (mastered)
30 (15)
Thunderfall55FMelee High (blade) / Ranged High (thunder) / Block (Ranged Low)
Lightning dropped from long range with whirling blades, Wall Rush, carrying a magic block at the end of the animation while the blades spin above her head. A good HP follow-up to Watera from a greater distance than her other follow-ups.
Base damage
1 x 8 (blade), 2 x 6 (thunder) (8 + 12)
Startup
55F
Type
Physical (blade) / Magical (thunder)
Priority
Melee High (blade) / Ranged High (thunder) / Block (Ranged Low)
EX Force
18
Effects
Wall Rush, Magic Block
CP (mastered)
40 (20)
HP links (Bravery → HP)
HP attacks that fire as an extension of a specific Bravery attack — the “HP link”. They are equipped like any other HP attack.
Flourish of Steel?Melee High
An HP link available only in the Commando role, following Launch. It is the HP attack that deals the most bravery damage in her assist combos.
Base damage
3, 3, 4 (10) / +Launch = (32)
Startup
?
Type
Physical
Priority
Melee High
EX Force
90
CP (mastered)
30 (15)
EX Mode: Omega Weapon equipped! & EX Burst
The “Omega Weapon equipped!” EX Mode: Regen, Critical Boost, Omega Weapon and Grav-con Unit. Omega Weapon, which triggers on a bravery attack, causes an instant Bravery Break if the opponent is close to Break — in practice, a breaking attack as soon as they are under 30% of their base bravery (200 BRV at level 100). Very powerful for inflating the damage of an EX Burst.
Grav-con Unit, always active in EX Mode, automatically avoids Wall Rush damage. The overview ranks Lightning among the most fearsome EX gauge users in the game: good EX Revenge combos, a good EX Mode, and Omega Weapon as a kill confirm off a Bravery Break.
EX Burst : Gestalt Drive: a chain of attacks imbued with Odin's powers, performed by entering the commands displayed on screen — the directions must be input on the analog stick, even if your movement is mapped to the directional buttons. The Commando role's passive +1 ATK applies to the EX Burst too.
Unique mechanic
Lightning has three distinct bravery sets, carried by her three roles: Commando (close and mid range), Ravager (zoning, poking and Thunder pressure) and Medic (bravery generation). Roles are switched with L + R; the default rotation is Commando > Ravager > Medic, and the Reverse Paradigm extra ability flips it to Ravager > Commando > Medic.
If every move of a role is removed, that role drops out of the rotation in battle — removing the Medic attacks lets her switch directly between Commando and Ravager. On top of that, the Commando role grants a passive +1 ATK bonus, which applies to the EX Burst as well. HP attacks stay available whatever the active role.
Gameplan & advanced tech
Paradigm Shift (L + R) structures everything: Commando for close and mid range (with a passive +1 ATK), Ravager for zoning, poking and rushdown, Medic for generating bravery. The default rotation is Commando > Ravager > Medic, flipped to Ravager > Commando > Medic with the Reverse Paradigm extra ability; equipping nothing in a role — typically Medic — removes it from the rotation and makes switching smoother. Medic bravery attacks are not a priority when learning the character, but they offer dedicated players an extra layer of optimisation.
In neutral, Thunder is the backbone: a 13F poke, anti-air, hard to punish even when blocked, and an assist gauge generator when strung together rhythmically thanks to its tiny recovery. Around it, Watera occupies space, Fire and Thundaga stop approaches, Blizzara counters the opponent's zoning setups, and Ruinga/Ruin offer rare long-distance whiff punishes. Against a defensive opponent, Army of One (especially in the air) forms a permanent block/dodge mixup with Thunder, and Thundaga buys her breathing room to cast or switch to Medic.
Every hit has to convert: high hit stun, Chase and Wall Rush let her confirm most hits into an assist, sometimes into HP. The standard routes: assist > Launch > Flourish of Steel (the HP attack that deals the most bravery damage), the grounded Fire extensions (after a grounded Wall Rush with Aerith, or behind Jecht, who buys the time to set it down), Watera/Blizzara followed up solo or with an assist, the solo opener Blaze Rush > dodge cancel > landing lag > Smite, and the very high EX generation combos such as Blizzara > Army of One (DC) > Thunder (270 EX) — Army of One > DC > Thunder requiring the Adamant Chains special effect away from walls.
Gauge economy is the real engine: her confirms generate a lot of EX Force, her dash speed and zoning win races for EX Cores, and the EX gauge can be filled twice in a long match. In Medic, Cure/Cura make up for a lost EX Core race, force an approach in a stalemate, or bank bravery from a safe distance. With a full gauge, EX Mode turns a Bravery Break into a kill confirm through Omega Weapon. Stay wary, though, of Glutton carriers, who siphon off her EX if she does not invest in EX intake range, and of your own Watera, which can wreck your combos when reflected.
Character-specific tech
Thunder rhythm (dodge cancel)
Exploit Thunder's tiny recovery to cancel into neutral and throw it out again on beat: the assist gauge climbs very fast, and even a successful block does not hand the turn back to the opponent — many characters cannot retaliate reliably, and Lightning can block again, dodge, or start over.
Aerora > Lightning Strike hit glitch
Aerora can hit glitch into Lightning Strike for an HP hit, reliably against a grounded opponent and possibly after a stagger on block. Harder to land than the handier link glitch combos. The community record lists the same route.
If the opponent blocks Watera, punish the stagger with HP or throw out another Watera by reflecting the first with Army of One; the aerial version of Army of One also serves to reflect a Watera on the fly.
Army of One > DC > Thunder (Adamant Chains)
Away from walls, this combo requires the Adamant Chains equipment special effect for the normal air dodge distance to be enough; near walls, ceilings and corners, the reduced knockback makes it unnecessary. Exceptional EX generation: 210, up to 270 when started from Blizzara — one of the most EX-generating solo combos in the game. The community's solo combo record confirms the route and specifies its opening: a held Blizzara (“Hold”), the Adamant equipment being required only when there is no wall.
According to Suih's guide (GameFAQs, 2012), one Aerora hit lets the whole of grounded Army of One follow: unlike the hit glitch into Lightning Strike (which leaves a small dodge window), that follow-up comes out 100% of the time as long as the range allows. The guide suggests covering the manoeuvre with an assist the opponent will be forced to dodge.
A long route built entirely on her setup projectiles: set down Fire, let the first two hits go by, place Crushing Blow while the remaining three hits land, then Blaze Rush with no follow-up, dodge cancel, landing lag and Smite. It is the longest conversion recorded in her kit.
Ruin is one of the rare moves in the cast whose hit stun allows an empty chase — a chase started without executing anything in it — leading to a reset of the assist gauge. According to the record, Thunder comes very close but does not make it.
Ravager braveries enable several solo combos for Lightning.
Universal techniques (blodge, dash feint, lock off, dodge punishment): see the Techniques & glitches page.
Matchups
No consolidated chart survives for Lightning, but the period threads on dissidiaforums (recovered through the Wayback Machine) show a clear consensus on her worst matchup: Sephiroth, rated at around 6-4 against her. Shadow Flare punishes the startup of Watera and Blizzara, rules out Cure/Cura within range and covers Sephiroth while he builds his gauge; Thunder is just about the only answer that gets through — which is no small thing, since it fills assist and EX quickly. The counter-measures from the threads: camp the ground under Thundaga, which Sephiroth cannot punish cleanly, play keepaway built on Omni Air Dash+ and BRV Boost on Dodge while scraping bravery with Cure (Cura is discouraged within Shadow Flare range, its startup gets hit), and punish with an assist the dodge cancels that follow every flare.
The Emperor is the other painful matchup according to the “Lightning's Toughest Opponent” thread: Starfall's Magic Block neutralises very nearly all of her Ravager spells (Fire, Blizzara, Thunder, Thundaga, Aerora, Ruin, Ruinga, right through to Blaze Rush), forcing her towards HP attacks that assists can punish; the recurring advice is never to let him set up his traps, to stick to him like glue — even taking Medic out of the rotation for the duration of the match. Exdeath is cited by several players as her most thankless opponent (omniblock answers everything), and Golbez comes up again and again: “a grounded Lightning is a dead Lightning” — staying above him narrows the problem to Sector Ray and Nightglow, but almost every Golbez bravery attack converts into Cosmic Ray. Occasionally, Jecht Block is flagged as neutralising Watera, and on the Firion side, LonelyGaruga describes (early 2012) a comfortable matchup for Firion: Straightarrow and Thunder punish Watera, Shield Bash blocks Blizzara, and Fire/Thunder/Straightarrow cover Cure/Cura camping.
Against all that, several mains on the forum reckon she has no unwinnable matchup, her Paradigm versatility always leaving her an answer. Cloud is given as slightly in her favour: he has no safe answer to Watera and she dominates him in the air, where she has every reason to lure him with Blizzara/Watera. Solde Starlight Serenity's Exdeath Steam guide (2020) describes for its part a “fun and heated” match in which Thunderfall, her main threat, is escaped with an assist cancel followed by a block of the HP segment — a sign that even her best tools need to be varied to get through.
Two builds are documented, both assuming the Equip Glitch for the total CP cost and Rubicante as the summon.
Adamant Chains + EX
450 CP, booster x1.4, 10972 HP: it runs the full Adamant set with Zantetsuken for the Adamant Chains special effect — the one that unlocks Army of One > DC > Thunder with no wall — alongside the Aerith assist and EX-oriented accessories (BRV = 0, White Drop x3, White Gem, Tenacious Attacker, Glutton, Great Gospel, Dismay Shock, Battle Hammer). Master Guardsman can be equipped for +1000 HP.
480 CP, booster x3.5: it leans on a high base bravery (1414) — Piggy’s Stick, Hero’s Shield, Royal Crown and Maximillian, the Tidus assist (or the player’s pick), and conditional boosters (Hyper Ring, Large Gap in HP, Summon Unused, Pre-EX Mode, Pre-EX Revenge, Hero’s Essence, Tenacious Attacker, Glutton). The Best Dresser extra ability adds +100 base bravery.
The “Bravery attacks / HP attacks” tables of both builds are empty in the extracted data: the move loadouts recommended per build are not known. TWOxACROSS's period FAQ (“Invoke my name — I am Spark”, dissidiaforums, 2011) does, however, argue the choice of equipment types: daggers (Initial EX Force+ bonus) for “one-shot” EX builds, katanas (high base bravery and EX Intake Range+ late in the progression) for aggressive HP chipping at the cost of DEF, Heaven's Cloud over Zwill Crossblade for a consistent EX Rush, and Super Rocket (glass cannon) or Genji (Soul of Yamato) sets depending on the EX plan chosen.
Build and check a Lightning loadout slot by slot: build creator (CP gauge, ability exclusions and tournament rules applied).
Assist synergies
Lightning as an assist
The wiki's assist section does not evaluate Lightning's assist moves: it merely notes that she works well with most tournament-viable assists. On Muggshotter's assist tier list, Lightning is rated Low.
Recommended assists
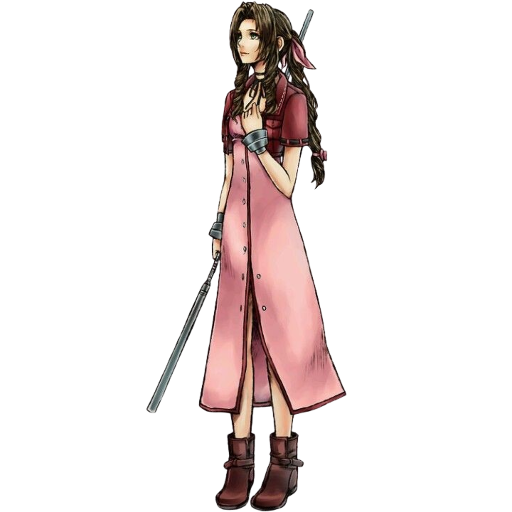
Aerith — The assist of the “Adamant Chains + EX” build, and the documented starting point of her advanced grounded combos: after a grounded Wall Rush with Aerith, Lightning has time to set down Fire and combo behind it.
Jecht — His assist buys enough time and distance to set down Fire and chain a combo behind it.
Tidus — The assist listed for the “Hybrid” build, explicitly interchangeable at the player's discretion.
A period combo montage and guide for Lightning (Varsona channel, August 2011), published a few months after the game's release — a filmed complement to the combo routes described by the wiki.
Dissidia 012 Duodecim: [TUTORIAL] Lightning Basics and Combos (Prologus) 2011
A tutorial on Lightning's basics and combos by FrizFroz, recorded on Dissidia 012 Prologus, the official prologue demo of Duodecim (January 2011): it predates the final game, so some data may differ slightly.
A community record of solo combo routes for all 31 characters, compiled by Eddiegames on the Discord DISSIDIA and published on pastebin (last updated December 2022). For Lightning, it confirms the Army of One > Thunder and Aerora > Lightning Strike routes described by the wiki, and adds Fire Set > Blaze Rush > Smite as well as Watera > Thunderfall.
List of empty chases leading to an assist gauge reset (Eddiegames)
A character-by-character record of the moves whose hit stun allows an empty chase followed by a reset of the assist gauge. Lightning appears there with Ruin; Thunder is flagged as just out of reach.
The wiki's matchup page is a stub: the matchup section is rebuilt from the period dissidiaforums threads (through the Wayback Machine) and the Exdeath Steam guide listed in sourcesBySection; no complete chart survives, and only the matchups actually discussed (Sephiroth, Emperor, Exdeath, Golbez, Cloud, Firion, Jecht) are covered.
The “Lightning's mechanic (Paradigm Shift)” section of the wiki page had escaped automatic extraction (its heading falls outside the standard schema): the unique mechanic was reinstated by hand from the archived page, and the split of bravery attacks by role comes from the Final Fantasy Wiki.
The assist section is marked undocumented (a single generic sentence): the assessment of Lightning as an assist rests solely on the assist tier list in meta-lite.json.
The wiki's References section is empty: the communityTech entries and the sources in sourcesBySection come from external research.
Incomplete frame data: Flourish of Steel's startup is unknown (“?”), Crushing Blow's damage is not filled in (“-”), and the cancels and assistGain fields are empty for every move.
The combo videos and the Thunderfall magic block video are mentioned without a usable URL.
The community's empty chase record is undated (the solo combo record that accompanies it is dated December 2022): its freshness cannot be established.
The Paradigm Shift role of each bravery attack (Commando / Ravager / Medic) comes from the Final Fantasy Wiki (Fandom), which files moves by role: dissidia.wiki, this site's main source, documents only the Medic set.
 Assist
 Rubicante
 Zantetsuken
 Adamant Shield
 Adamant Helm
 Adamant Vest
 Dismay Shock

 BRV = 0
 White Drop



 Large Gap in HP
 Summon Unused
 Pre-EX Mode