Defensive all-rounder with HP links, solid from every angle
Fastest BRV 13F (Dayflash ground)Fastest HP 51F (Shining Wave)Dash 77 (Average / Good)ATK 110DEF 1131-hit HP YesMultipleHP links Yes
Standing in the meta
Tier A14th of 30 — 2017 tournament tier list from dissidia.wiki (half matchup values, half expert player votes).
Ranked 14th (tier A) on the 2017 tier list: a consistent high tier, carried by a fundamentally solid moveset that fits the metagame.
Overview
The Warrior of Light is a versatile melee fighter who does everything competently. His style rests on classic fundamentals: fast pokes with Dayflash, committal gap closers, mid-range projectiles. His standard mobility lets him build offence as well as defence, and as soon as an opening appears, his HP links deal good damage, supported by high base bravery builds, HP Wall Rush and assist combos; he works with a great many assists and his combo routes stay consistent almost everywhere. The coverage of his HP links (Shield Strike / Rising Buckler > Bitter End) lets him punish from almost every angle.
His standout assets are defensive: a very high base DEF (113, among the best), amplified further in EX Mode (+10), and above all Shield of Light, an advancing command block that guards from frame 1 and finishes with a 1-hit HP attack carrying Wall Rush — a rare property in this game. That option makes his dodges safe and beats low-priority attacks with long active frames. As an all-rounder, he accommodates a wide variety of builds, including EX and Side by Side.
His limits: he struggles against persistent projectiles, his disjoints being risky, and his own projectiles remain decent but offer little return at range. His reliance on HP links exposes him to punishes after an LV1 Assist Change; safer options exist, at the cost of damage. His air dodge has an average fall speed ratio, which he sometimes has to cover with Shield of Light — a powerful but highly committal option, and a vulnerable one when it fails.
Competitively, the Warrior of Light is usually ranked high tier: a fundamentally good moveset and stats, for a consistent style in tune with the metagame.
Strengths
All-rounder: average to good stats, HP links and a moveset with an answer to most situations.
Accessible: excellent for beginners and seasoned players alike, ideal for learning the game and working on fundamentals.
Command block: Shield of Light, an advancing 1-hit HP attack that guards instantly throughout its startup, useful on offence as well as after a dodge.
Ground game: projectiles and assist combo starters through empty chases, to adapt the pace of the match.
Build synergy: works with every common style, including EX, bravery boost on dodge and Side by Side.
EX generation: most of his bravery attacks produce 30 to 90 EX Force; Dayflash, his main poke, generates 90.
EX Mode: the highest DEF in the game, automatic blocking of Ranged Low projectiles and increased damage on his melee bravery attacks.
Weaknesses
Struggles against traps: for all his projectiles and disjoints, he cannot easily punish characters sheltering behind persistent projectiles without spending resources or taking significant risk.
Committal vertical attacks: Rising Buckler and Shield Strike are decent but reactable and impossible to cancel early on whiff.
The 4 bravery slot dilemma: all his aerial bravery attacks are useful to him, but he cannot equip them all.
A floaty air dodge and risky protection: Shield of Light covers his aerial dodges well, but the option is very risky and loses to high-priority attacks; outside a Dayflash clash, his air dodges leave him vulnerable.
Stats & speeds
Name
Warrior of Light
Original game
Final Fantasy
Base ATK (LV100)
110 (Average)
Base DEF (LV100)
113 (Very High, +10 during EX Mode)
Run Speed
6 (Average / Good)
Dash Speed
77 (Average / Good)
Fall Speed
87 (Average)
Fall Speed Ratio After Dodge
40 (Average)
Fastest BRV
13F (Dayflash ground)
Fastest HP
51F (Shining Wave)
1-Hit HP
Yes (Multiple)
HP Links
Yes
Command Block
Shield of Light
Weapon
Axes, Daggers, Greatswords, Katanas, Swords
Armor
Chestplates, Gauntlets, Heavy Armor, Helms, Large Shields, Light Armor, Shields
Exclusive weapons
Flame Sword, Braveheart, Barbarian's Sword
Unlock
Default
Alignment
Cosmos
Voice Actor (JP)
Toshihiko Seki
Voice Actor (ENG)
Grant George
Mobility profile (normal mode) — position within the cast
Gold dot: this character · small dots: the rest of the cast · violet line: average. Wiki values, lower = faster; the rank on the right reads directly (1st = fastest).
Moves
Startup of Warrior of Light's moves
Shorter bar = faster move. Startup in frames (60 fps, dissidia.wiki data), with priority after the value. Moves marked ★ are the fastest in the kit — usually your best punish and pressure tools.
Bravery attacks
Ground
Ascension15FMelee Low
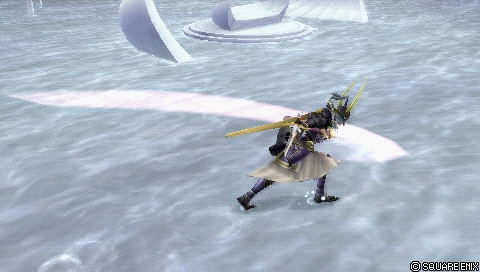
A close-range combo for punishes, solo ground combos and the occasional approach. Fast (15F), an anti-air, two Circle follow-ups then a Chase (or a Wall Rush near the ceiling), and above all the Rune Saber HP link at the end of the chain: good damage without an assist. Average recovery and no cancel on whiff: a miss can cost him his “turn”.
A committal gap closer that advances towards the opponent, used mostly to beat ground blocks thanks to the initial mid priority shield. Reactable (31F), it keeps advancing even on whiff, cannot anti-air and can be blocked on reaction: take care against blocks.
Normal31FMelee Mid (1st hit)
Melee Low (others)
Base damage
30 (6, 3x3, 15)
Startup
31F
Type
Physical
Priority
Melee Mid (1st hit) Melee Low (others)
EX Force
30
Effects
Wall Rush
Cancels
Dodge
CP (mastered)
30 (15)
EX Mode31FMelee Mid (1st hit)
Melee Low (others)
Base damage
40 (6, 3x3 +4, 15 +6)
Startup
31F
Type
Physical
Priority
Melee Mid (1st hit) Melee Low (others)
EX Force
30
Effects
Wall Rush Block (Ranged Low)
Cancels
Dodge
CP (mastered)
30 (15)
Red Fang41FRanged Low
A fast single-hit projectile with the longest range of his bravery attacks (wall to wall in Order's Sanctuary). Low priority, short hit stun, low reward: little used competitively, since his other projectiles do more.
Base damage
15
Startup
41F
Type
Magical
Priority
Ranged Low
EX Force
0
Effects
Block (Ranged Low, EX Mode)
Cancels
Dodge
CP (mastered)
30 (15)
Blue Fang41FRanged Low
A group of mid-range projectiles that strike from above (or below). A niche move, mostly useful on low-ceiling stages to harass zoners hiding behind their projectiles (Laguna under Electro Shield, Ultimecia under a charged Knight's Lance). It can hit from behind and ignore a block, but it is slow, deals little damage and is unsuited to close quarters.
Base damage
7 each
Startup
41F
Type
Magical
Priority
Ranged Low
EX Force
0
Effects
Block (Ranged Low, EX Mode)
Cancels
Dodge
CP (mastered)
30 (15)
White Fang47FRanged Low
His reference ground projectile for pressure and combos. He can still act while the bolts advance, which covers his approach, and its decent hit stun links into Ascension, Dayflash and more. Active for only about 1.7 s, with slow homing on steep vertical angles: beware of dashes going straight through it.
Base damage
6 each
Startup
47F
Type
Magical
Priority
Ranged Low
EX Force
0
Effects
Block (Ranged Low, EX Mode)
Cancels
Dodge
CP (mastered)
30 (15)
Dayflash (Ground)13FMelee Low
His main poke: fast (13F), 90 EX, an assist combo starter. It can be whiffed safely to charge the assist gauge thanks to its short recovery and its many cancels (dodge, block, another attack). On hit, two Circle follow-ups with a long window ideal for hit confirming, then a Chase; a delayed empty chase forces a ground Wall Rush and restarts the assist combos. A pillar of his competitive game.
Normal13FMelee Low
Base damage
22 (3, 4, 15)
Startup
13F
Type
Physical
Priority
Melee Low
EX Force
90
Effects
Chase
Cancels
A missed attack that doesn't make any contact. )
CP (mastered)
30 (15)
EX Mode13FMelee Low
Base damage
36 (3 +4, 4 +4, 15 +6)
Startup
13F
Type
Physical
Priority
Melee Low
EX Force
90
Effects
Chase Block (Ranged Low)
Cancels
Dodge, Block & Attack (Whiff )
CP (mastered)
30 (15)
Aerial
Crossover23FMelee Low
An advancing bravery attack with an HP link, the aerial alternative to Ascension: it punishes long attacks and staggered opponents, and can be used to approach sparingly. The Circle follow-up causes a Chase or a Wall Rush near the ceiling, and has to be completed to launch Rune Saber; a borderline reactable startup (23F) and about a second before a dodge cancel becomes possible: dangerous to whiff in neutral. The last hit can miss at the ceiling against large frames (Garland, Golbez, Exdeath).
Normal23FMelee Low
Base damage
40 (5, 5, 10, 20)
Startup
23F
Type
Physical
Priority
Melee Low
EX Force
90
Effects
Chase, Wall Rush
Cancels
Dodge
CP (mastered)
30 (15)
EX Mode23FMelee Low
Base damage
50 (5, 5, 10 +4, 20 +6)
Startup
23F
Type
Physical
Priority
Melee Low
EX Force
90
Effects
Chase, Wall Rush Block (Ranged Low)
Cancels
Dodge
CP (mastered)
30 (15)
Rising Buckler25FMelee Low
An anti-air punish against opponents above him, rewarded with the Bitter End HP link. A disjointed shield that pierces projectiles, with a possible side switch on hit and a reliable follow-up from Kuja's and Sephiroth's aerial bravery assists. Reactable (25F) with a distinct audio cue, and no tracking once launched; useful in certain aerial matchups such as Sephiroth and Kuja.
Normal25FMelee Low
Base damage
30 (2x4, 6, 16)
Startup
25F
Type
Physical
Priority
Melee Low
EX Force
30
Effects
Wall Rush
Cancels
Dodge
CP (mastered)
30 (15)
EX Mode25FMelee Low
Base damage
42 (2x4 +6, 6, 16 +6)
Startup
25F
Type
Physical
Priority
Melee Low
EX Force
30
Effects
Wall Rush Block (Ranged Low)
Cancels
Dodge
CP (mastered)
30 (15)
Shield Strike25FMelee Low
Almost identical to Rising Buckler but downwards: his main air-to-ground move, which punishes careless play from below and hits opponents staggered after an LV2 Assist Change. It also has the Bitter End HP link. The same flaws: reactable, telegraphed, long recovery, no tracking after the throw; the shield also hits in front of him, hence the HP combo after the Sephiroth assist.
Normal25FMelee Low
Base damage
30 (2x4, 6, 16)
Startup
25F
Type
Physical
Priority
Melee Low
EX Force
30
Effects
Wall Rush
Cancels
Dodge
CP (mastered)
30 (15)
EX Mode25FMelee Low
Base damage
42 (2x4 +6, 6, 16 +6)
Startup
25F
Type
Physical
Priority
Melee Low
EX Force
30
Effects
Wall Rush Block (Ranged Low)
Cancels
Dodge
CP (mastered)
30 (15)
Dayflash (midair)15FMelee Low
An essential aerial version, close to the ground one: fast (15F, still unreactable), safe to whiff for assist gauge, reliable for confirming assist combos and building EX. The hitbox reaches low enough to hit a grounded opponent. Its damage is the lowest in his arsenal, but his longevity depends on mastering this move.
Normal15FMelee Low
Base damage
22 (3, 4, 15)
Startup
15F
Type
Physical
Priority
Melee Low
EX Force
90
Effects
Chase
Cancels
A missed attack that doesn't make any contact. )
CP (mastered)
30 (15)
EX Mode15FMelee Low
Base damage
36 (3 +4, 4 +4, 15 +6)
Startup
15F
Type
Physical
Priority
Melee Low
EX Force
90
Effects
Chase Block (Ranged Low)
Cancels
Dodge, Block & Attack (Whiff )
CP (mastered)
30 (15)
HP attacks
Ground
Shield of Light (ground)53F (Block from 1F to 53F)Melee High, Block Mid
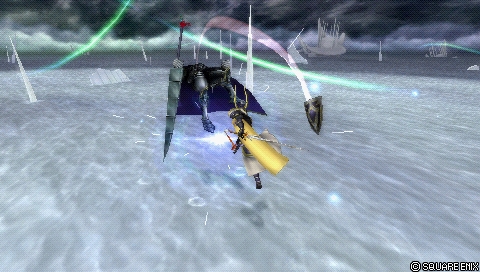
His signature command block: he advances then releases a 1-hit blast that Wall Rushes, guarding from frame 1 until the hit. It punishes low-priority pokes and serves as immediate defence after a ground dodge. It only blocks low priorities — HP attacks and higher moves guard crush or stagger him — and a miss leaves him wide open. It becomes airborne in use and automatically aims diagonally at an airborne opponent, with no correction possible along the way.
Startup
53F (Block from 1F to 53F)
Priority
Melee High, Block Mid
EX Force
0
Effects
Block, Wall Rush
Cancels
Dodge
CP (mastered)
30 (15)
Shining Wave51FMelee High (blade)
Ranged High (light pillar)
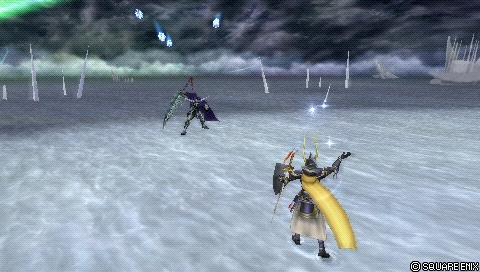
A long-range HP attack in the form of a wave: a counter-attack after a block stagger and passive space control. A solid anti-air (instant high vertical hitboxes, full rotation), with beams that cannot be reflected and persist even when blocked, and Ranged High priority that ignores LV2 Assist Change staggers in a combo. To be used sparingly: he is vulnerable after the shot, it loses to high-priority melee and to Jecht's and Exdeath's command blocks, and it can miss against very fast movement through the projectile.
Startup
51F
Priority
Melee High (blade) Ranged High (light pillar)
EX Force
each 60
Cancels
Dodge
CP (mastered)
30 (15)
Ultimate Shield41FMelee High
His fastest ground HP attack (41F), for punishing blocks, close dodges and even attacks, with strong hemispherical tracking. He stays in place while the shield goes out; without contact there is no combo follow-up, hence a little more safety at range. It reflects HP projectiles without advancing. A hit glitch with White Fang can trigger the follow-ups without contact, which can cost dearly; long recovery, so beware of Assist Changes.
Base damage
20 (4 x 3, 8)
Startup
41F
Type
Physical
Priority
Melee High
EX Force
30
Effects
Wall Rush
Cancels
Dodge
CP (mastered)
30 (15)
Aerial
Shield of Light (midair)53F (Block from 1F to 53F)Melee High, Block Mid
The aerial and most used version of the signature command block: self-defence after an air dodge and a call-out against slow Melee Low or mid moves — a key argument against the other all-rounders such as Cloud and Squall. Being 1-hit, it also foils EX Revenge checkmates through EX depletion. Short range and limited vertical tracking, but a possible Wall Rush on a good read and double assist setups with Aerith. Indispensable.
Startup
53F (Block from 1F to 53F)
Priority
Melee High, Block Mid
EX Force
0
Effects
Block, Wall Rush
Cancels
Dodge
CP (mastered)
30 (15)
Radiant Sword77FRanged High
Long-range homing projectiles to harass or contest EX Cores. A low contact rate: a telegraphed animation and a gradual acceleration that lines the projectiles up in an easily dodged file. On hit, a Wall Rush and an assist combo starter, with a clear frame advantage after a dodge cancel — but the setups are limited. Use with caution.
Startup
77F
Priority
Ranged High
EX Force
0
Effects
Wall Rush
Cancels
Dodge
CP (mastered)
30 (15)
HP links (Bravery → HP)
HP attacks that fire as an extension of a specific Bravery attack — the “HP link”. They are equipped like any other HP attack.
Rune Saber (ground)?Melee High (?)
Ascension's HP link, remarkable for its combo potential and its relative safety against Assist Changes. Long vertical knockback: a consistent Wall Rush on low-ceiling stages (Sky Fortress Bahamut, Edge of Madness), and multi-hit assists such as Sephiroth allow knockback cancels elsewhere. The last hit, high and active for a long time, partly covers the end of the animation, without being entirely safe.
Base damage
10 (2 x 3, 4) / +Ascension = (50 Total)
Startup
?
Type
Magical
Priority
Melee High (?)
EX Force
0
Effects
Wall Rush
Cancels
Dodge
CP (mastered)
30 (15)
Rune Saber (midair)??Melee High (?)
Crossover's HP link, always recommended, functionally identical to the ground version. Careful with ceiling Wall Rushes: Crossover being aerial, it can Wall Rush before Rune Saber connects.
Base damage
10 (2 x 3, 4) / +Crossover = (50 Tota)
Startup
??
Type
Magical
Priority
Melee High (?)
EX Force
0
Effects
Wall Rush
Cancels
Dodge
CP (mastered)
30 (15)
Bitter End A??Melee High (?)
Rising Buckler's HP link and a pillar of his game: it rewards whiff punishes with HP damage without an assist. Total damage slightly below Rune Saber but with no ceiling worries; a reliable Wall Rush to start assist combos, and a long animation suited to knockback cancels with Sephiroth — and to recovering base bravery with high BRV builds. Very risky against an opponent who has escaped with LV1 Assist Change: no cancel before the last hit, immobile and poorly protected vertically.
Base damage
15 (2 x 6, 3) / +Rising Buckler = (29 Total)
Startup
??
Type
Physical
Priority
Melee High (?)
EX Force
0
Effects
Wall Rush
Cancels
Dodge
CP (mastered)
30 (15)
Bitter End B??Melee High (?)
Identical to Bitter End A, but as a branch of Shield Strike.
Base damage
15 (2 x 6, 3) / +Shield Strike = (29 Total)
Startup
??
Type
Physical
Priority
Melee High (?)
EX Force
0
Effects
Wall Rush
Cancels
Dodge
CP (mastered)
30 (15)
EX Mode: Class Change! & EX Burst
The “Class Change!” EX Mode — effects: Regen, Critical Boost, Mirror Attack, Protect and Light's Blessing. The Warrior of Light gains extra hits on his melee bravery attacks (Light's Blessing, swords of light at 1 base damage each, a source of hit stun without new solo combo routes), a large damage reduction through +10 base DEF (Protect) and the blocking of Ranged Low attacks during his attack animations, recovery included (Mirror Attack).
Since EX Modes mostly serve to secure a win through an assist combo, the defensive bonuses rarely come fully into play — assists often interrupt EX Mode and the opponent can run away to buy time if the Warrior of Light does not lock them into a combo. It remains a competent EX Mode.
EX Burst : Oversoul is a fairly standard EX Burst: six directional inputs to enter correctly (the analogue stick is refused), near-immediate follow-ups that leave the opponent little time to raise their DEF and, whatever the outcome, a final strike at 25 base damage.
Gameplan & advanced tech
The gameplay loop is built around Dayflash: whiff the poke without risk to fill the assist gauge, generate 90 EX per hit and confirm hits visually to go into an assist combo. On the ground, White Fang covers the approach and links into Ascension (White Fang > Ascension > Rune Saber, his reference solo route: 56 minimum plus HP damage and Wall Rush) or into Dayflash with a delayed empty chase to force a ground Wall Rush, pick up all the EX on the stage and call another assist.
HP damage comes through three channels: the HP links (Ascension/Crossover > Rune Saber, Rising Buckler/Shield Strike > Bitter End), which punish without an assist from almost every angle; assist combos started off Dayflash or a Wall Rush (typical midscreen combo: Dayflash 2 hits > BRV assist > Assist Chase > Shield Strike > Bitter End); and Shield of Light as a defensive read, which turns a block into a Wall Rush.
Defensively, play the double layer: dodge then an instant Shield of Light against dashes and low-priority attacks — the opponent risks HP damage simply by approaching. Keep that highly committal option for the moments that need it, though: it loses to high priorities and leaves him wide open on a miss.
On resources, Dayflash's EX generation supports long-term survival through the EX gauge, and high base bravery builds maximise the bravery returned during Bitter End's long animations at the end of an assist combo. Finally, mind the reliance on HP links: after an opponent's LV1 Assist Change, Bitter End and Rune Saber become punishable — favour the safe options over damage then.
Character-specific tech
Dayflash empty chase reset
Delay Dayflash's Chase as long as possible, then trigger it just before the opponent touches the ground to force a Wall Rush reaction. It allows him to chase without being countered, to recover all the EX on the stage and to reset his assist usage so as to extend a combo if another bar is in stock. The community record of empty chases confirms Dayflash (on the ground) among the rare moves in the cast that offer this reset.
Press the assist (Sephiroth) at the exact moment Bitter End's last bravery hit connects: the assist strikes during the end of the animation and holds the opponent in place, opening a second Shield Strike > Bitter End anywhere on the stage, with no wall.
Ultimate Shield hit glitch
If White Fang connects at the moment Ultimate Shield is launched, the move chains its follow-ups without any real contact with the opponent. Given the move's short range, this glitch is a trap to know about rather than a tool.
Aerith double assist
After a Wall Rush, Shield of Light can set up a second Aerith assist within the same combo; with high base bravery, the double assist deals very heavy damage.
Documented solo combo routes
White Fang and Blue Fang link into any melee attack except Shield of Light; EX Crossover (without the last hit) > dodge cancel > aerial EX Dayflash; the author also mentions ground EX Dayflash (2 hits on an airborne opponent) > DC > landing lag > EX Crossover, flagging it himself as unconfirmed.
Warrior of Light can create assist combos with Wall Rush, Dayflash and even during his Bitter End and Rune Saber HP links |
An HP attack that branches from a bravery attack. e.g. Cloud's Slashing Blow into Omnislash Version 5.
. This gives him flexibility in setting up HP damage. When following up after Sephiroth, delay Assist Chase a little so that Shield Strike connects more consistently.
Universal techniques (blodge, dash feint, lock off, dodge punishment): see the Techniques & glitches page.
Matchups
The wiki's matchups page is a stub: no detailed table is documented. The sources give a few markers: Rising Buckler gains value in air-oriented matchups such as Sephiroth and Kuja; Blue Fang dislodges characters entrenched behind their projectiles, such as Laguna under Electro Shield or Ultimecia under a charged Knight's Lance; and characters with persistent projectiles remain his main difficulty. Note also that Crossover's last hit can miss at the ceiling against large frames (Garland, Golbez, Exdeath).
The Warrior of Light works with a wide variety of builds: balanced hybrids, Bravery Boost on Dodge, Side by Side. Since most of his damage comes from Dayflash assist combos and from his HP links, he is rarely built for bravery damage; high base bravery, on the other hand, benefits his assist combos enormously.
The documented hybrid build aims at EX intake and EX depletion — a good starting point, since most competitive builds play on damage, EX and/or gauge depletion. It rests on the Seal of Lufenia set (with the Equip Glitch, 450 CP in total): its DEF drop is offset by his very high base DEF, and Lufenian Dirk brings +1 ATK to counterbalance the low ATK of Heaven's Cloud, whose increased EX absorption range makes collecting EX Force easier. Assist: Sephiroth; summon: Rubicante.
The total CP cost of the documented build assumes the Equip Glitch is used. Build stats: 11299 HP, 996 BRV, 178 ATK, 184 DEF, 60 LUK.
Build and check a Warrior of Light loadout slot by slot: build creator (CP gauge, ability exclusions and tournament rules applied).
Assist synergies
Warrior of Light as an assist
As an assist, the Warrior of Light is one of the weakest in the game (Low tier on the assist tier list). His bravery attacks do not hold the opponent for long and push them away from the player quickly; without an Assist Chase, he struggles to set up the player character's HP attacks and depends on Wall Rush. It is better to fight close to the ground so that Rising Buckler at least pins the opponent to the floor.
Rising Buckler keeps a niche: the best combination of vertical range and speed among aerial bravery assists, hence combos from certain chase moves (Laguna's Pummel, the close-range finisher of Kuja's Strike Energy) — even if Zidane's aerial BRV assist is generally preferred in that role. Shield of Light can block attacks, which is notable in a scramble and in checkmate situations, but as an HP attack it remains expensive and risky.
Recommended assists
Sephiroth — The most popular synergy in competition: combos from almost all his moves, a consistent Wall Rush, and multi-hits that make knockback cancels easy anywhere. His lower knockback angle makes Crossover > Rune Saber more consistent and more damaging as a follow-up.
Aerith — Less bravery damage and less whiff punishing, but safer combos and EX intake. Dayflash chase setups shine here (EX, bypassing LV2 Assist Change staggers), and Shield of Light after a Wall Rush allows a very damaging double assist with high base bravery.
Jecht — Strikes faster than Sephiroth; his aerial BRV opens extended ground combos for plenty of bravery, with the option of restarting through Dayflash's (ground) empty chase reset. A competent synergy, at the cost of consistent midscreen knockback cancels.
Community tech
Shining Wave can miss against fast movement
A video demonstration: Shining Wave's wave hitbox can miss an opponent crossing the projectile at high speed. A risky attempt on the opponent's part, so rarely a problem in practice.
Need Warrior of Light tips. (GameFAQs thread) 2012
A period thread from the Duodecim board: White Fang link glitches (with Ascension, Sword Thrust, Rising Buckler through to Bitter End, Crossover), an Ultimate Shield / Shield of Light comparison and advice from mains on which moves to equip.
A community record of solo combo routes for all 31 characters, compiled by Eddiegames on the Discord DISSIDIA and published on pastebin (last updated December 2022). The record keeps his links from White Fang and Blue Fang, and two EX routes.
List of empty chases leading to an assist gauge reset (Eddiegames)
A character-by-character record of the moves whose hit stun allows an empty chase (a chase initiated without executing anything in it) followed by a reset of the opponent's assist gauge. The detail for this character is covered in the specific techniques.
The wiki's matchups page is a stub: no detailed matchup is documented.
No unique mechanic is documented (the section is absent from the sources).
The solo combos section is marked “Main article pending”: only two solo combos and three assist combos (Sephiroth) are detailed.
The assist gain values of the moves are not filled in in the data.
The exact startup of the HP links (Rune Saber, Bitter End) is unknown (“?” in the tables), as are certain EX Force and Comrade's Vow counts for the combos (“???”).
Only one build is documented (the Seal of Lufenia hybrid); no variants are detailed (the dedicated builds article is not included in the data).
The community's empty chase record is undated (the solo combo record that accompanies it is dated December 2022): how current it is cannot be established.

 Assist
 Rubicante
 Heaven's Cloud
 Lufenian Dirk
 Lufenian Headband
 Lufenian Vest
 Muscle Belt

 Summon Unused
 Pre-EX Mode
 Summon Unused
 White Gem

 Rune Saber (midair)